PC Games
• Orb
• Lasagne Monsters
• Three Guys Apocalypse
• Water Closet
• Blob Wars : Attrition
• The Legend of Edgar
• TBFTSS: The Pandoran War
• Three Guys
• Blob Wars : Blob and Conquer
• Blob Wars : Metal Blob Solid
• Project: Starfighter
• TANX Squadron
Tutorials
• 2D shoot 'em up
• 2D top-down shooter
• 2D platform game
• Sprite atlas tutorial
• Working with TTF fonts
• 2D adventure game
• Widget tutorial
• 2D shoot 'em up sequel
• 2D run and gun
• Roguelike
• Medals (Achievements)
• 2D turn-based strategy game
• 2D isometric game
• 2D map editor
• 2D mission-based shoot 'em up
• 2D Santa game
• 2D split screen game
• 2D quest game
• SDL 1 tutorials (outdated)
Latest Updates
The Legend of Edgar 1.38
Thu, 1st January 2026
SDL2 Quest game tutorial
Wed, 7th May 2025
SDL2 Versus game tutorial
Wed, 20th March 2024
Download keys for SDL2 tutorials on itch.io
Sat, 16th March 2024
The Legend of Edgar 1.37
Mon, 1st January 2024
Tags
• battle-for-the-solar-system (10)
• blob-wars (10)
• brexit (1)
• code (6)
• edgar (10)
• games (45)
• lasagne-monsters (1)
• making-of (5)
• match3 (1)
• numberblocksonline (1)
• orb (2)
• site (1)
• tanx (4)
• three-guys (3)
• three-guys-apocalypse (3)
• tutorials (18)
• water-closet (4)
Books
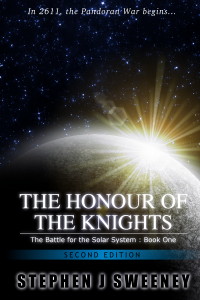
The Honour of the Knights (Second Edition) (Battle for the Solar System, #1)
When starfighter pilot Simon Dodds is enrolled in a top secret military project, he and his wingmates begin to suspect that there is a lot more to the theft of a legendary battleship and the Mitikas Empire's civil war than the Helios Confederation is willing to let on. Somewhere out there the Pandoran army is gathering, preparing to bring ruin to all the galaxy...
— Making a 2D split screen game —
Part 4: Ready Player Two
Note: this tutorial assumes knowledge of C, as well as prior tutorials.


Introduction
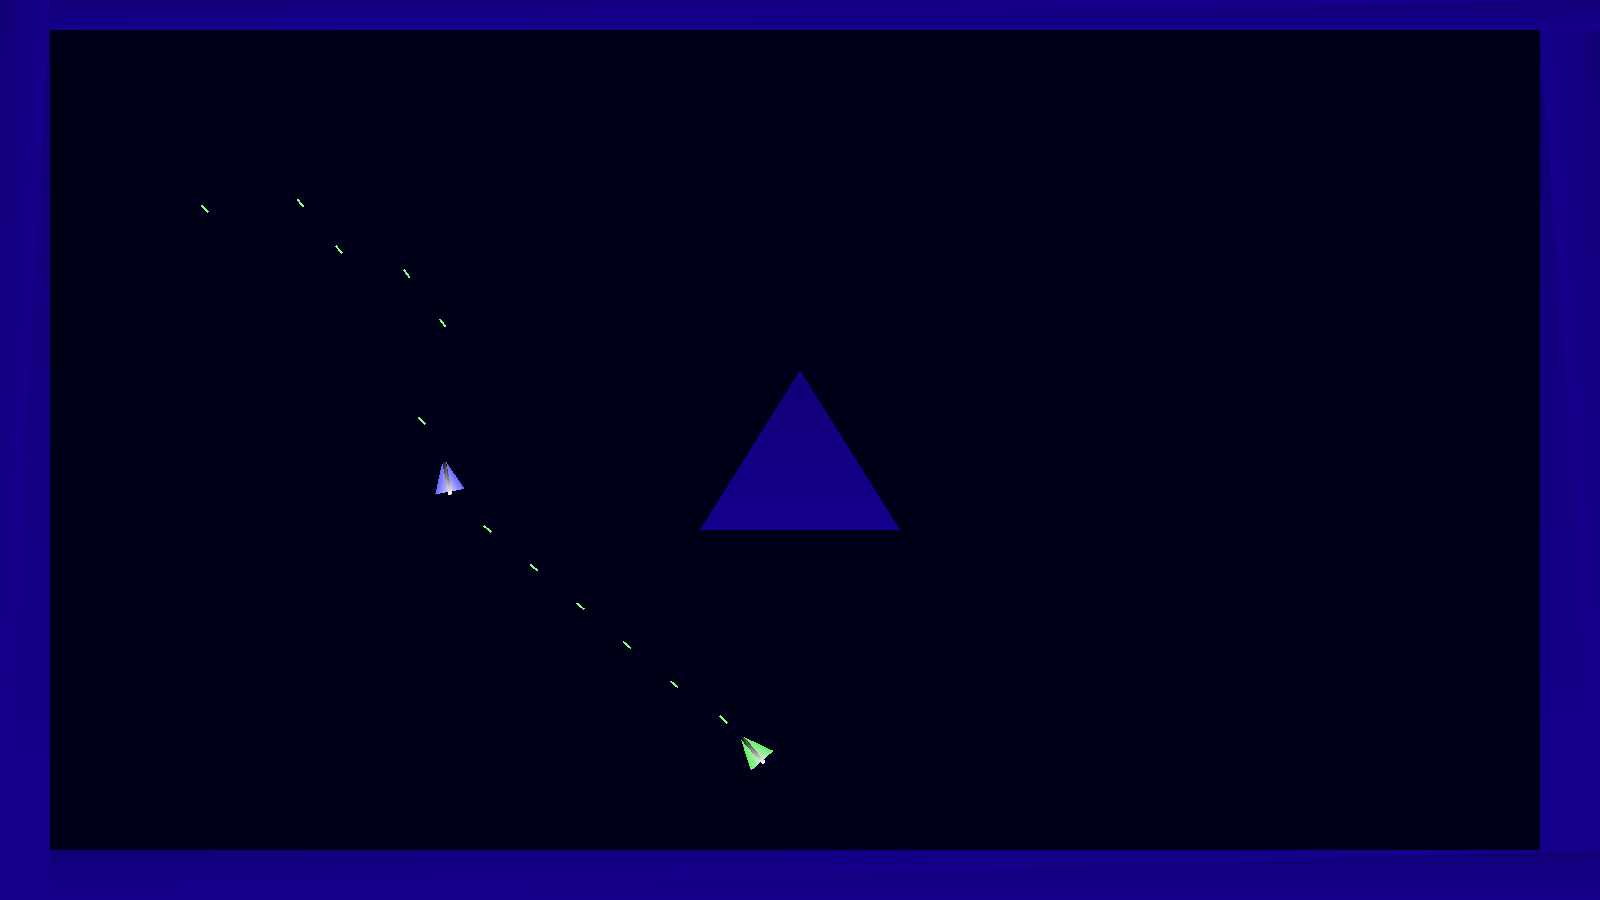
Our two player game has, up until now, been missing the second player! In this part, we're changing all that. From here on, we'll have two spaceships to play with, each controlled by a different player (or, as is most likely, somewhat awkwardly by yourself!). Both players are identical, flying the same, shooting the same. The only major difference is that one is blue and the other is green. This part will see the beginning of the beautiful journey into creating a split screen shooter.
Extract the archive, run cmake CMakeLists.txt, followed by make, and then use ./versus04 to run the code. You will see a window open like the one above, with blue and green ships on the left and right of the screen. Use WASD and Left Ctrl to control player one, and the cursor keys and Right Ctrl to control player two.
Press Escape to bring up the in-game menu and use the arrow keys, plus Space / Return to action the selected item. Navigate to P1 Controls / P2 Controls, to change the controls for player 1 or player 2. Highlight the control you wish to change, then press Space / Return. The control will change to "...". Press the key or button you wish to use, or Escape to cancel. Pressing Backspace will also clear the control. When using a controller, the name of the controller is displayed in blue at the top of the screen. Player 1 will always use the first controller detected, player 2, the second. In both cases, the left and right rotation of the ships is controlled by the joystick X axis. Play the game as normal. Once you're finished, close the window to exit.
Inspecting the code
Before we begin, something very important - in order to allow for the control scheme to be set and used, we've needed in incorporate far more code and features than will be covered in this section. This is because we need an interface, the ability to detect and use joysticks, and the need to save this configuration, so that it can be ported across to the subsequent parts, without the need to set it all up each time. Again, however, we will only be focusing on the code that is relevant to this tutorial; widgets, joystick controls, and configuration setup, and saving have been detailed in other tutorials, so we will not revisit them here.
We've put a lot of work into setting up one player, and thanks to the way we've put everything together, adding in the second is quite straightforward. The only thing that we really need to do is ensure that we are controlling the correct ship via the correct control scheme. As you'll see, this isn't very tricky.
First, let's look at defs.h:
#define NUM_PLAYERS 2
We've added a new define here. NUM_PLAYERS is a constant to hold the number of players in our game. Note that changing this value won't result in more players; it exists to make things more readable in places.
Next up, the changes to structs.h. As we've added in seperate control schemes for the two players (as expected), we have a struct called Controls:
typedef struct
{
	int keyControls[CONTROL_MAX];
	int joypadControls[CONTROL_MAX];
	int deadzone;
} Controls;
This, we've seen in other games, such as SDL2 Gunner and SDL Shooter 3. We're basically storing the control configuration for the keyboard and joypad (joystick) here.
Next up, we have the Game struct:
typedef struct
{
	// snipped

	Controls controls[NUM_PLAYERS];

	// snipped
} Game;
As stated earlier, there are many things we've added into this part, to allow the configuration settings to be ported forward, without the need to set things up each time. Right now, we'll focus on just the bits we need. In this case, we have a Game struct that controls an array of Controls, of NUM_PLAYERS in length. Basically, this represents the control configuration for each of our two players.
Finally, we've updated the Player struct:
typedef struct
{
	uint8_t num;
	double  reload;
} Player;
We've added in a field called `num`, that will identify which player this is (`num`, being a value of 0 or 1, for player 1 or 2).
Move on now to player.c, we've made a load of changes. Since as we now have two players, we need to identify them separately, and do things such as respond to the correct controls.
To start with, we've updated initPlayer:
void initPlayer(int num, int x, int y)
{
	Entity *e;
	Player *p;

	if (models[0] == NULL)
	{
		models[0] = loadModel("data/models/player1");
		models[1] = loadModel("data/models/player2");
	}

	p = malloc(sizeof(Player));
	memset(p, 0, sizeof(Player));

	p->num = num;

	e = spawnEntity(ET_PLAYER);
	e->position.x = x;
	e->position.y = y;
	e->radius = 15;
	e->model = models[num];
	e->data = p;

	e->tick = tick;
	e->draw = draw;
	e->touch = touch;
}
We're now passing over `num`, as one of the parameters, to identify this player. We're also using two different models for our players, so we're testing if we need to load them. With that done, we setup the player as normal, setting `p`'s (Player) `num` to the value of `num` passed into the function, and assign the entity's model from our array, at index `num`.
Next, we've updated `steer` - we're now passing over the Player data, as we already do with the `fire` function:
static void steer(Entity *self, Player *p)
{
	double rot;

	if (isControl(CONTROL_LEFT, p->num))
	{
		self->angle -= 3 * app.deltaTime;
	}

	if (isControl(CONTROL_RIGHT, p->num))
	{
		self->angle += 3 * app.deltaTime;
	}

	if (isControl(CONTROL_THRUST, p->num))
	{
		rot = TO_RAIDANS(self->angle);

		self->dir.x += 0.15 * sin(rot) * app.deltaTime;
		self->dir.y += 0.15 * -cos(rot) * app.deltaTime;
	}

	if (isControl(CONTROL_BRAKE, p->num))
	{
		self->dir.x *= 1 - (0.05 * app.deltaTime);
		self->dir.y *= 1 - (0.05 * app.deltaTime);
	}
}
Now, instead of our hardcoded WSAD controls, we're calling out to isControl (defined in controls.c), passing over the control we wish to test for, as well as the player number (`num`). This will let us determine if the control for that player is currently active, and respond correctly. Everything else remains the same.
The `fire` function has seen a similar change:
static void fire(Entity *self, Player *p)
{
	p->reload = MAX(p->reload - app.deltaTime, 0);

	if (p->reload == 0)
	{
		if (isControl(CONTROL_FIRE, p->num))
		{
			firePlayerBullet(self, p->num);

			p->reload = FPS / 12;
		}
	}
}
We're checking if the fire control has been pressed for the current player. However, we're also calling an updated version of firePlayerBullet, where we're now passing over the player number. This, as we'll see later, is so that we can select the correct player bullet model to use.
That's it for player.c. Next up, we have the updates to entities.c. Since we now have another entity, we want to test the interactions. As such, we've made changes to doEntities:
void doEntities(void)
{
	Entity *e;

	for (e = zone.entityHead.next; e != NULL; e = e->next)
	{
		e->tick(e);

		if (e->touch != NULL)
		{
			touchWorld(e);

			touchOthers(e);
		}
	}
}
We've added a call to touchOthers, passing over the current entity (`e`):
static void touchOthers(Entity *e)
{
	Entity *other;

	for (other = zone.entityHead.next; other != NULL; other = other->next)
	{
		if (e != other && circleCircleCollision(e->position.x, e->position.y, e->radius, other->position.x, other->position.y, other->radius))
		{
			e->touch(e, other);
		}
	}
}
What this function does is simple enough to understand - we loop through all the entities in the zone, and test if their bounding spheres have collided (via a circle-circle collision test, found in util.c). If so, we'll call the entity's `touch` function. As we've seen before, this function for the Player simply bounces them. This means that our two ships will bounce off one another.
Moving over to bullets.c now, we've made a handful of changes to account for the additional player. Starting first with initBullets:
void initBullets(void)
{
	memset(&head, 0, sizeof(Bullet));
	tail = &head;

	if (playerBulletModels[0] == NULL)
	{
		playerBulletModels[0] = loadModel("data/models/player1Bullet");
		playerBulletModels[1] = loadModel("data/models/player2Bullet");
	}
}
As with the players themselves, we're loading in two bullet models now, one for each player (as playerBulletModels).
Next, we've updated doBullets:
void doBullets(void)
{
	Bullet *b, *prev;

	prev = &head;

	for (b = head.next; b != NULL; b = b->next)
	{
		// snipped

		b->health -= app.deltaTime;

		touchWorld(b);

		touchEntities(b);

		// snipped

		prev = b;
	}
}
Again, as with the entity processing, we're now having the bullets test for collisions against entities, by calling a function named touchEntities:
static void touchEntities(Bullet *b)
{
	Entity *e;

	for (e = zone.entityHead.next; e != NULL; e = e->next)
	{
		if (e != b->owner && circleCircleCollision(b->position.x, b->position.y, b->radius, e->position.x, e->position.y, e->radius))
		{
			b->health = 0;
			return;
		}
	}
}
Here, we're looping through all the entities in the zone, checking if the entity is not the owner of the bullet, and then testing if their bounding spheres overlap. If so, the bullet has hit the entity. We'll therefore set the bullet's `health` to 0, to remove it. Right now, there's nothing much else we're doing.
Finally, we have the update to firePlayerBullet:
void firePlayerBullet(Entity *e, int num)
{
	Bullet *b;

	b = spawnBullet();
	b->position = e->position;
	b->dir.x = e->dir.x + (12 * sin(TO_RAIDANS(e->angle)));
	b->dir.y = e->dir.y + (12 * -cos(TO_RAIDANS(e->angle)));
	b->health = FPS * 3;
	b->radius = 3;
	b->angle = e->angle;
	b->owner = e;
	b->model = playerBulletModels[num];
}
Again, we're passing over the player's `num` here, so that we can select the appropriate bullet model to use, by indexing using that value.
The last major thing we need to do is update zone.c. Turning to initZone, we're now setting up two players:
void initZone(void)
{
	memset(&zone, 0, sizeof(Zone));

	initEntities();

	initBullets();

	initWorld();

	loadWorld(0);

	initPlayer(0, 500, (SCREEN_HEIGHT / 2) + 300);
	initPlayer(1, SCREEN_WIDTH - 500, (SCREEN_HEIGHT / 2) + 300);

	app.delegate.logic = logic;
	app.delegate.draw = draw;
}
Where before we were calling initPlayer once, we're now calling it twice, and passing over the number of the player this is (either 0 or 1), as the first parameter.
That's it for adding in our two players! Of couse, as mentioned before, we've had to add in a mountain of other things behind the scenes, but for our game, the above is all we needed to change. Before we finish up, let's quickly look at how the control schemes are handled.
Over in controls.c, we have isControl:
uint8_t isControl(int type, int player)
{
	int       key, btn;
	Controls *controls;

	controls = &game.controls[player];

	if (type == CONTROL_LEFT && app.joypadAxis[player][JOYPAD_AXIS_X] < -controls->deadzone)
	{
		return 1;
	}

	if (type == CONTROL_RIGHT && app.joypadAxis[player][JOYPAD_AXIS_X] > controls->deadzone)
	{
		return 1;
	}

	key = controls->keyControls[type];

	btn = controls->joypadControls[type];

	return ((key != 0 && app.keyboard[key]) || (btn != -1 && app.joypadButtons[player][btn]));
}
When it comes to testing our control, we're passing over the player number (as `player`), and using that to index the control in our `controls` array in Game. When it comes to testing the joystick controls, we also need to index into the joystick itself (our joysticks are detected and setup in init.c).
For the default controls, we set things up in game.c, in the initGame function:
void initGame(void)
{
	// snipped

	game.controls[0].keyControls[CONTROL_LEFT] = SDL_SCANCODE_A;
	game.controls[0].keyControls[CONTROL_RIGHT] = SDL_SCANCODE_D;
	game.controls[0].keyControls[CONTROL_THRUST] = SDL_SCANCODE_W;
	game.controls[0].keyControls[CONTROL_BRAKE] = SDL_SCANCODE_S;
	game.controls[0].keyControls[CONTROL_FIRE] = SDL_SCANCODE_LCTRL;
	game.controls[0].keyControls[CONTROL_ALT_FIRE] = SDL_SCANCODE_LSHIFT;

	game.controls[1].keyControls[CONTROL_LEFT] = SDL_SCANCODE_LEFT;
	game.controls[1].keyControls[CONTROL_RIGHT] = SDL_SCANCODE_RIGHT;
	game.controls[1].keyControls[CONTROL_THRUST] = SDL_SCANCODE_UP;
	game.controls[1].keyControls[CONTROL_BRAKE] = SDL_SCANCODE_DOWN;
	game.controls[1].keyControls[CONTROL_FIRE] = SDL_SCANCODE_RCTRL;
	game.controls[1].keyControls[CONTROL_ALT_FIRE] = SDL_SCANCODE_RSHIFT;

	for (i = 0; i < CONTROL_MAX; i++)
	{
		game.controls[0].joypadControls[i] = game.controls[1].joypadControls[i] = -1;
	}

	game.controls[0].deadzone = game.controls[1].deadzone = 16000;

	// snipped
}
For both player 1 and player 2, keyboard controls on the left and right side of the keyboard are defined. Not the easiest to use scheme, but it serves to prove this is possible and works. It is recommended that you control at least one of the players using a joystick..!
We're done! We have now introduced our second player to the game, who can also fly their own ship around, fire bullets, and interact with the environment.
But, again, there's something missing. Isn't this supposed to be a split screen game? As it stands, both players are located on the same screen, without any scrolling. Well, in the next part, we'll change that. We'll add in separate screens for the two players, left and right, add in some scrolling, and expanded our zone a little bit.
Purchase
The source code for all parts of this tutorial (including assets) is available for purchase, as part of the SDL2 tutorials bundle:
From itch.io