PC Games
• Orb
• Lasagne Monsters
• Three Guys Apocalypse
• Water Closet
• Blob Wars : Attrition
• The Legend of Edgar
• TBFTSS: The Pandoran War
• Three Guys
• Blob Wars : Blob and Conquer
• Blob Wars : Metal Blob Solid
• Project: Starfighter
• TANX Squadron
Tutorials
• 2D shoot 'em up
• 2D top-down shooter
• 2D platform game
• Sprite atlas tutorial
• Working with TTF fonts
• 2D adventure game
• Widget tutorial
• 2D shoot 'em up sequel
• 2D run and gun
• Roguelike
• Medals (Achievements)
• 2D turn-based strategy game
• 2D isometric game
• 2D map editor
• 2D mission-based shoot 'em up
• 2D Santa game
• 2D split screen game
• 2D quest game
• SDL 1 tutorials (outdated)
Latest Updates
The Legend of Edgar 1.38
Thu, 1st January 2026
SDL2 Quest game tutorial
Wed, 7th May 2025
SDL2 Versus game tutorial
Wed, 20th March 2024
Download keys for SDL2 tutorials on itch.io
Sat, 16th March 2024
The Legend of Edgar 1.37
Mon, 1st January 2024
Tags
• battle-for-the-solar-system (10)
• blob-wars (10)
• brexit (1)
• code (6)
• edgar (10)
• games (45)
• lasagne-monsters (1)
• making-of (5)
• match3 (1)
• numberblocksonline (1)
• orb (2)
• site (1)
• tanx (4)
• three-guys (3)
• three-guys-apocalypse (3)
• tutorials (18)
• water-closet (4)
Books

A North-South Divide
For over a hundred years, messenger Duncan has wandered the world, searching for the missing pieces of an amulet that will rid him of his curse; a curse that has burdened him with an extreme intolerance of the cold, an unnaturally long life, and the despair of watching all he knew and loved become lost to the ravages of time. But now, Duncan is close to the end of his long quest.
— Creating a Run and Gun game —
Part 14: Game controller support
Note: this tutorial assumes knowledge of C, as well as prior tutorials.


Introduction
Something that's missing from our game to give it a real arcade feeling is joystick controls. SDL has always supported various gamepads, so in this part of the tutorial we're going to look into how to implement them into our game. Please note that this tutorial makes use of and expands upon the widgets found in the Widgets tutorial and the SDL2 Shooter 2 tutorial. Also, you should connect your joypad before running the program, so that they can be detected upon startup. Note: I'm using "joysticks" and "joypads" here interchangeably. They both refer to the same thing, however.
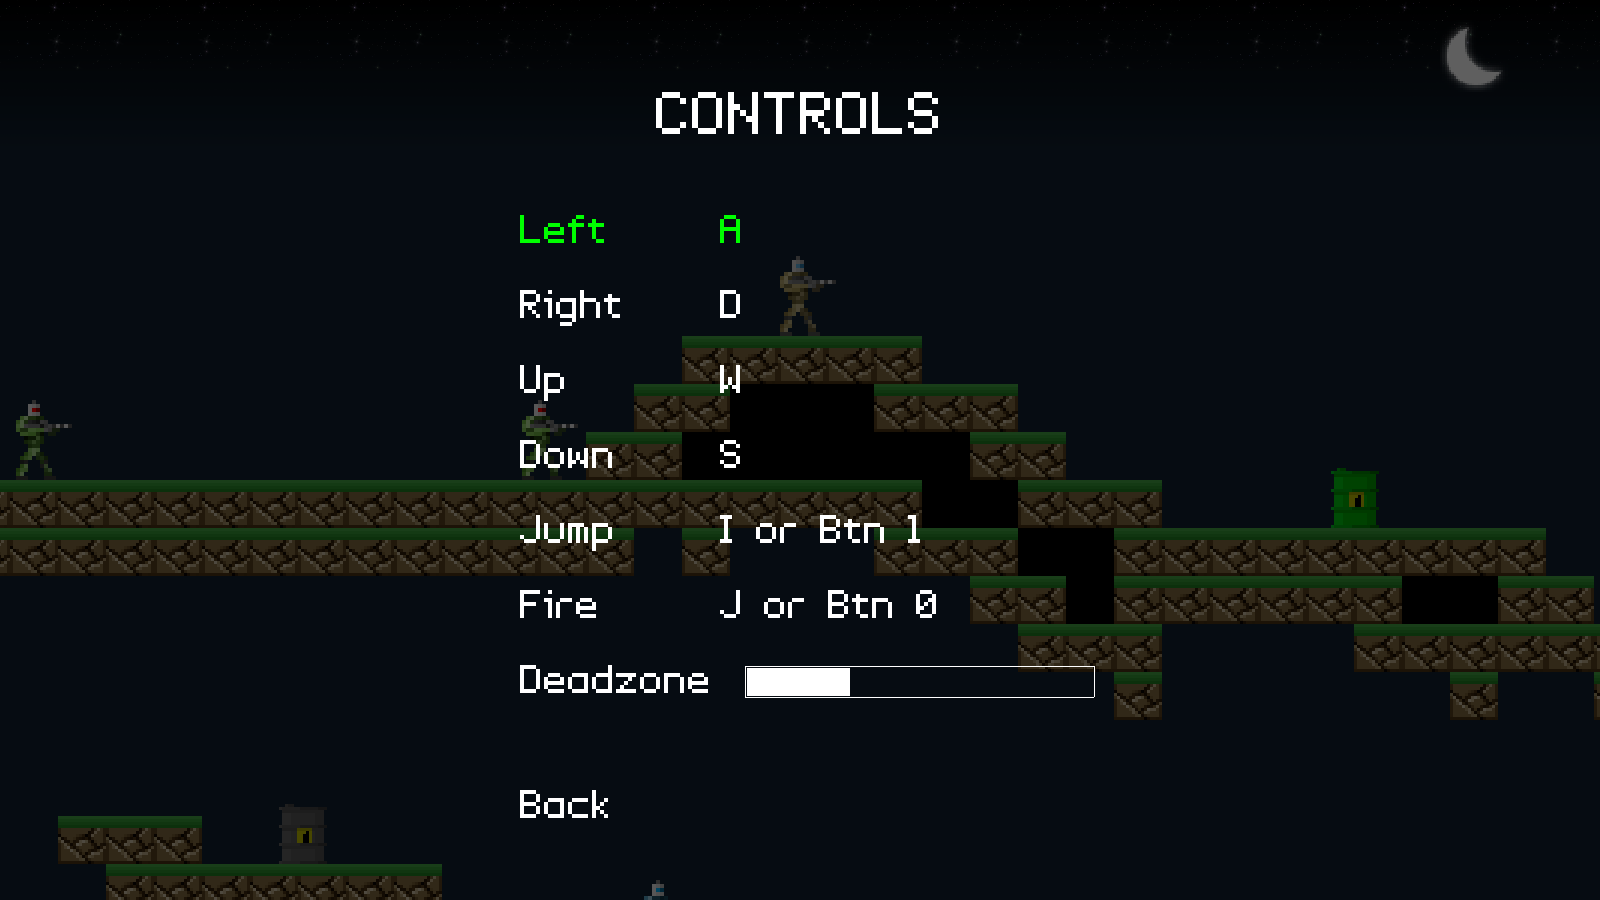
Extract the archive, run cmake CMakeLists.txt, followed by make, and then use ./gunner14 to run the code. You will see a window open like the one above. Press Escape to bring up the in-game menu and use the arrow keys, plus Space / Return to action the selected item. Navigate to Options, then Controls. Highlight the control you wish to change, then press Space / Return. The control will change to "...". Press the key or button you wish to use, or Escape to cancel. Pressing Backspace will also clear the control. These controls will now be in effect. Note that the character movement is always controlled with the left analog stick (or dpad, if no analog stick is available). Press Escape or select Back to leave the menu. Once you're finished, close the window to exit.
Inspecting the code
While supporting controllers is not hard at all, what takes a lot of time is creating the interface for the player to configure their controller and plumb in everything around it. We've had to make quite a few changes, though some of them are rather minor. We'll start with defs.h:
#define MAX_JOYPAD_BUTTONS     16
#define DEADZONE_MAX           32000
Two new defines: MAX_JOYPAD_BUTTONS and DEADZONE_MAX. MAX_JOYPAD_BUTTONS is the maximum number of buttons we'll supoort for a joypad, while DEADZONE_MAX is the maximum deadzone threshold for an analog joystick. Some joysticks when plugged in report a small non-zero value on the axis to the computer. The deadzone will help us to ignore this and prevent the character from moving while there is no user interaction.
We've also added in a few new enums:
enum {
	CONTROL_LEFT,
	CONTROL_RIGHT,
	CONTROL_UP,
	CONTROL_DOWN,
	CONTROL_JUMP,
	CONTROL_FIRE,
	CONTROL_MAX
};
The CONTROL enum will be used to define the type of control we wish to query or work with. This should be familiar to you, if you've looked at the SDL2 Shooter code.
enum {
	JOYPAD_AXIS_X,
	JOYPAD_AXIS_Y,
	JOYPAD_AXIS_MAX
};
The JOYPAD_AXIS enum will be used to determine which axis (x or y) we're working with when it comes to testing analog sticks.
We'll move onto the updates to structs.h now. We've introduced all the widgets from SDL2 Shooter into our structs.h file, though we've now modified ControlWidget:
typedef struct {
	int x;
	int y;
	int keyboard;
	int joypad;
} ControlWidget;
`x` and `y` are the positions of the widget on screen, while `keyboard` will hold the value of the keyboard key we've configured (an SDL scancode) and `joypad` will hold the value of the joypad button we've configured.
We've also added in a Game struct:
typedef struct {
	int keyControls[CONTROL_MAX];
	int joypadControls[CONTROL_MAX];
	int deadzone;
	int soundVolume;
	int musicVolume;
} Game;
Again, this should look familiar to you if you've studied the Widgets and SDL2 Shooter 2 tutorial. There is now the addition of joypadControls, as an array of ints up to CONTROL_MAX (6 elements).
Lastly, we've updated App:
typedef struct {
	struct {
		void (*logic)(void);
		void (*draw)(void);
	} delegate;
	SDL_Renderer *renderer;
	SDL_Window *window;
	int keyboard[MAX_KEYBOARD_KEYS];
	int joypadButton[MAX_JOYPAD_BUTTONS];
	int joypadAxis[JOYPAD_AXIS_MAX];
	char inputText[MAX_INPUT_LENGTH];
	SDL_Joystick *joypad;
	int lastKeyPressed;
	int lastButtonPressed;
	double deltaTime;
	double fontScale;
	Widget *activeWidget;
	struct {
		int fps;
		int collisionChecks;
		int showHitboxes;
	} dev;
} App;
We've added in five new fields: joypadButton, joypadAxis, lastKeyPressed, lastButtonPressed, and `joypad`. joypadButton is an array of int, like `keyboard`, to hold the state of the joypad buttons. joypadAxis does likewise for the axis of our analog sticks. lastKeyPressed will hold the value of the last key that was pressed, while lastButtonPressed will hold the value of the last joypad button that was pressed. `joypad` is a pointer to the SDL joystick that's currently in use.
That's our defs.h and structs.h done, so we can now look at the how we actually use our joysticks. Turning to init.c, we've updated initSDL:
void initSDL(void)
{
	// snipped

	if (SDL_Init(SDL_INIT_VIDEO|SDL_INIT_JOYSTICK) < 0)
	{
		printf("Couldn't initialize SDL: %s\n", SDL_GetError());
		exit(1);
	}

	// snipped
}
We've added in SDL_INIT_JOYSTICK to the SDL_Init function. Without this, SDL will not open the joystick subsystem and our joysticks will not be found. It will therefore mean that SDL will report 0 joysticks being available for use. We've also added in a new function called initJoypad:
static void initJoypad(void)
{
	int i, n;

	n = SDL_NumJoysticks();

	SDL_LogMessage(SDL_LOG_CATEGORY_APPLICATION, SDL_LOG_PRIORITY_INFO, "%d joysticks available", n);

	for (i = 0 ; i < n ; i++)
	{
		app.joypad = SDL_JoystickOpen(i);

		if (app.joypad != NULL)
		{
			SDL_LogMessage(SDL_LOG_CATEGORY_APPLICATION, SDL_LOG_PRIORITY_INFO, "Joystick [name='%s', Axes=%d, Buttons=%d]", SDL_JoystickNameForIndex(i), SDL_JoystickNumAxes(app.joypad), SDL_JoystickNumButtons(app.joypad));

			return;
		}
	}
}
The goal behind this function is to search for a joystick and use it (note - we only care about the first joystick we find). The first thing this function does is call SDL_NumJoysticks and assign the value to a variable named `n`. We then log a message saying how many joysticks are found. If this message reports 0, there are no joysticks available (which may be a result of SDL_INIT_JOYSTICK failing) or your joystick not being plugged in.
We then setup a for-loop, looping through all the joysticks that were detected and attempt to open (use) them. We do this by calling SDL_JoystickOpen and passing in the index of the joystick (`i`). We assign this to `app.joypad`. Next, we test if `app.joystick` is not NULL (quite possible, if the joystick was removed between SDL_INIT_JOYSTICK and this call). If it's not NULL, we can consider this joystick valid. We log the details of the joystick and then return from the function, as we've found a joystick to use.
We've also tweaked our initGameSystem function:
void initGameSystem(void)
{
	srand(time(NULL));

	initJoypad();

	initFonts();

	initAtlas();

	initWidgets();

	initSound();

	initTextures();

	initEntityFactory();

	initGame();
}
We've now calling initJoypad and initGame (which we'll see later on).
So, we can now detect our joystick. Let's look at how we handle it. Turning to input.c, we've made a few updates and additions. Starting with doInput:
void doInput(void)
{
	SDL_Event event;

	while (SDL_PollEvent(&event))
	{
		switch (event.type)
		{
			case SDL_QUIT:
				exit(0);
				break;

			case SDL_KEYDOWN:
				doKeyDown(&event.key);
				break;

			case SDL_KEYUP:
				doKeyUp(&event.key);
				break;

			case SDL_JOYBUTTONDOWN:
				doButtonDown(&event.jbutton);
				break;

			case SDL_JOYBUTTONUP:
				doButtonUp(&event.jbutton);
				break;

			case SDL_JOYAXISMOTION:
				doJoyAxis(&event.jaxis);
				break;

			default:
				break;
		}
	}
}
We've handling three new SDL events: SDL_JOYBUTTONDOWN, SDL_JOYBUTTONUP, and SDL_JOYAXISMOTION. Upon processing these events, we'll call doButtonDown, doButtonUp, and doJoyAxis respectively. For SDL_JOYBUTTONDOWN and SDL_JOYBUTTONUP, we'll pass over the event's `jbutton` event. For SDL_JOYAXISMOTION, we'll pass over the `jaxis` event.
We'll look at doButtonDown first:
static void doButtonDown(SDL_JoyButtonEvent *event)
{
	if (event->state == SDL_PRESSED && event->button < MAX_JOYPAD_BUTTONS)
	{
		app.joypadButton[event->button] = 1;

		app.lastButtonPressed = event->button;
	}
}
A simple function. We're testing the state of the SDL_JoyButtonEvent, to ensure that the button has been pressed and that the button id is less than MAX_JOYPAD_BUTTONS (so we don't overflow our array), and then setting the value of App's joypadButton to 1, at the array index of the button id. We're also assigning App's lastButtonPressed to the id of the button. This means we can now query the joypadButton array in App to find out if a button has been pressed.
doButtonUp is quite similar:
static void doButtonUp(SDL_JoyButtonEvent *event)
{
	if (event->state == SDL_RELEASED && event->button < MAX_JOYPAD_BUTTONS)
	{
		app.joypadButton[event->button] = 0;
	}
}
The difference, as you can see, is that we're testing if the button has been released and that we're setting the value of the button index to 0, to say it's no longer in use.
doJoyAxis is equally simple:
static void doJoyAxis(SDL_JoyAxisEvent *event)
{
	if (event->axis < JOYPAD_AXIS_MAX)
	{
		app.joypadAxis[event->axis] = event->value;
	}
}
We've ensuring that the value of axis can fit within our array (JOYPAD_AXIS_MAX) and then setting the value of App's joypadAxis appropriately.
And that's all we need to do to handle our joystick input. However, the problem we now face is that all joysticks are different and will report different ids for their buttons. Some controllers will have 3 buttons, others 8 or more. The controller I used for development has 4 face buttons, two shoulder buttons, and two additional buttons that might be considered Start and Select. We therefore cannot assume that to jump the player will press button 1, as it might not be the same on one joystick to the next.
Therefore, we're going to update our widget code to allow for the user to input the joystick buttons they wish to use. Turning to widgets.c, we've made several changes to our ControlWidget processing (again, ensure you're familiar with the Widget tutorial). Starting with doWidgets:
void doWidgets(char *groupName)
{
	// snipped

	if (!handleInputWidget && !handleControlWidget)
	{
		// snipped

		if (app.keyboard[SDL_SCANCODE_SPACE] || app.keyboard[SDL_SCANCODE_RETURN])
		{
			app.keyboard[SDL_SCANCODE_SPACE] = app.keyboard[SDL_SCANCODE_RETURN] = 0;

			if (app.activeWidget->type == WT_INPUT)
			{
				cursorBlink = 0;

				handleInputWidget = 1;

				memset(app.inputText, 0, sizeof(app.inputText));
			}
			else if (app.activeWidget->type == WT_CONTROL)
			{
				app.lastKeyPressed = -1;

				app.lastButtonPressed = -1;

				handleControlWidget = 1;
			}
			else if (app.activeWidget->action != NULL)
			{
				app.activeWidget->action();
			}
		}
	}

	// snipped
}
When it comes to handling our WT_CONTROL widgets, we're now setting App's lastButtonPressed to -1, in addition to lastKeyPressed. Now, when we come to doControlWidget, we're checking both these values:
static void doControlWidget(void)
{
	ControlWidget *cw;

	if (app.lastKeyPressed != -1 || app.lastButtonPressed != -1)
	{
		cw = (ControlWidget*) app.activeWidget->data;

		if (app.lastKeyPressed == SDL_SCANCODE_BACKSPACE)
		{
			cw->keyboard = 0;

			cw->joypad = -1;
		}
		else if (app.lastKeyPressed != SDL_SCANCODE_ESCAPE)
		{
			if (app.lastKeyPressed != -1)
			{
				cw->keyboard = app.lastKeyPressed;

				app.keyboard[app.lastKeyPressed] = 0;
			}

			if (app.lastButtonPressed != -1)
			{
				cw->joypad = app.lastButtonPressed;

				app.joypadButton[app.lastButtonPressed] = 0;
			}

			if (app.activeWidget->action != NULL)
			{
				app.activeWidget->action();
			}
		}

		handleControlWidget = 0;
	}
}
Focusing on lastButtonPressed for now, you'll remember that input.c recorded the last button that was pressed during the doButtonDown function. We test to see if this is not -1 and respond. We're setting the ControlWidget's `joypad` value to the value of App's lastButtonPressed, then zeroing the value in App's joypadButton array, to ensure no unwanted behaviour when we return to the game (such as jumping or firing, since we just assigned the key). We're also first testing to see if the Backspace key has been pressed, in which case we'll clear the control, to allow it to be reset.
Pretty simple. The only other thing we need to do is update the rendering code for the ControlWidget, so we can show the user which key and button is in use for the control in question. We've updated drawControlWidget for this purpose:
static void drawControlWidget(Widget *w)
{
	SDL_Color c;
	ControlWidget *cw;
	char text[32];

	cw = (ControlWidget*) w->data;

	if (w == app.activeWidget)
	{
		c.g = 255;
		c.r = c.b = 0;
	}
	else
	{
		c.r = c.g = c.b = 255;
	}

	drawText(w->label, w->x, w->y, c.r, c.g, c.b, TEXT_ALIGN_LEFT, 0);

	if (handleControlWidget && app.activeWidget == w)
	{
		drawText("...", cw->x, cw->y, c.r, c.g, c.b, TEXT_ALIGN_LEFT, 0);
	}
	else
	{
		if (cw->keyboard != 0 && cw->joypad != -1)
		{
			sprintf(text, "%s or Btn %d", SDL_GetScancodeName(cw->keyboard), cw->joypad);
		}
		else if (cw->keyboard != 0)
		{
			sprintf(text, "%s", SDL_GetScancodeName(cw->keyboard));
		}
		else if (cw->joypad != -1)
		{
			sprintf(text, "Btn %d", cw->joypad);
		}
		else
		{
			sprintf(text, "N/A");
		}

		drawText(text, cw->x, cw->y, c.r, c.g, c.b, TEXT_ALIGN_LEFT, 0);
	}
}
Now, when creating the `text` that we're going to pass to drawText, we're testing the `keyboard` and `joypad` fields of our ControlWidget. If they're both valid (`keyboard` is not 0 and `joypad` is not -1), we're rendering text to say which key or joypad button can be used. Otherwise, if `keyboard` is not 0 (meaning that `joypad` is -1) we're rendering just the name of the key. If `joypad` is not -1 (`keyboard` is 0), we'll be drawing just the button id. Finally, we'll be setting the text as "N/A" if neither a key nor a joypad button is in use. This satisifies all 4 possible conditions of our ControlWidget.
We're now able to set a keyboard key or button to our Control widgets. What we then need to do is set this data into our game configuration. If we turn to options.c (introduced as part of pulling in the widgets and other config files from SDL2 Shooter 2), we can see how this is done in updateControls:
static void updateControls(void)
{
	ControlWidget *w;

	w = (ControlWidget*) getWidget("left", "controls")->data;
	game.keyControls[CONTROL_LEFT] = w->keyboard;
	game.joypadControls[CONTROL_LEFT] = w->joypad;

	w = (ControlWidget*) getWidget("right", "controls")->data;
	game.keyControls[CONTROL_RIGHT] = w->keyboard;
	game.joypadControls[CONTROL_RIGHT] = w->joypad;

	w = (ControlWidget*) getWidget("up", "controls")->data;
	game.keyControls[CONTROL_UP] = w->keyboard;
	game.joypadControls[CONTROL_UP] = w->joypad;

	w = (ControlWidget*) getWidget("down", "controls")->data;
	game.keyControls[CONTROL_DOWN] = w->keyboard;
	game.joypadControls[CONTROL_DOWN] = w->joypad;

	w = (ControlWidget*) getWidget("jump", "controls")->data;
	game.keyControls[CONTROL_JUMP] = w->keyboard;
	game.joypadControls[CONTROL_JUMP] = w->joypad;

	w = (ControlWidget*) getWidget("fire", "controls")->data;
	game.keyControls[CONTROL_FIRE] = w->keyboard;
	game.joypadControls[CONTROL_FIRE] = w->joypad;
}
This function is largely the same as in SDL2 Shooter 2, except that as well as setting Game's keyControls from the ControlWidget, we're now also setting Game's joypadControls from the Widget's `joypad` value.
Additionally, we've updated setupWidgets:
static void setupWidgets(void)
{
	Widget *w;
	SliderWidget *sw;
	ControlWidget *cw;

	// snipped

	w = getWidget("left", "controls");
	w->action = updateControls;
	cw = (ControlWidget*) w->data;
	cw->x = w->x + 200;
	cw->y = w->y;
	cw->keyboard = game.keyControls[CONTROL_LEFT];
	cw->joypad = game.joypadControls[CONTROL_LEFT];

	w = getWidget("right", "controls");
	w->action = updateControls;
	cw = (ControlWidget*) w->data;
	cw->x = w->x + 200;
	cw->y = w->y;
	cw->keyboard = game.keyControls[CONTROL_RIGHT];
	cw->joypad = game.joypadControls[CONTROL_RIGHT];

	// snipped
}
Taking our "left" ControlWidget as an example - we're setting both the `keyboard` and `joypad` fields from Game's keyControls and joypadControls for the CONTROL_LEFT value of the arrays. In short, the opposite of what is happening with updateControls, to keep the two in sync with one another.
That's all our setup done. We now have the ability to configure the controls as we want. The only thing remaining is to actually use them. To do this, we've introduced a new function into player.c, called isControl:
static int isControl(int type)
{
	int key, btn;

	if (type == CONTROL_LEFT && app.joypadAxis[JOYPAD_AXIS_X] < -game.deadzone)
	{
		return 1;
	}

	if (type == CONTROL_RIGHT && app.joypadAxis[JOYPAD_AXIS_X] > game.deadzone)
	{
		return 1;
	}

	if (type == CONTROL_UP && app.joypadAxis[JOYPAD_AXIS_Y] < -game.deadzone)
	{
		return 1;
	}

	if (type == CONTROL_DOWN && app.joypadAxis[JOYPAD_AXIS_Y] > game.deadzone)
	{
		return 1;
	}

	key = game.keyControls[type];

	btn = game.joypadControls[type];

	return ((key != 0 && app.keyboard[key]) || (btn != -1 && app.joypadButton[btn]));
}
The function takes a single argument: the type of control we wish to query (such as CONTROL_LEFT, CONTROL_JUMP, etc). To begin with, we're testing if `type` is CONTROL_LEFT. If so, we're checking if the value of App's joypadAxis array at index JOYPAD_AXIS_X is less than the negative of Game's `deadzone`. In short, we're testing to see if the left analog stick (or dpad) is being pushed left. If so, we'll return 1. App's joypadAxis array values can be anything from -32,768 or +32,767. That's a large range! In an ideal world, we need only test if the value at the index is less than 0 (0 meaning the stick is at rest). However, joysticks can report small values, such as -21, 311, -89, etc., due to their analog nature. We therefore want to check against our `deadzone`, to ensure the value is within the range we're expecting. So, for example, if the joystick at rest is reporting that JOYPAD_AXIS_X is 362 and our deadzone is set to 1000, we'll ignore the value. Similarly, if JOYPAD_AXIS_X is reporting -111 and our deadzone is 1000, we'll ignore a value of greater than -1000.
We're repeating this check for our Right, Up, and Down controls, testing the JOYPAD_AXIS_Y for our Up and Down directions (since these are for pushing the stick up and down, and are therefore stored in a different array index).
If we're not testing a direction control, we'll start checking the other controls. We first grab the values of the keyboard control and the joypad control from the keyControls and joypadControls arrays in Game, and assign them to variables named `key` and `btn`. This is done just to make the next part more readable and isn't strictly necessary. We're then checking whether `key` is not 0 and the value in App's `keyboard` array at index `key` is set. We're also testing whether `btn` is not -1 and if the value at App's joypadButton array at index `btn` is set. If either of these conditions are met, we'll return 1.
Now that we can test which control is in use, we can use the logic in our movement and firing code. Turning to handleMovement:
static void handleMovement(Entity *self, Gunner *g)
{
	// snipped

	if (isControl(CONTROL_LEFT))
	{
		self->dx = -RUN_SPEED;

		self->facing = FACING_LEFT;
	}

	if (isControl(CONTROL_RIGHT))
	{
		self->dx = RUN_SPEED;

		self->facing = FACING_RIGHT;
	}

	// snipped
}
Where before we would test App's `keyboard` for SDL_SCANCODE_A for moving left, we're now calling isControl and passing in CONTROL_LEFT. This will allow our Gunner to move left whether we press the relevant keyboard key or hold left on our joystick. The same is true of moving right, where we now call isControl and pass over CONTROL_RIGHT. The remainder of the function has also seen similar changes.
handleShoot has also been changed:
static void handleShoot(Entity *self, Gunner *g)
{
	g->reload = MAX(g->reload - app.deltaTime, 0);

	if (isControl(CONTROL_FIRE) && g->reload == 0)
	{
		// snipped
	}
}
Now, instead of testing if the J key on the keyboard has been pressed, we're calling isControl and passing over CONTROL_FIRE.
We're almost done! Before we wrap up, we'll look at how we're saving our control data. Again, this is very similar to what we were doing in SDL2 Shooter 2, so we'll keep things brief. Turning to game.c, we'll start with initGame:
void initGame(void)
{
	game.soundVolume = MIX_MAX_VOLUME;

	game.musicVolume = MIX_MAX_VOLUME;

	game.keyControls[CONTROL_LEFT] = SDL_SCANCODE_A;
	game.joypadControls[CONTROL_LEFT] = -1;

	game.keyControls[CONTROL_RIGHT] = SDL_SCANCODE_D;
	game.joypadControls[CONTROL_RIGHT] = -1;

	game.keyControls[CONTROL_UP] = SDL_SCANCODE_W;
	game.joypadControls[CONTROL_UP] = -1;

	game.keyControls[CONTROL_DOWN] = SDL_SCANCODE_S;
	game.joypadControls[CONTROL_DOWN] = -1;

	game.keyControls[CONTROL_JUMP] = SDL_SCANCODE_I;
	game.joypadControls[CONTROL_JUMP] = -1;

	game.keyControls[CONTROL_FIRE] = SDL_SCANCODE_J;
	game.joypadControls[CONTROL_FIRE] = -1;

	loadGame();

	setSoundVolume(game.soundVolume);

	setMusicVolume(game.musicVolume);
}
We're setting all Game's joypadControls to -1, to say that no button is assigned to that control.
When it comes to loading our saved game, we've made a small adjustment to the JSON. Starting with saveGame:
void saveGame(void)
{
	cJSON *root, *controls, *keyboard, *joypad, *volumes;
	char *out;

	keyboard = cJSON_CreateObject();
	cJSON_AddNumberToObject(keyboard, "left", game.keyControls[CONTROL_LEFT]);
	cJSON_AddNumberToObject(keyboard, "right", game.keyControls[CONTROL_RIGHT]);
	cJSON_AddNumberToObject(keyboard, "up", game.keyControls[CONTROL_UP]);
	cJSON_AddNumberToObject(keyboard, "down", game.keyControls[CONTROL_DOWN]);
	cJSON_AddNumberToObject(keyboard, "jump", game.keyControls[CONTROL_JUMP]);
	cJSON_AddNumberToObject(keyboard, "fire", game.keyControls[CONTROL_FIRE]);

	joypad = cJSON_CreateObject();
	cJSON_AddNumberToObject(joypad, "left", game.joypadControls[CONTROL_LEFT]);
	cJSON_AddNumberToObject(joypad, "right", game.joypadControls[CONTROL_RIGHT]);
	cJSON_AddNumberToObject(joypad, "up", game.joypadControls[CONTROL_UP]);
	cJSON_AddNumberToObject(joypad, "down", game.joypadControls[CONTROL_DOWN]);
	cJSON_AddNumberToObject(joypad, "jump", game.joypadControls[CONTROL_JUMP]);
	cJSON_AddNumberToObject(joypad, "fire", game.joypadControls[CONTROL_FIRE]);
	cJSON_AddNumberToObject(joypad, "deadzone", game.deadzone);

	volumes = cJSON_CreateObject();
	cJSON_AddNumberToObject(volumes, "sound", game.soundVolume);
	cJSON_AddNumberToObject(volumes, "music", game.musicVolume);

	controls = cJSON_CreateObject();
	cJSON_AddItemToObject(controls, "keyboard", keyboard);
	cJSON_AddItemToObject(controls, "joypad", joypad);

	root = cJSON_CreateObject();
	cJSON_AddItemToObject(root, "controls", controls);
	cJSON_AddItemToObject(root, "volumes", volumes);

	out = cJSON_Print(root);

	writeFile(SAVE_GAME_FILENAME, out);

	cJSON_Delete(root);

	free(out);
}
Now that we have both keyboard and joystick controls available, we need to save both. We're creating a JSON object named "keyboard", into which we're saving all our keyboard config. We're also creating one named "joypad", in which we're saving all our joypad config. We're grabbing the values from Game's joypadControls at each control index and using cJSON_AddNumberToObject to create a JSON object. With both the keyboard and joypad JSON objects created, we're creating another JSON object named "controls", and adding both keyboard and joypad to it. We're then saving the JSON as normal.
loadGame has also been tweaked, to support the new format:
static void loadGame(void)
{
	char *data;
	cJSON *root, *controls, *node;

	data = readFile(SAVE_GAME_FILENAME);

	if (data != NULL)
	{
		root = cJSON_Parse(data);

		controls = cJSON_GetObjectItem(root, "controls");

		node = cJSON_GetObjectItem(controls, "keyboard");

		game.keyControls[CONTROL_LEFT] = cJSON_GetObjectItem(node, "left")->valueint;
		game.keyControls[CONTROL_RIGHT] = cJSON_GetObjectItem(node, "right")->valueint;
		game.keyControls[CONTROL_UP] = cJSON_GetObjectItem(node, "up")->valueint;
		game.keyControls[CONTROL_DOWN] = cJSON_GetObjectItem(node, "down")->valueint;
		game.keyControls[CONTROL_JUMP] = cJSON_GetObjectItem(node, "jump")->valueint;
		game.keyControls[CONTROL_FIRE] = cJSON_GetObjectItem(node, "fire")->valueint;

		node = cJSON_GetObjectItem(controls, "joypad");

		game.joypadControls[CONTROL_LEFT] = cJSON_GetObjectItem(node, "left")->valueint;
		game.joypadControls[CONTROL_RIGHT] = cJSON_GetObjectItem(node, "right")->valueint;
		game.joypadControls[CONTROL_UP] = cJSON_GetObjectItem(node, "up")->valueint;
		game.joypadControls[CONTROL_DOWN] = cJSON_GetObjectItem(node, "down")->valueint;
		game.joypadControls[CONTROL_JUMP] = cJSON_GetObjectItem(node, "jump")->valueint;
		game.joypadControls[CONTROL_FIRE] = cJSON_GetObjectItem(node, "fire")->valueint;
		game.deadzone = cJSON_GetObjectItem(node, "deadzone")->valueint;

		node = cJSON_GetObjectItem(root, "volumes");
		game.soundVolume = MAX(MIN(cJSON_GetObjectItem(node, "sound")->valueint, MIX_MAX_VOLUME), 0);
		game.musicVolume = MAX(MIN(cJSON_GetObjectItem(node, "music")->valueint, MIX_MAX_VOLUME), 0);

		cJSON_Delete(root);

		free(data);
	}
}
We're grabbing the "controls" JSON object and pulling out the "keyboard" and "joypad" JSON objects from it, setting Game's keyControls and joypadControls values as needed.
And there we have it! Joypad controls. It might seem like a lot, but remember that we were also making sure the process of configuring the controller is as simple as possible. We also want the user to retain the settings they've selected, so we need to save the joystick config when they're finished.
Only one part to go - the finishing touches! We'll be adding in some music and sound effects, a title screen, and adjusting the HUD.
Purchase
The source code for all parts of this tutorial (including assets) is available for purchase:
From itch.io
It is also available as part of the SDL2 tutorial bundle: