PC Games
• Orb
• Lasagne Monsters
• Three Guys Apocalypse
• Water Closet
• Blob Wars : Attrition
• The Legend of Edgar
• TBFTSS: The Pandoran War
• Three Guys
• Blob Wars : Blob and Conquer
• Blob Wars : Metal Blob Solid
• Project: Starfighter
• TANX Squadron
Tutorials
• 2D shoot 'em up
• 2D top-down shooter
• 2D platform game
• Sprite atlas tutorial
• Working with TTF fonts
• 2D adventure game
• Widget tutorial
• 2D shoot 'em up sequel
• 2D run and gun
• Roguelike
• Medals (Achievements)
• 2D turn-based strategy game
• 2D isometric game
• 2D map editor
• 2D mission-based shoot 'em up
• 2D Santa game
• 2D split screen game
• 2D quest game
• SDL 1 tutorials (outdated)
Latest Updates
The Legend of Edgar 1.38
Thu, 1st January 2026
SDL2 Quest game tutorial
Wed, 7th May 2025
SDL2 Versus game tutorial
Wed, 20th March 2024
Download keys for SDL2 tutorials on itch.io
Sat, 16th March 2024
The Legend of Edgar 1.37
Mon, 1st January 2024
Tags
• battle-for-the-solar-system (10)
• blob-wars (10)
• brexit (1)
• code (6)
• edgar (10)
• games (45)
• lasagne-monsters (1)
• making-of (5)
• match3 (1)
• numberblocksonline (1)
• orb (2)
• site (1)
• tanx (4)
• three-guys (3)
• three-guys-apocalypse (3)
• tutorials (18)
• water-closet (4)
Books

H1NZ
Arriving on the back of a meteorite, an alien pathogen has spread rapidly around the world, infecting all living humans and animals, and killing off all insect life. Only a handful are immune, and these survivors cling desperately to life, searching for food, fresh water, and a means of escape, find rescue, and discover a way to rebuild.
— Making a 2D split screen game —
Part 5: Split Screen
Note: this tutorial assumes knowledge of C, as well as prior tutorials.


Introduction
It's time to introduce the second major part of our game - the split screen view. As we'll soon see, this is far, far easier than one would at first have thought; it just involves two "cameras", one for each player, and SDL's ability to render to textures. The former we've seen many times before, but the render to texture is something new.
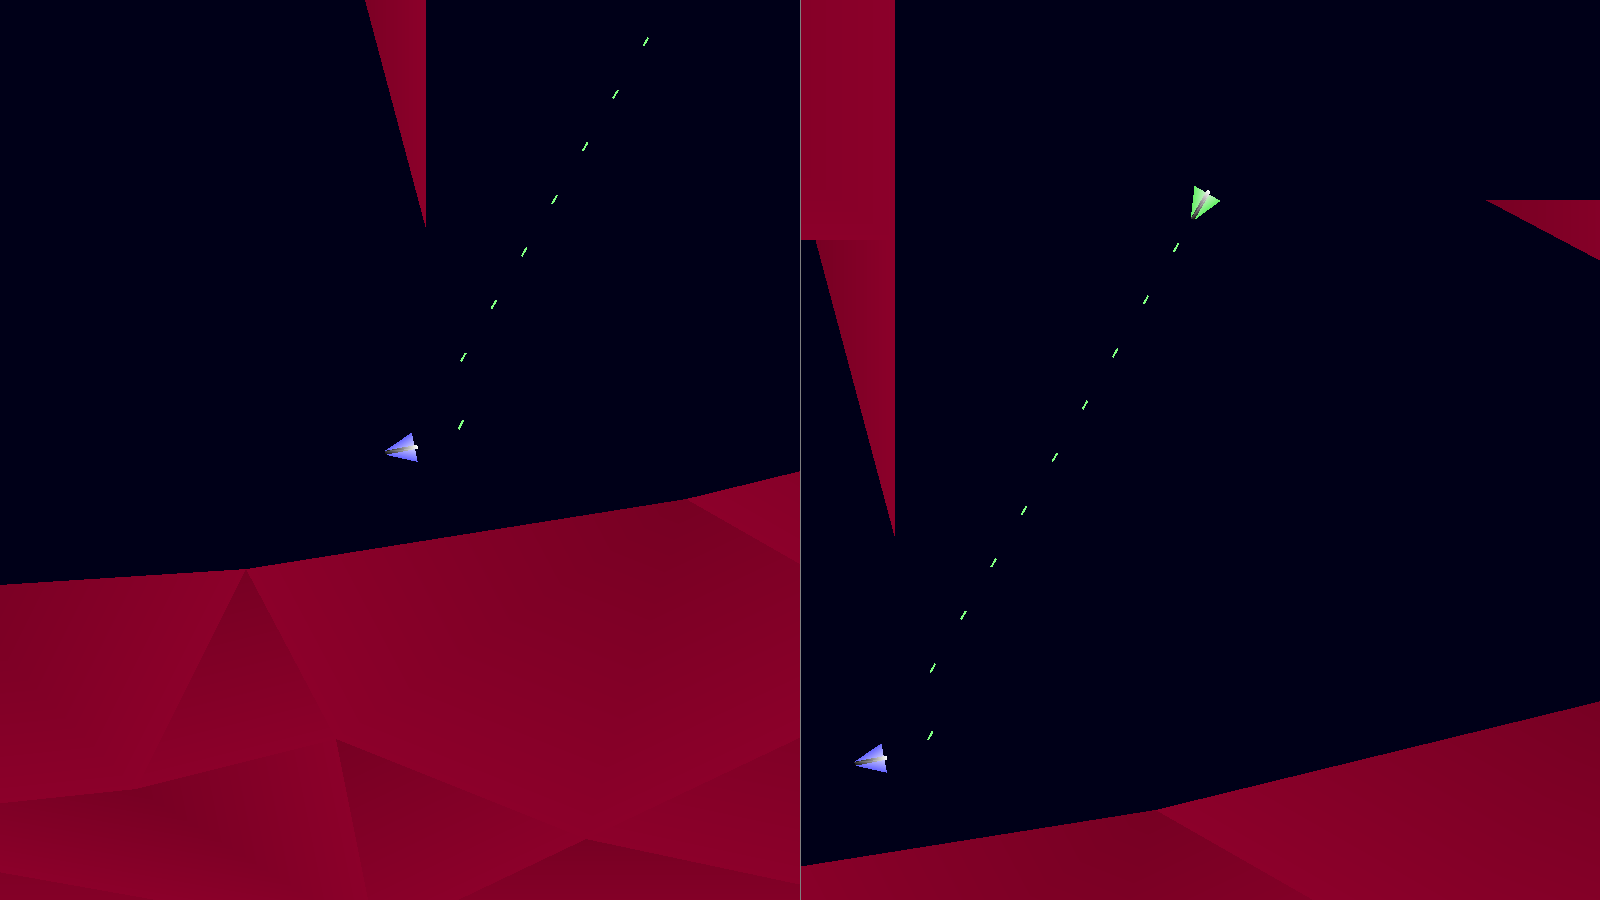
Extract the archive, run cmake CMakeLists.txt, followed by make, and then use ./versus05 to run the code. You will see a window open like the one above, with each player on either side of our zone. Use the default controls (or, at your option, copy the config.json file from a previous tutorial, to use that - remember to exit the game before copying the replacement file). Play the game as normal. Notice how the camera view stays centered on the releveant player, and how it is also constrained to the bounds of the zone itself. Once you're finished, close the window to exit.
Inspecting the code
As stated before, adding in our split screen is very straightforward, and doesn't require a huge amount of effort. We need to make a number of tweaks to our code, mostly all around rendering, but as you can already see, this part is far smaller than one might expect.
Let's start first with the changes to structs:
struct Entity
{
	// snipped

	void (*tick)(Entity *self);
	void (*draw)(Entity *self, SDL_FPoint *camera);
	void (*touch)(Entity *self, Entity *other);
	Entity *next;
};
We've updated the Entity struct here, to change the `draw` function pointer. It now accepts an SDL_FPoint as the second parameter, that we're calling `camera`. This will hold the data about the camera position we want to render with.
Next, we've updated Zone:
typedef struct
{
	Entity entityHead, *entityTail;
	SDL_FPoint cameras[NUM_PLAYERS];
	SDL_Rect bounds;
} Zone;
We've added two new variables here. `cameras` is an array of SDL_FPoints, that will hold our camera positions for each player. `bounds` is a variable that will hold the size of our world. We'll be using the SDL_Rect's `x`, `y`, `w`, and `h` as the corners.
Since we're talking about the Zone bounds, let's move over to zone.c, to see how we're using it. We've updated just two functions in this file. Starting with loadWorld:
void loadWorld(int zoneNum)
{
	int       i, numLines, n;
	Triangle *t;
	FILE     *fp;
	char      filename[MAX_FILENAME_LENGTH];

	// snipped

	zone.bounds.x = zone.bounds.y = INT_MAX;

	for (t = head.next; t != NULL; t = t->next)
	{
		for (n = 0; n < 3; n++)
		{
			zone.bounds.x = MIN(zone.bounds.x, t->points[n].x);
			zone.bounds.y = MIN(zone.bounds.y, t->points[n].y);
			zone.bounds.w = MAX(zone.bounds.w, t->points[n].x);
			zone.bounds.h = MAX(zone.bounds.h, t->points[n].y);
		}
	}

	SDL_LogMessage(SDL_LOG_CATEGORY_APPLICATION, SDL_LOG_PRIORITY_INFO, "Zone bounds: [%d,%d -> %d,%d]\n", zone.bounds.x, zone.bounds.y, zone.bounds.w, zone.bounds.h);
}
After we've loaded our world's triangles, we're going to loop through each one, and determine the overall maximum and minimum point values, with the help of our MIN and MAX macros (found in defs.h). Zone's `bound`'s `x` and `y` will be the smallest x and y found while checking our triangles, while the `w` and `h` will contains the largest `x` and `y` values. Notice how we first set the bound's `x` and `y` to a very large value, so our MIN test doesn't start at 0.
Next, let's turn to drawWorld:
void drawWorld(SDL_FPoint *camera)
{
	int        n;
	SDL_Vertex v;
	Triangle  *t;

	n = 0;

	for (t = head.next; t != NULL; t = t->next)
	{
		for (n = 0; n < 3; n++)
		{
			memset(&v, 0, sizeof(SDL_Vertex));

			v.position = t->points[n];
			v.position.x -= camera->x;
			v.position.y -= camera->y;

			v.color = t->colors[n];

			drawVertex(&v);
		}
	}
}
Here, we've updated the function to accept an SDL_FPoint as a parameter. All we're doing with it is adjusting our Vertex's position by `camera`, by subtracting `camera`'s `x` and `y` from the SDL_Vertex's `position`'s `x` and `y`. You will find that all the other draw function updates do the same.
Moving on now to player.c. Again, we've made some small changes to this file, starting with `tick`:
static void tick(Entity *self)
{
	Player *p;
	SDL_FPoint *c;

	// snipped

	c = &zone.cameras[p->num];

	c->x = MIN(MAX(self->position.x - (SCREEN_WIDTH / 4), zone.bounds.x), zone.bounds.w - SCREEN_WIDTH / 2);
	c->y = MIN(MAX(self->position.y - (SCREEN_HEIGHT / 2), zone.bounds.y), zone.bounds.h - SCREEN_HEIGHT);
}
At the end of the function, after we've moved our player, we're going to grab a pointer to the Player's `camera` in Zone (indexing using the Player's `num`), so that we can set its values. Something important to note here: normally, we would horizontally centre the player on the screen, by using half of the screen's width (SCREEN_WIDTH / 2). However, since we're in split screen, we need to halve this value again. Therefore, we're subtracting just a quarter of SCREEN_WIDTH. Additionally, when it comes to the maximum horizontal position of the camera, we're limiting to the width of the zone, less half of the screen width. Again, if this were full screen, this would be the full screen width.
The `y` limits of our camera are as one might expect, making use of the zone's `y` and `h` bounds, less half the screen height or the full height, respectively.
Now over to `draw`. The calculation here will look familiar:
static void draw(Entity *self, SDL_FPoint *camera)
{
	SDL_FPoint drawPosition;

	drawPosition = self->position;
	drawPosition.x -= camera->x;
	drawPosition.y -= camera->y;

	drawModel(self->model, drawPosition, self->angle);
}
Just as with drawing the world triangles, we are subtracting the `camera`'s `x` and `y` from the entity's position (as drawPosition), and passing this value to drawModel. This adjusts the entity's rendering position according to the camera view passed into the function.
That's it for player.c. Next over to entities.c, where we've made a predictable change to drawEntities:
void drawEntities(SDL_FPoint *camera)
{
	Entity *e;

	for (e = zone.entityHead.next; e != NULL; e = e->next)
	{
		e->draw(e, camera);
	}
}
This function has been updated to accept an SDL_FPoint that acts as our camera position. We're passing this over to each entity when we call its `draw` function.
Moving across to bullets.c, we can see we've done likewise with drawBullets:
void drawBullets(SDL_FPoint *camera)
{
	Bullet *b;
	SDL_FPoint drawPosition;

	for (b = head.next; b != NULL; b = b->next)
	{
		drawPosition = b->position;
		drawPosition.x -= camera->x;
		drawPosition.y -= camera->y;

		drawModel(b->model, drawPosition, b->angle);
	}
}
When it comes to drawing our bullets, we're adjusting the rendering position (as drawPosition) before calling drawModel.
Finally, let's move over to zone.c, where all the really interesting stuff happens. Starting with initZone:
void initZone(void)
{
	// snipped

	if (playerViewportTexture == NULL)
	{
		playerViewportTexture = SDL_CreateTexture(app.renderer, SDL_PIXELFORMAT_RGBA8888, SDL_TEXTUREACCESS_TARGET, SCREEN_WIDTH / 2, SCREEN_HEIGHT);
	}

	showOptions = 0;

	app.delegate.logic = logic;
	app.delegate.draw = draw;
}
We've introduced a new static variable here called playerViewportTexture. playerViewportTexture is an SDL_Texture, that, as the name suggests, will act as the viewport for our camera. It is a texture that can be used as a render target by SDL's APIs. What this means is that we can choose to draw to it, instead of the main screen. Once done, we can then draw this texture to the main display. For us, this has great benefits, such as clipping of object drawn, and the ability to position this texture wherever we wish (such as side by side).
When creating the texture, note how we're making it half of our defined screen width (since this texture will occupy one half of the screen). The height remains the same, as expected. The texture is created with a target type of SDL_TEXTUREACCESS_TARGET, means we're allowed to draw directly to it. SDL_PIXELFORMAT_RGBA8888 is chosen as the format that is both commonly supported by native APIs and hardware, and meets our requirements.
More information about the SDL_CreateTexture can be found here: https://wiki.libsdl.org/SDL2/SDL_CreateTexture.
With that done, we come to the final (and most important) change to our code - the `draw` function:
static void draw(void)
{
	int         i;
	SDL_FPoint *c;

	for (i = 0; i < NUM_PLAYERS; i++)
	{
		SDL_SetRenderTarget(app.renderer, playerViewportTexture);

		drawRect(0, 0, SCREEN_WIDTH / 2, SCREEN_HEIGHT, 0, 0, 24, 255);

		c = &zone.cameras[i];

		drawEntities(c);

		drawBullets(c);

		drawWorld(c);

		flushGeometry();

		SDL_SetRenderTarget(app.renderer, NULL);

		blit(playerViewportTexture, (SCREEN_WIDTH / 2) * i, 0, 0, SDL_FLIP_NONE);
	}

	if (!showOptions)
	{
		drawRect(SCREEN_WIDTH / 2, 0, 1, SCREEN_HEIGHT, 128, 128, 128, 255);
	}
}
You will immediately notice that we're using a for-loop, where before we were simply calling drawEntities, drawBullets, etc. just once. Let's walk through the changes to this function.
As noted, we're now using a for-loop. We use this to loop through all the cameras in Zone (again, just two, one per player). We first call SDL_SetRenderTarget, passing over playerViewportTexture, to tell SDL to use playerViewportTexture as our render target, so all our subsequent drawing operations are sent to this texture. Next, we grab a reference to a camera (an SDL_FPoint) from Zone, indexed by `i`. We then call drawEntities, drawBullets, etc. passing over the SDL_FPoint.
If you remember, in player.c we're setting the position of each Player's camera in the `tick` function. We're now using that camera data when it comes to drawing, so that we draw the scene correctly for the targetted player. drawEntities, drawBullets, etc. are all passed this camera (`c`).
With all our drawing complete, we call flushGeometry, to ensure we no nothing left in our batch, then call SDL_SetRenderTarget again, this time passing over NULL, to return to our default / main render target (the screen). Lastly, we draw playerViewportTexture to the screen (via `blit`). It will be horizontally positioned at either the left-side of the screen or the middle of the screen, depending on whether this is player 1 or 2 that we're working with. This results in the views being positioned side by side.
The last thing we do is draw a horizontal dividing line down the middle of the screen, via drawRect (being 1 pixel in width), to create a visual separation between the two views.
Done! Wow, this is great! We have the makings of a split screen, two player game. We can control our ships separately, and render the scenes at different points of view. From here on out, we can start to introduce more of our core gameplay elements, knowing we've accomplished the most important aspects*. In the next part, we'll handle the player dying.
(* - well, almost; the more astute amongst the readers will become aware of some minor trouble brewing)
Purchase
The source code for all parts of this tutorial (including assets) is available for purchase, as part of the SDL2 tutorials bundle:
From itch.io