PC Games
• Orb
• Lasagne Monsters
• Three Guys Apocalypse
• Water Closet
• Blob Wars : Attrition
• The Legend of Edgar
• TBFTSS: The Pandoran War
• Three Guys
• Blob Wars : Blob and Conquer
• Blob Wars : Metal Blob Solid
• Project: Starfighter
• TANX Squadron
Tutorials
• 2D shoot 'em up
• 2D top-down shooter
• 2D platform game
• Sprite atlas tutorial
• Working with TTF fonts
• 2D adventure game
• Widget tutorial
• 2D shoot 'em up sequel
• 2D run and gun
• Roguelike
• Medals (Achievements)
• 2D turn-based strategy game
• 2D isometric game
• 2D map editor
• 2D mission-based shoot 'em up
• 2D Santa game
• 2D split screen game
• 2D quest game
• SDL 1 tutorials (outdated)
Latest Updates
The Legend of Edgar 1.38
Thu, 1st January 2026
SDL2 Quest game tutorial
Wed, 7th May 2025
SDL2 Versus game tutorial
Wed, 20th March 2024
Download keys for SDL2 tutorials on itch.io
Sat, 16th March 2024
The Legend of Edgar 1.37
Mon, 1st January 2024
Tags
• battle-for-the-solar-system (10)
• blob-wars (10)
• brexit (1)
• code (6)
• edgar (10)
• games (45)
• lasagne-monsters (1)
• making-of (5)
• match3 (1)
• numberblocksonline (1)
• orb (2)
• site (1)
• tanx (4)
• three-guys (3)
• three-guys-apocalypse (3)
• tutorials (18)
• water-closet (4)
Books

Firmware
HF-Tech's chips have changed the world. Embedded into the heads of over 90% of the world's population, they have cured autism, dementia, provided intelligence boosts, and helped to ease some of the more mundane tasks in life. Daniel Blair, hacker and Workshop member, however is not convinced that everything is as rosy as it seems. But is he looking in all the wrong places..?
— A simple turn-based strategy game —
Part 1: Basic unit control
Note: this tutorial assumes knowledge of C, as well as prior tutorials.


Introduction
Turn-based strategy games became very popular in the 1990s, and remain popular today. Creating one isn't too hard, but there are plenty of little caveats one needs to be aware of. In this tutorial series, we're going to put a simple one together - Wizards vs Ghosts. The goal of the game will be to guide our 3 little wizards around, eliminating the ghosts as they encounter them. We'll use action points to determine how much a unit (wizard or ghost) can move and attack, and make use of attributes such as accuracy and random damage.
A word of caution before continuing: this tutorial relies a lot on those that have preceeded it, especially the roguelike tutorial (SDL2 Rogue). It should therefore be considered a prerequisite. To save on repeating oneself, this tutorial will largely skip over things that have already been discussed in the past. You should make yourself as familiar as possible with the roguelike tutorial, otherwise you could find yourself becoming lost quite quickly.
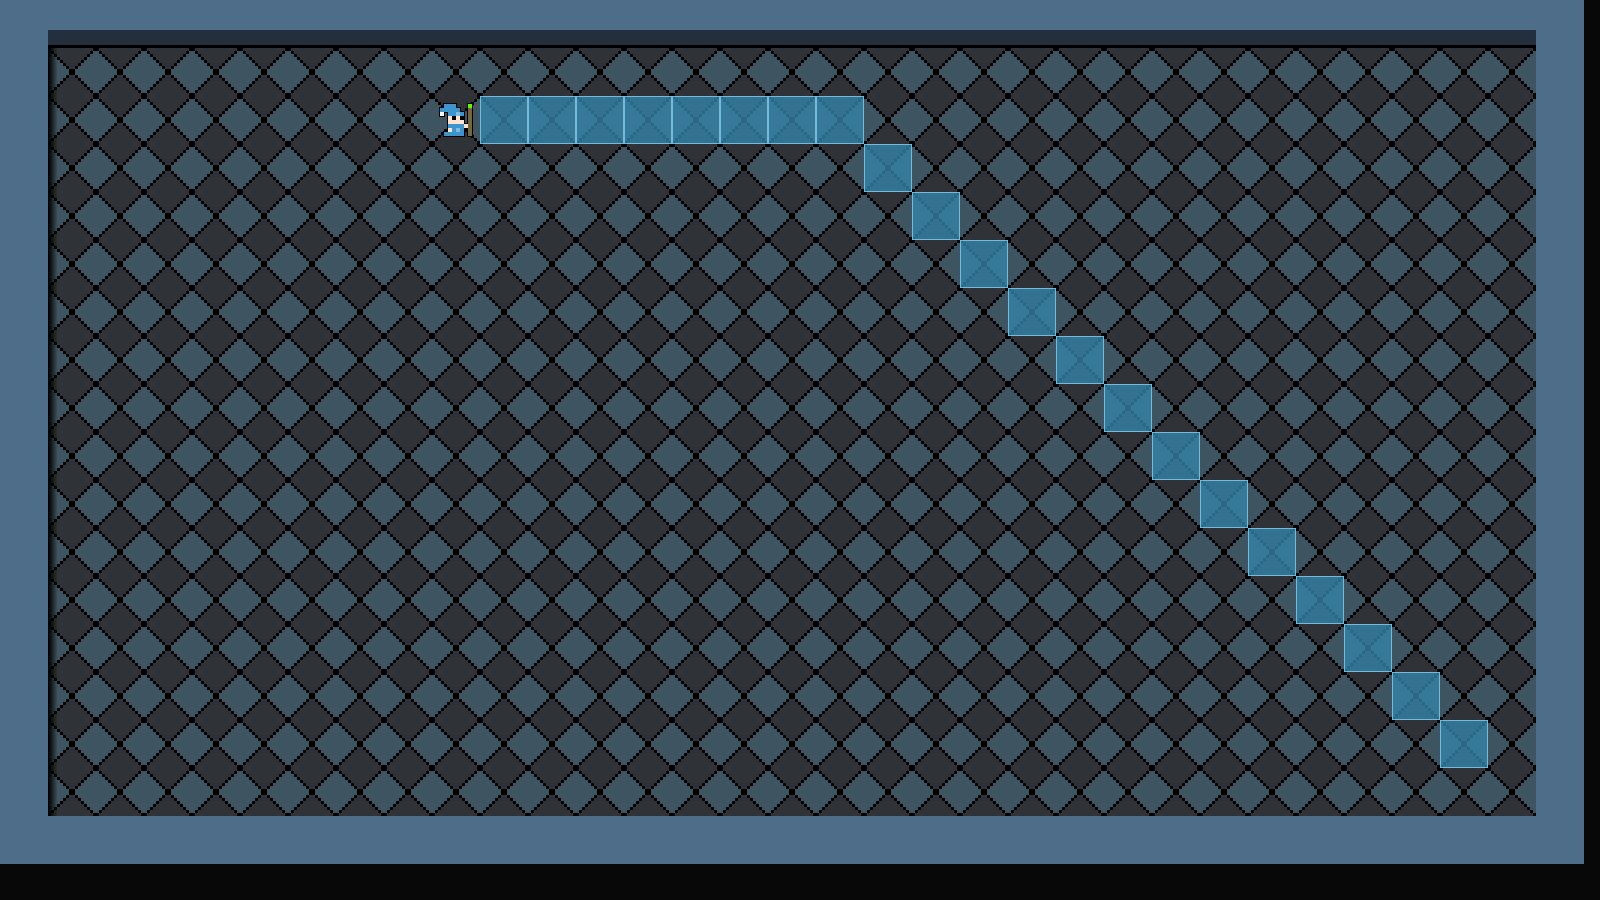
Extract the archive, run cmake CMakeLists.txt, followed by make, and then use ./sdl2TBS01 to run the code. You will see a window open like the one above, showing our main character in a small room, surrounded by walls. Click any floor tile to instruct the character to move to that location. You will see the A* path he walks. Clicking on the walls won't result in a path. Once you're finished, close the window to exit.
Inspecting the code
This first part is going to be about laying down the foundations, and so is going to be quite long. At the end of it, we'll have a good starting point to work with.
We'll start with defs.h:
#define MAP_TILE_SIZE             48

#define MAX_TILES                 15

#define MAP_WIDTH                 33
#define MAP_HEIGHT                18

#define MAP_TO_SCREEN(x)          (x * MAP_TILE_SIZE) + MAP_TILE_SIZE / 2

#define TILE_WALL                 0
#define TILE_GROUND               5
#define TILE_SLIME                10

enum {
	ET_WORLD,
	ET_MAGE
};

enum {
	FACING_LEFT,
	FACING_RIGHT
};
Nothing out of the ordinary here. We're setting up a number of constants to work with, as well as enums. Once again, if you've worked through past tutorials this should all be quite clear. One thing to note is the MAP_TO_SCREEN macro. This will convert a map coordinate to a screen coordinate. This is quite a common calculation that needs to be performed, so we've put it into a macro to make things a bit easier.
Moving onto structs.h now. We'll only consider those structs most relevant to our game:
struct Entity {
	unsigned int id;
	int type;
	char name[MAX_NAME_LENGTH];
	int x;
	int y;
	int side;
	int solid;
	int facing;
	AtlasImage *texture;
	void (*draw) (Entity *self);
	Entity *next;
};
We've added in the familiar Entity struct. It should be clear what most fields here are for. `type` will represent the type of entity this is, such as ET_MAGE, as seen in defs.h. `x` and `y` will be the entity's location on the map. `solid` will say whether the entity is a solid object and blocks movement (this is important for things such as items).
Next up, we have the MapTile struct:
typedef struct {
	int tile;
} MapTile;
Right now, this struct has just one field: `tile`, which will represent the type of tile this is.
Finally, the all-important Stage struct:
typedef struct {
	unsigned int entityId;
	MapTile map[MAP_WIDTH][MAP_HEIGHT];
	Entity entityHead, *entityTail;
	Entity *currentEntity;
	Node routeHead;
	int animating;
	struct {
		int x;
		int y;
	} selectedTile;
} Stage;
This struct will hold all the data for the stage (dungeon, world, etc) that we are currently playing in. `map` is a multidimensional array of MapTiles, of MAP_WIDTH and MAP_HEIGHT size. currentEntity points to the entity that we are currently handling. routeHead will act as the head of the linked list for our A* pathfinding. `animating` is a flag to say whether animations are playing out (such as an entity or bullet moving, or damage text being displayed) and will act as input and flow control. Finally, selectedTile will hold the location of the tile the player's mouse is currently hovering over. We'll see how all of these are used later.
Now, it's over to aStar.c. This is where we'll be doing our A* pathfinding. Note that this is more or less lifted from the roguelike tutorial, and is therefore just a simple A* pathfinding routine. However, there is one crucial difference: the createRoute function:
static void createRoute(int x, int y)
{
	Node *n, *tail, *route;

	for (n = nodeHead.next ; n != NULL ; n = n->next)
	{
		if (n->x == x && n->y == y)
		{
			tail = &stage.routeHead;

			for (n = n->parent ; n != NULL ; n = n->parent)
			{
				route = malloc(sizeof(Node));
				memset(route, 0, sizeof(Node));
				tail->next = route;
				tail = route;

				route->x = n->x;
				route->y = n->y;
			}

			return;
		}
	}
}
In the roguelike tutorial, we were calculating the path for the AI and then taking the first node to use as their movement. This was because in the roguelike the player and enemies all moved one step at a time. In this game, we want the full path to be followed.
The function takes two parameters: `x` and `y`. These represent the starting position of our route. We start by looping through all the nodes in the linked list we produced while constructing our route (assigning to a variable called `n`), looking for the one that matches the values of `x` and `y`. Once we've found it, we'll want to walk the chain to find the path. The node's `parent` field will help us do this. We set a variable called `tail` to stage's routeHead, to help with our path linked list creation. We then setup another for-loop, following each `n`'s `parent`, until we hit a NULL (meaning we've reached the end of the path).
For each iteration of the loop, we're mallocing a new Node, assigning it to a variable called `route`, and adding it to our linked list. `route`'s `x` and `y` are assigned `n`'s `x` and `y`. We do this so that we can create a linked list that contains just the nodes we're interested in, rather than try to micromanage the right path later on. Once we're found all the nodes we're interested in, we exit out of the function by calling return.
If we quickly look at createAStarRoute, we can see how this function is used:
void createAStarRoute(Entity *e, int x, int y)
{
	if (!isBlocked(x, y))
	{
		resetAStar();

		buildRouteMap(x, y, e->x, e->y);

		createRoute(e->x, e->y);
	}
}
We call createRoute as the last action after building our path. Something to note is that if we fail to construct a path, Stage's routeHead's `next` will be NULL. This means that we can easily check to see if a path was constructed.
That's our A* tweaked to generate a full path. We can now move onto seeing how the path is used. If we turn next to units.c, we will find a load of code for handling our units (the wizards and ghosts). Starting with initUnits:
void initUnits(void)
{
	moveTimer = 0;
}
A short function. We're just setting a variable called moveTimer (static in units.c) to 0. This timer will be used to create a short delay between each of the unit's movements when walking the A* path. Otherwise, our unit will fly to its destination in a blink of an eye.
Next, we have initUnit:
void initUnit(Entity *e)
{
	e->draw = draw;
}
This function takes an Entity as an argument. You will have seen this pattern before in other tutorials. For now, we're just setting the entity's `draw` to the static `draw` function in units.c. It will be expanded upon in future.
The doUnits function comes next:
void doUnits(void)
{
	if (stage.routeHead.next != NULL)
	{
		move();
	}
}
Again, this one is simple. We're testing to see if Stage's routeHead's `next` is not NULL, and calling a function called `move` if it's not. The doUnits function will be called during each loop in our game. In short, if we see there is a path to walk, the currently active unit to move along it.
The `move` function itself follows:
static void move(void)
{
	Node *n;

	moveTimer -= app.deltaTime;

	if (moveTimer <= 0)
	{
		n = stage.routeHead.next;

		if (n->x < stage.currentEntity->x)
		{
			stage.currentEntity->facing = FACING_LEFT;
		}
		else if (n->x > stage.currentEntity->x)
		{
			stage.currentEntity->facing = FACING_RIGHT;
		}

		stage.currentEntity->x = n->x;
		stage.currentEntity->y = n->y;

		stage.routeHead.next = n->next;

		free(n);

		if (stage.routeHead.next == NULL)
		{
			resetAStar();
		}

		moveTimer = 5;
	}
}
There's a bit more to this function compared to what has come before. It's still very easy to follow, though. We first decrease the value of moveTimer, and check if it's fallen to 0 or less. If so, we grab Stage's routeHead's `next` Node and assign it to `n`. We test where `n` lies relative to our current entity (Stage's currentEntity), and update the unit's `facing` depending on whether it is to the left or right (so the unit doesn't walk backwards). With that done, we assign our entity's `x` and `y` values to those of `n`. This will mean the current entity moves to `n`'s location.
With that done, we assign Stage's routeHead's `next` to `n`'s `next`, to remove `n` from the linked list, and then free `n`, to delete the memory. We then check to see if routeHead's next is NULL, meaning we've reached the end of our path. If we have, we'll call resetAStar to clear all the A* data we created for this movement. Lastly, we'll set moveTimer to 5, to create a new delay between movements. Increasing this value will create a longer delay between node movements.
So, while we have a path to follow, the current entity will walk it, and we'll delete the nodes as we go.
Moving onto `draw` function now:
static void draw(Entity *self)
{
	int x, y;

	x = MAP_TO_SCREEN(self->x);
	y = MAP_TO_SCREEN(self->y);

	blitAtlasImage(self->texture, x, y, 1, self->facing == FACING_RIGHT ? SDL_FLIP_NONE : SDL_FLIP_HORIZONTAL);
}
Here, we're drawing the entity passed into the function (`self`). We're making use of the MAP_TO_SCREEN macro we defined in defs.h, to take the entity's `x` and `y` map position and convert it into screen coordinates. We're assigning these to `x` and `y`, just for the sake of readability. We're then calling blitAtlasImage to draw the entity.
The last function we'll look at is isBlocked:
int isBlocked(int x, int y)
{
	if (!isGround(x, y))
	{
		return 1;
	}

	return 0;
}
Right now, this function simply calls out to isGround, found in map.c, passing in the `x` and `y` values that were passed over. This function will be expanded upon in later parts, hence why it's not exactly optimised (it could simply return the negative of isGround). This function is used by the A* pathfinding routine, to discover if a map square can be trasversed by the currently active entity.
Moving next to player.c, where we find all the functions that are used to handle the player input and actions. Starting with initPlayer:
void initPlayer(void)
{
	addPlayerUnits();
}
This function is called when we first setup the stage that will be played. Not a lot going on for now - we're just calling addPlayerUnits. We'll see more on this in a bit.
Next up is doPlayer. This is called for each loop of our game and handles the player:
void doPlayer(void)
{
	doMoveUnit();
}
Again, a simple function. We're calling doMoveUnit, which we actually come to next:
static void doMoveUnit(void)
{
	if (app.mouse.buttons[SDL_BUTTON_LEFT])
	{
		app.mouse.buttons[SDL_BUTTON_LEFT] = 0;

		createAStarRoute(stage.currentEntity, stage.selectedTile.x, stage.selectedTile.y);
	}
}
A bit more to this one! We're first checking to see if the left mouse button has been pressed. If so, we'll clear the button, by zeroing the appropriate index in App's mouse's buttons array, and then call createAStarRoute. We're passing through the entity that we want to build the route for, and the x and y positions of Stage's selectedTile. Basically, this means that when we click the left mouse button over a square in the map, we'll attempt to build a path to that position. You will remember that units.c will then make use of this route to move the unit around.
The last function is addPlayerUnits:
static void addPlayerUnits(void)
{
	Entity *e;
	int i;
	char *names[] = {"Andy"};

	for (i = 0 ; i < NUM_PLAYER_UNITS ; i++)
	{
		e = initEntity(names[i]);

		e->side = SIDE_PLAYER;

		do
		{
			e->x = rand() % MAP_WIDTH;
			e->y = rand() % MAP_HEIGHT;
		}
		while (!isGround(e->x, e->y));

		units[i] = e;
	}

	stage.currentEntity = units[0];
}
This function is responsible for adding the player's units to the stage. Right now, we're only adding one (NUM_PLAYER_UNITS is defined as 1) - a mage called Andy. We'll create him in a loop, calling initEntity and passing through the value of names at the index defined by `i` (again, 0 = Andy). We'll also set the entity's `side` to SIDE_PLAYER, so we know this is a player's unit (something that we'll go into depth with later on in this tutorial).
With our unit created, we want to randomly place him on the map. We setup a do-loop, assigning the entity's `x` and `y` to random values of the map's width and height. We repeat this while the result of isGround is false. In other words, until we place the entity on a value ground tile. After this is done, we add the entity to an array called units (static in player.c) at index `i`. Again, this will come into play in the next part. Finally, we set Stage's currentEntity to the unit at index 0, to tell the game it is the entity currently under control.
That's our player covered. We can now move onto map.c. There's not a great deal here, so we'll cover this fairly quickly. Starting with initMap:
void initMap(void)
{
	loadTiles();
}
We're just calling loadTiles, to load our tile graphics. drawMap follows:
void drawMap(void)
{
	int x, y, n;

	for (x = 0 ; x < MAP_WIDTH ; x++)
	{
		for (y = 0 ; y < MAP_HEIGHT ; y++)
		{
			n = stage.map[x][y].tile;

			blitAtlasImage(tiles[n], x * MAP_TILE_SIZE, y * MAP_TILE_SIZE, 0, SDL_FLIP_NONE);
		}
	}
}
All we're doing here is using two for-loops to render our tiles. We're assigning the value of the revelant MapTile's tile at the x and y indexes to a variable called `n`, just to for easier reading before then calling blitAtlasImage and using the tile at index `n` as the texture we want to draw.
isInsideMap is the next function:
int isInsideMap(int x, int y)
{
	return x >= 0 && y >= 0 && x < MAP_WIDTH && y < MAP_HEIGHT;
}
This is basically just a utility function, to help us determine if a point is inside the map bounds. It should be clear what's happening here. Next, we have isGround:
int isGround(int x, int y)
{
	return isInsideMap(x, y) && stage.map[x][y].tile >= TILE_GROUND && stage.map[x][y].tile < TILE_SLIME;
}
We saw this function being called elsewhere. As you can see, it first checks to see if the point (`x` and `y`) is inside the map bounds, and that the tile value at the relevant map index is equal to or greater than TILE_GROUND (10) and less than TILE_SLIME (15). Our game can have 5 different ground tile types.
Next, we have drawAStarPath:
void drawAStarPath(void)
{
	int x, y;
	Node *n;

	for (n = stage.routeHead.next ; n != NULL ; n = n->next)
	{
		x = MAP_TO_SCREEN(n->x);
		y = MAP_TO_SCREEN(n->y);

		blitAtlasImage(routeTile, x, y, 1, SDL_FLIP_NONE);
	}
}
This is the function that draws the A* path that our unit is walking. We simply use a for-loop to iterate over the active route nodes, calling MAP_TO_SCREEN to get the correct screen position, and then call blitAtlasImage to draw them. We're using a texture called routeTile, that we're loading in the loadTiles function:
static void loadTiles(void)
{
	int i;
	char filename[MAX_FILENAME_LENGTH];

	for (i = 0 ; i < MAX_TILES ; i++)
	{
		sprintf(filename, "gfx/tiles/%d.png", i);

		tiles[i] = getAtlasImage(filename, 0);
	}

	routeTile = getAtlasImage("gfx/tiles/route.png", 1);
}
We've seen this before in our tutorials, so we won't say any more about it, other than that we're loading the tile graphics the map will use.
Moving along to mages.c now. This is where we setup our mage units (those used by the player). There's not a huge amount going on right now, so this will once again be quite brief. Starting with initMage:
void initMage(Entity *e, char *filename)
{
	e->type = ET_MAGE;
	e->solid = 1;
	e->texture = getAtlasImage(filename, 1);

	initUnit(e);
}
This is a function that will be shared by the three different mages that we have in our game. The function takes an entity and a filename as its arguments. We set `e`'s `type` as ET_MAGE, set it as solid, and then set its `texture` as that specified by the filename passed into the function. With that done, we call initUnit, to setup the unit specific function pointers (such as the `draw` function).
initAndyMage is the only other function here:
void initAndyMage(Entity *e)
{
	STRCPY(e->name, "Andy");

	initMage(e, "gfx/units/andy.png");
}
We're simply setting the name of the entity (`e`) to Andy, and then delegating everything else to initMage. initAndyMage is called by our entityFactory (via initEntity), using a similar design pattern found in SDL2 Rogue and other tutorials.
Moving along to entities.c now. Here, as expected, is where we'll be handling our entity processing. initEntities is the first function to consider:
void initEntities(void)
{
	memset(&stage.entityHead, 0, sizeof(Entity));
	stage.entityTail = &stage.entityHead;

	selectedUnitTexture = getAtlasImage("gfx/hud/selectedUnit.png", 1);

	selectedUnitPulse = 0;
}
We're first setting our our entity linked list, and then grabbing a texture and assigning to selectedUnitTexture. This texture is the little yellow square that you can see pulse over the mage during play. It will be used to show which entity is currently active. We also set a variable called selectedUnitPulse to 0. This will be used to control the pulsing of the square.
Next, we have doEntities:
void doEntities(void)
{
	selectedUnitPulse += 0.1 * app.deltaTime;
}
We're only doing one thing here - increasing the value of selectedUnitPulse.
The drawEntities function comes next:
void drawEntities(void)
{
	Entity *e;
	int x, y, size;

	for (e = stage.entityHead.next ; e != NULL ; e = e->next)
	{
		e->draw(e);
	}

	if (!stage.animating)
	{
		size = 48 + sin(selectedUnitPulse) * 8;

		x = MAP_TO_SCREEN(stage.currentEntity->x);
		y = MAP_TO_SCREEN(stage.currentEntity->y);

		blitScaled(selectedUnitTexture, x, y, size, size, 1);
	}
}
As expected, we're looping through all our entities and calling their draw function. After this, we're drawing the selected unit square. We're first testing to see if Stage's `animating` flag is false, and then setting a variable called `size`. We're setting it to 48, then making an adjustment based on the sine value of selectedUnitPulse, multiplied by 8. In effect, this will make the square grow and shrink as selectedUnitPulse's value changes. We're then using blitScaled to draw the square over the selected unit.
Moving next to hud.c, we're going to see how our overlay is handled. First, let's consider initHud:
void initHud(void)
{
	selectedTileTexture = getAtlasImage("gfx/hud/selectedTile.png", 1);

	selectedTilePulse = 0;
}
We're just grabbing a texture to use to indicate our selected tile, and also setting a variable called selectedTilePulse to 0. Like in entities.c, this variable will be used with the drawing of the square.
doHud comes next:
void doHud(void)
{
	doSelectedTile();
}
Not a lot happening here - we're just calling doSelectedTile:
static void doSelectedTile(void)
{
	selectedTilePulse += 0.1 * app.deltaTime;

	stage.selectedTile.x = (app.mouse.x / MAP_TILE_SIZE);
	stage.selectedTile.y = (app.mouse.y / MAP_TILE_SIZE);

	stage.selectedTile.x = MIN(MAX(stage.selectedTile.x, 0), MAP_WIDTH - 1);
	stage.selectedTile.y = MIN(MAX(stage.selectedTile.y, 0), MAP_HEIGHT - 1);
}
We're doing a few things here. We're first increasing the value of selectedTilePulse, and we're also working out which square in the map our mouse is currently over. We find this out by just taking the mouse's `x` and `y` and dividing by MAP_TILE_SIZE. With that worked out, we then do some sanity checking, to make sure we clamp selectedTile's `x` and `y` values to the map bounds. We don't want these to fall outside of the range, otherwise when accessing the values later we could find outselves moving outside of map's array bounds, leading to crashes and all sorts of other issues. Doing this check here also ensures we don't need to keep doing it elsewhere.
drawHud comes next:
void drawHud(void)
{
	if (!stage.animating)
	{
		drawSelectedTile();
	}
}
Right now, we're just calling drawSelectedTile, but only if Stage's `animating` flag is not set. We don't want to be drawing the selected tile while units are moving, etc., as it can appear confusing.
drawSelectedTile comes last:
static void drawSelectedTile(void)
{
	double pulse;
	int x, y;

	pulse = (sin(selectedTilePulse) + 1) / 2;

	SDL_SetTextureAlphaMod(selectedTileTexture->texture, 127 + (128 * pulse));

	x = (stage.selectedTile.x * MAP_TILE_SIZE);
	y = (stage.selectedTile.y * MAP_TILE_SIZE);

	blitAtlasImage(selectedTileTexture, x, y, 0, SDL_FLIP_NONE);

	SDL_SetTextureAlphaMod(selectedTileTexture->texture, 255);
}
We're first setting a variable called `pulse` to the sine of selectedTilePulse. We're then adding 1, and dividing the whole result by 2. What this means is that pulse will hold a value between 0 and 1.0. Typically, when using `sin` you'll get a value between -1 and 1, but this isn't what we want here. Next, we're setting the alpha value of selectedTileTexture to 127, plus 128 multiplied by `pulse`. This means that the alpha will shift between 127 and 255, half transparent and fully opaque.
With the pulsing done, we just render the selected tile in much the same way as everything else by multiplying its `x` and `y` values by MAP_TILE_SIZE, and then calling blitAtlasImage. Finally, we set selectedTileTexture's alpha back to 255 (remember that this operation affects the whole of our texture atlas, so it would impact all the graphics in the game).
We're almost done! Only a few more pieces left to consider for this part.
Moving over to stage.c, we can see where everything we've worked at is put together. Starting with initStage:
void initStage(void)
{
	memset(&stage, 0, sizeof(Stage));

	initEntities();

	initUnits();

	initHud();

	initMap();

	generateMap();

	initPlayer();

	app.delegate.logic = logic;

	app.delegate.draw = draw;
}
We're making calls to a lot of init functions for our entities, units, map, etc., as well as setting up our `logic` and `draw` delegates. The generateMap function is currently where we create our basic single room. This code lives in mapGen.c, which we'll visit later on when we come to building an actual random map.
The `logic` function follows:
static void logic(void)
{
	if (!stage.animating)
	{
		doPlayer();
	}

	doEntities();

	doUnits();

	doHud();

	stage.animating = stage.routeHead.next != NULL;

	app.mouse.visible = !stage.animating;
}
For each loop, we're calling doEntities, doUnits, and doHud. We're also calling doPlayer, but only if Stage's `animating` flag isn't set. This is to prevent the player from manipulating the game (moving the camera, clicking things, and all the rest) while various animations are playing out. We can also see here where the `animating` flag is being set. Currently, it is set to 1 if an A* path is being walked (Stage's routeHead's `next` is not null). We're also toggling the mouse pointer visibility based on the state of the `animating` flag. Once again, we don't want to display the mouse pointer if animations are taking place, so as not to confuse the player. The game also looks a bit neater this way.
The `draw` function is last, and should come as any real surprise:
static void draw(void)
{
	drawMap();

	drawAStarPath();

	drawEntities();

	drawHud();
}
We're drawing the map, the current A* path, the entities, and finally the hud. Our A* path is rendered after we've drawn the map, but before we draw the entities so that it doesn't draw over the top of things such as items (that would be non-solid and wouldn't block the A*).
Turning now to init.c, the initGameSystem function sets up a bunch of necessary dependencies:
void initGameSystem(void)
{
	srand(time(NULL));

	initAtlas();

	initDraw();

	initFonts();

	initSound();

	initAStar();

	initEntityFactory();
}
The initDraw function is where we get our mouse pointer graphic, while initAStar is used to setup our A* pathfinding. We're also making sure our entity factory is ready.
At last, we come to main.c. The `main` function here won't be shocking at all, either:
int main(int argc, char *argv[])
{
	long then;

	memset(&app, 0, sizeof(App));

	initSDL();

	initGameSystem();

	initStage();

	atexit(cleanup);

	nextFPS = SDL_GetTicks() + 1000;

	while (1)
	{
		then = SDL_GetTicks();

		prepareScene();

		doInput();

		logic();

		app.delegate.draw();

		presentScene();

		/* allow the CPU/GPU to breathe */
		SDL_Delay(1);

		app.deltaTime = LOGIC_RATE * (SDL_GetTicks() - then);

		doFPS();
	}

	return 0;
}
We're performing all our setup steps (initSDL, initGameSystem, and then initStage), before we move into our main loop to do our game processing.
Phew! That was a lot, eh? Thankfully, we've now setup a good base and framework that we can expand upon, so the subsequent parts of this tutorial should be shorter and easier to implement. We now have a unit that we can move around a map, which will follow an A* path. In the next part, we'll look into adding some more units to the mix, which the player can swap between. Our game will ultimately feature three mages: Andy, Danny, and Izzy, who will wear different colours and also have different stats.
Purchase
The source code for all parts of this tutorial (including assets) is available for purchase:
From itch.io
It is also available as part of the SDL2 tutorial bundle: