PC Games
• Orb
• Lasagne Monsters
• Three Guys Apocalypse
• Water Closet
• Blob Wars : Attrition
• The Legend of Edgar
• TBFTSS: The Pandoran War
• Three Guys
• Blob Wars : Blob and Conquer
• Blob Wars : Metal Blob Solid
• Project: Starfighter
• TANX Squadron
Tutorials
• 2D shoot 'em up
• 2D top-down shooter
• 2D platform game
• Sprite atlas tutorial
• Working with TTF fonts
• 2D adventure game
• Widget tutorial
• 2D shoot 'em up sequel
• 2D run and gun
• Roguelike
• Medals (Achievements)
• 2D turn-based strategy game
• 2D isometric game
• 2D map editor
• 2D mission-based shoot 'em up
• 2D Santa game
• 2D split screen game
• 2D quest game
• SDL 1 tutorials (outdated)
Latest Updates
The Legend of Edgar 1.38
Thu, 1st January 2026
SDL2 Quest game tutorial
Wed, 7th May 2025
SDL2 Versus game tutorial
Wed, 20th March 2024
Download keys for SDL2 tutorials on itch.io
Sat, 16th March 2024
The Legend of Edgar 1.37
Mon, 1st January 2024
Tags
• battle-for-the-solar-system (10)
• blob-wars (10)
• brexit (1)
• code (6)
• edgar (10)
• games (45)
• lasagne-monsters (1)
• making-of (5)
• match3 (1)
• numberblocksonline (1)
• orb (2)
• site (1)
• tanx (4)
• three-guys (3)
• three-guys-apocalypse (3)
• tutorials (18)
• water-closet (4)
Books
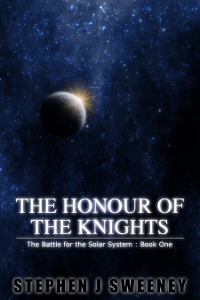
The Honour of the Knights (First Edition) (The Battle for the Solar System)
When starfighter pilot Simon Dodds is enrolled in a top secret military project, he and his wingmates begin to suspect that there is a lot more to the theft of a legendary battleship and an Imperial nation's civil war than either the Confederation Stellar Navy or the government are willing to let on.
— Mission-based 2D shoot 'em up —
Part 31: Finishing touches
Note: this tutorial assumes knowledge of C, as well as prior tutorials.


Introduction
In this final part of the tutorial, we're going to make a few tweaks to the code, to add in things such as enforcing our mission requirements, and also handling the red beam sound effect (any bug fixes will also find their way into this part, if future tweaks are required).
Extract the archive, run cmake CMakeLists.txt, followed by make, and then use ./shooter3-31 to run the code. The game will start, displaying the title screen. Play the game as normal. You will need to complete missions to unlock new ones, starting with Radish. You may replay any mission you wish, as many times as you want. Once you're finished, close the window to exit.
Inspecting the code
This final part is all about tweaking the existing code to present our game in the way we want it to be. Most missions will be locked at the beginning, and we're adding in some sound effects, and extra layers of sparkle.
Let's first head over to structs.h, where we've updated Mission:
struct Mission
{
	char filename[MAX_FILENAME_LENGTH];
	char **requires;
	int numRequires;
	Comms    commsHead;
	int      available;
	int      complete;
	Mission *next;
};
We've added two new fields here: `requires` and numRequires. `requires` will be a list of planets upon which this Mission depends. We will need to have completed all the planets in the list in order to unlock this mission. numRequires is the length of the `requires` array.
Now over to planets.c, where we've introduced a couple of new functions, and made some other modifications. To begin with, we've updated initPlanets:
void initPlanets(void)
{
	intermission.selectedPlanet = NULL;

	updateMissionStatuses();

	selectedPlanetPulse = 0;

	starTexture = getAtlasImage("gfx/planets/star.png", 1);
}
We're calling updateMissionStatuses. This is the function that will responsible for unlocking our missions as we progress through the game. Since we're calling this in initPlanets, it will reassess our progress each time the intermission is entered (via initIntermission).
Now for updateMissionStatuses itself:
static void updateMissionStatuses(void)
{
	Planet *p;

	for (p = intermission.planetHead.next; p != NULL; p = p->next)
	{
		if (p->mission != NULL)
		{
			p->mission->available = hasClearedMission(p);
		}
	}
}
Here, we're looping through all our planets, searching for those with a mission (in our finished game, only Sprout doesn't have a mission), and updating it's `mission`'s `available` flag according to the result of hasClearedMission.
The hasClearedMission function follows:
static int hasClearedMission(Planet *p)
{
	Planet *other;
	int     i;

	for (i = 0; i < p->mission->numRequires; i++)
	{
		for (other = intermission.planetHead.next; other != NULL; other = other->next)
		{
			if (strcmp(other->name, p->mission->requires[i]) == 0 && other->mission != NULL && !other->mission->complete)
			{
				return 0;
			}
		}
	}

	return 1;
}
We're passing in the planet (`p`) we're interested in unlocking the mission for, and then looping through its `mission`'s `requires` list. We then have another loop, to go through all our planets (`other`) and find one with a matching `name`. Once found, we test if that planet has a mission of its own, and also if that mission has been completed. If it hasn't, we'll return 0. The function will ultimately return 1, to indicate that all the prerequisite missions have been finished.
Next up we have drawPlanets:
void drawPlanets(void)
{
	Planet  *p;
	SDL_Rect r;
	char     text[64];
	int      textY, w, h;
	SDL_Color c;

	// snipped

	textY = 10;

	for (p = intermission.planetHead.next; p != NULL; p = p->next)
	{
		if (p->mission != NULL && p->mission->available)
		{
			c.r = 200;
			c.g = 255;
			c.b = 200;

			if (p->mission->complete)
			{
				c.r *= 0.35;
				c.g *= 0.35;
				c.b *= 0.35;
			}

			sprintf(text, "New mission alert at %s", p->name);
			drawText(text, 15, textY, c.r, c.g, c.b, TEXT_ALIGN_LEFT, 0);

			if (p->mission->complete)
			{
				calcTextDimensions(text, &w, &h);

				drawRect(15, textY + 14, w, 2, c.r, c.g, c.b, 255);
			}

			textY += 32;
		}
	}

	// snipped
}
We've made a modification here to loop through all our planets and look for planets that have available missions. If so, we're going to render the "New mission alert ..." text in the top left. While doing that, we're testing if the mission has been completed. If so, we'll dim the text colour we originally planned to use (c, an SDL_Color), and also draw a line through it, to show it has been finished. Note that our game still permits the player to undertake the mission as many times as they like, since it's just a demo build..!
Finally, we come to loadPlanets:
void loadPlanets(void) { // snipped for (node = root->child; node != NULL; node = node->next) { // snipped if (missionNode != NULL) { // snipped p->mission->requires = toArray(cJSON_GetObjectItem(missionNode, "requires")->valuestring, &p->mission->numRequires); // snipped } // snipped } // snipped }We've added in a single line here, to set our Planet's (`p`) `mission`'s `requires` field. This works in the same way as the enemyTypes when loading a mission. The "requires" field in our JSON is a comma separated list of planets, with the numRequires of the mission collecting the array length.
That's all the updates to planets.c. We just need to update intermission.c to put it into effect.
A single line update to `logic` is all we have to do:
static void logic(void)
{
	// snipped

	hasSelectedMission = intermission.selectedPlanet != NULL && intermission.selectedPlanet->mission != NULL && intermission.selectedPlanet->mission->available;

	doBackground(ssx * app.deltaTime, ssy * app.deltaTime);

	doStarfield(ssx, ssy);

	// snipped
}
Our hasSelectedMission flag now includes a check that the selected planet's mission is available (end of the line). We don't have to change anything else..!
Now for our red beam update. We're going to head over to bullets.c, to implement the sound effect. This one is somewhat trickier, since it involves a looping sound, meaning there are several things that we might consider when using it.
We'll start with initBullets:
void initBullets(void)
{
	// snipped

	redBeamActive = 0;
}
We're setting a flag called redBeamActive to 0. This variable is static in bullets.c, and will be used to track if a red beam is being fired by anything in the game (either the player or The Gravlax, for example). This will help us to control the sound effect.
Next, we turn to doBullets:
void doBullets(void)
{
	Bullet *b, *prev;
	int     wasRedBeamActive;

	wasRedBeamActive = redBeamActive;

	redBeamActive = 0;

	prev = &stage.bulletHead;

	for (b = stage.bulletHead.next; b != NULL; b = b->next)
	{
		// snipped
	}

	if (wasRedBeamActive && !redBeamActive)
	{
		stopChannel(CH_BEAM);
	}
}
We set a variable called wasRedBeamActive to current value of redBeamActive, to find out if a red beam was being fired before we begin processing our bullets. We then set the redBeamActive to 0, to default it no longer being active. We'll see in a bit that as we process our bullets, the redBeamActive flag can be set to 1 by the beam itself. Finally, with all our bullets processed, we test the values of wasRedBeamActive and redBeamActive. If wasRedBeamActive is true (a beam was being fired), but redBeamActive is now false (a beam is no longer being fired), we know that we have to shut down the looping sound. We have a sound channel dedicated to the red beam - CH_BEAM - that we'll stop, by calling stopChannel (in sound.c).
In summary, this is just state tracking.
Now for fireRedBeam:
void fireRedBeam(Entity *owner)
{
	Bullet *b;

	// snipped

	playSoundLoop(SND_BEAM, CH_BEAM);

	redBeamActive = 1;
}
Two lines added here, one to start playing the red beam sound effect, using playSoundLoop (sound.c), and another to set redBeamActive to 1 (true). Note that when playing the sound loop, we're using the dedicated channel.
Next, we come to redBeamTick:
static void redBeamTick(Bullet *b)
{
	Entity  *e;
	SDL_Rect r;
	double   damage;

	// snipped

	if (b->owner->dead)
	{
		b->health = 0;
	}

	redBeamActive = 1;
}
The `tick` function of the red beam is setting redBeamActive to 1. The bullet's `tick` will be called by doBullets, in its processing loop. Therefore, whenever a beam is active, the redBeamActive flag will be set to 1. We're also testing if the owner of the beam is dead, and if so we're killing the beam too. We don't want it to still be active if its owner has been killed..!
That's almost all we need to do for our red beam sound effect. But there are other little tweaks that we need to make. If we were to leave things here, it would mean that pausing the game when a beam is active would result in the sound effect continuing to play. Quitting the game would also keep it playing..! This would get annoying pretty fast. To deal with this, let's first head to stage.c.
We've updated `logic` with a few new function calls:
static void logic(void)
{
	switch (show)
	{
		case SHOW_STAGE:
			if (stage.status == MS_INCOMPLETE)
			{
				if (app.keyboard[SDL_SCANCODE_ESCAPE])
				{
					app.keyboard[SDL_SCANCODE_ESCAPE] = 0;

					pauseSound();

					app.mouse.showCursor = 1;

					show = SHOW_MISSION_OPTIONS;
				}

				if (isControl(CONTROL_PAUSE))
				{
					clearControl(CONTROL_PAUSE);

					pauseSound();

					show = SHOW_PAUSE;
				}
			}

			// snipped

			break;

		case SHOW_PAUSE:
			if (isControl(CONTROL_PAUSE))
			{
				clearControl(CONTROL_PAUSE);

				resumeSound();

				show = SHOW_STAGE;
			}
			break;

		// snipped
	}
}
Whenever we pause the game or enter the in-game menu, we're calling pauseSound (sound.c). This will pause all our sound channels (with the exception of the UI), so that things like the beam effect stop playing. We're then calling resumeSound when we unpause (this function is also called in the `resume` function, used by the widgets). Nice and simple - we're just pausing all our sound effects, and starting them up again once we re-enter the game.
Finally, let's head to transition.c, where we've made a similar update. In startTransition we've added a some new logic:
void startTransition(void)
{
	int i, oldVal;

	for (i = 0 ; i < MAX_SND_CHANNELS ; i++)
	{
		if (i != CH_GUI)
		{
			stopChannel(i);
		}
	}

	// snipped
}
We're looping through all the sound channels in our game and stopping them from playing entirely. startTransition, as we've seen, is called whenever we move from one part of the game to another, and so we don't to stop most sounds from playing. Notice that we're not stopping the channel the UI sounds play on (CH_GUI). This is so that our button click effects won't suddenly cut out, which will sound very odd (and perhaps a bit jarring).
To that end, we've also updated endTransition:
void endTransition(void)
{
	long elapsed;

	while (Mix_Playing(CH_GUI))
	{
		SDL_Delay(1);
	}

	elapsed = 500 - (SDL_GetTicks() - transitionStartTime);

	// snipped
}
Before we commence with the section we've moved to, we're checking if the UI channel is still playing a sound effect. If so, we're going to call SDL_Delay (with 1ms) in a loop while we wait for it to finish. This is what causes the delay on the title screen once the player starts a new game or continues an existing one (artistic license!).
And that's it! Our game is now finished (any bugs not withstanding). Hopefully, you will have learned a lot from this tutorial, and how to go about creating such a 2D space shooter yourself. Project: Starfighter was the first C game that I created, and used a very similar setup to what we've been through here. It was a great stepping stone.
Purchase
The source code for all parts of this tutorial (including assets) is available for purchase:
From itch.io
It is also available as part of the SDL2 tutorial bundle: