PC Games
• Orb
• Lasagne Monsters
• Three Guys Apocalypse
• Water Closet
• Blob Wars : Attrition
• The Legend of Edgar
• TBFTSS: The Pandoran War
• Three Guys
• Blob Wars : Blob and Conquer
• Blob Wars : Metal Blob Solid
• Project: Starfighter
• TANX Squadron
Tutorials
• 2D shoot 'em up
• 2D top-down shooter
• 2D platform game
• Sprite atlas tutorial
• Working with TTF fonts
• 2D adventure game
• Widget tutorial
• 2D shoot 'em up sequel
• 2D run and gun
• Roguelike
• Medals (Achievements)
• 2D turn-based strategy game
• 2D isometric game
• 2D map editor
• 2D mission-based shoot 'em up
• 2D Santa game
• 2D split screen game
• 2D quest game
• SDL 1 tutorials (outdated)
Latest Updates
The Legend of Edgar 1.38
Thu, 1st January 2026
SDL2 Quest game tutorial
Wed, 7th May 2025
SDL2 Versus game tutorial
Wed, 20th March 2024
Download keys for SDL2 tutorials on itch.io
Sat, 16th March 2024
The Legend of Edgar 1.37
Mon, 1st January 2024
Tags
• battle-for-the-solar-system (10)
• blob-wars (10)
• brexit (1)
• code (6)
• edgar (10)
• games (45)
• lasagne-monsters (1)
• making-of (5)
• match3 (1)
• numberblocksonline (1)
• orb (2)
• site (1)
• tanx (4)
• three-guys (3)
• three-guys-apocalypse (3)
• tutorials (18)
• water-closet (4)
Books
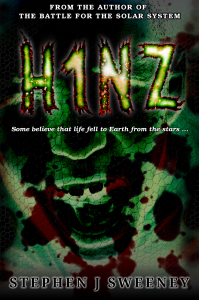
H1NZ
Arriving on the back of a meteorite, an alien pathogen has spread rapidly around the world, infecting all living humans and animals, and killing off all insect life. Only a handful are immune, and these survivors cling desperately to life, searching for food, fresh water, and a means of escape, find rescue, and discover a way to rebuild.
— Mission-based 2D shoot 'em up —
Part 15: Intermission: Planets
Note: this tutorial assumes knowledge of C, as well as prior tutorials.


Introduction
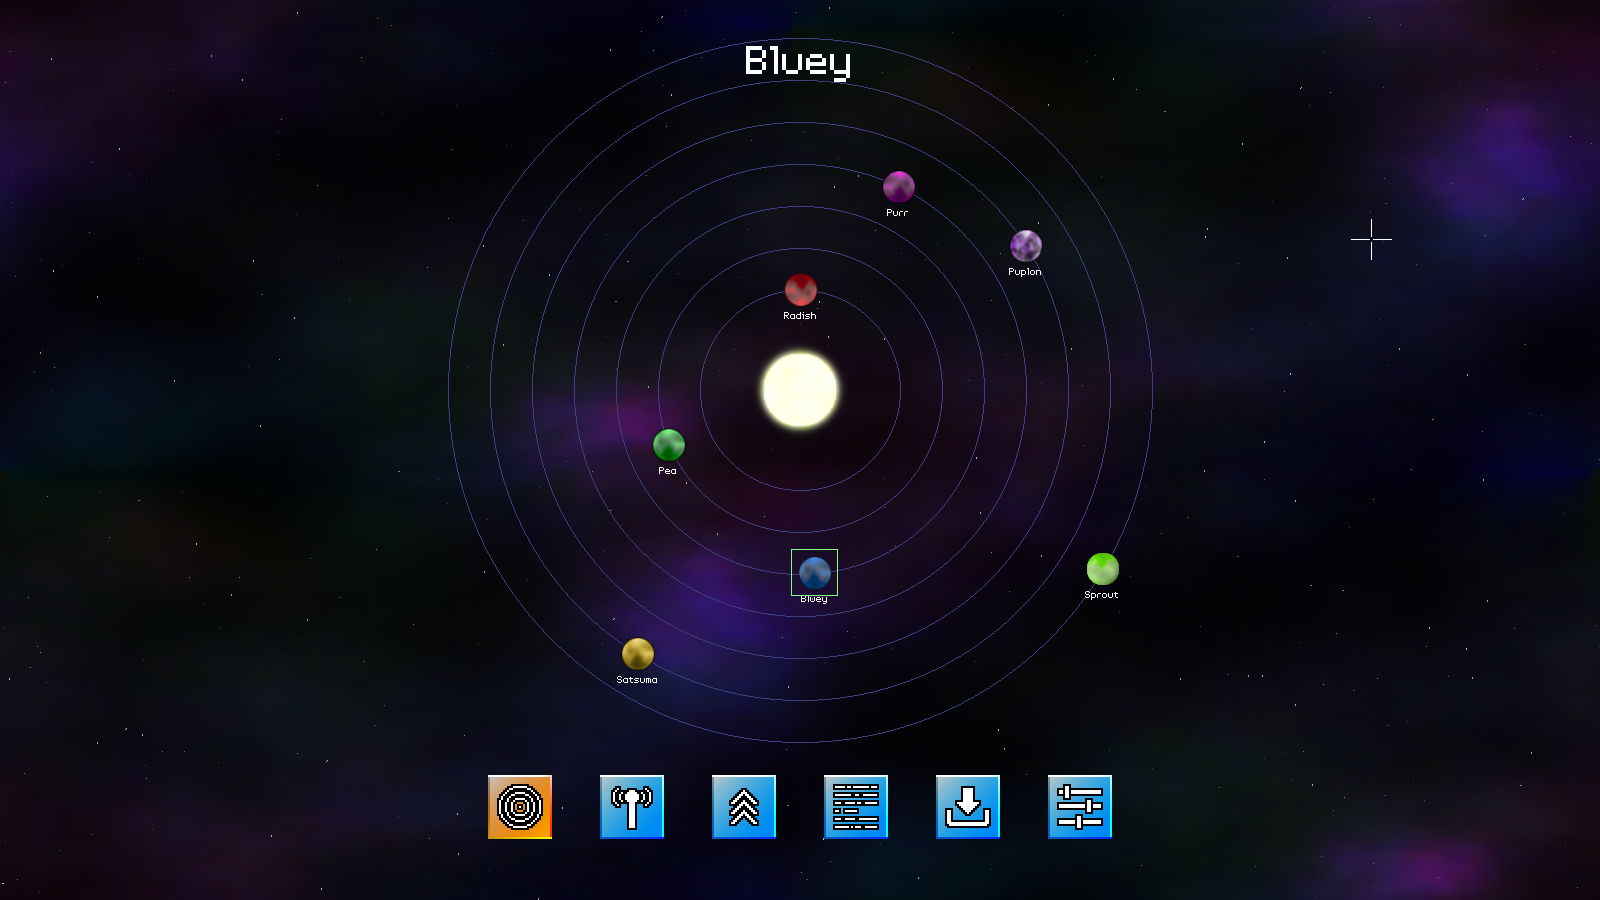
With our base intermission support done, we can begin implementing the various sections. We're going to start with the planets section. This will display a bunch of planets, orbiting a central star. The planets themselves will be labelled and can be clicked on by the player. Later, missions will be connected to the planets. For now, we're just going to deal with the display, motion, and interaction.
Extract the archive, run cmake CMakeLists.txt, followed by make, and then use ./shooter3-15 to run the code. You will see a window open like the one above. Use the mouse to control the cursor. Click on a planet to select it, resulting in a green pulsing box outlining it. Its name will be shown at the top of the screen, in a larger font. There's nothing more to do for now. Once you're finished, close the window to exit.
Inspecting the code
Those who played Project: Starfighter will recognise this screen (and some other screens to come!). This screen will be where we select planets, to play missions. Clicking on a mission in future will affect the comms icon, and whether it can be selected. This screen is also not yet complete, but will be in future. For now, let's look at how it works.
Starting with structs.h:
struct Planet
{
	char        name[MAX_NAME_LENGTH];
	AtlasImage *texture;
	double      x, y;
	double      orbit;
	double      speed;
	int         distance;
	Planet     *next;
};
We've added a struct called Planet, to hold our planet data. `name` is the name of the planet, `texture` the texture image it uses, `x` and `y` are its position. `orbit` is the current orbital position (technically also its position!). `speed` is how fast the planet is orbiting the star. `distance` is how far out from the star it is.
We've also added a struct to hold our intermission data:
typedef struct
{
	Planet planetHead, *selectedPlanet;
} Intermission;
The struct will hold just our list of planets, and a reference to the currently selected planet (selectedPlanet).
Now for planets.c, the new compilation unit that will handle all our planet section logic. A number of functions exists in this file. We'll start with initPlanets:
void initPlanets(void)
{
	intermission.selectedPlanet = NULL;

	selectedPlanetPulse = 0;

	starTexture = getAtlasImage("gfx/planets/star.png", 1);
}
We're starting by clearing Intermission's selected planet, setting a variable called selectedPlanetPulse (the variable that controls the pulsing green square) to 0, and loading the texture for the star in the middle of the screen (starTexture). All good and simple.
Now for doPlanets:
void doPlanets(void)
{
	Planet *p;

	for (p = intermission.planetHead.next; p != NULL; p = p->next)
	{
		p->orbit += p->speed * app.deltaTime;

		p->x = (SCREEN_WIDTH / 2) + (sin(p->orbit) * p->distance) - (p->texture->rect.w / 2);
		p->y = (STAR_SYSTEM_Y / 2) + (-cos(p->orbit) * p->distance) - (p->texture->rect.h / 2);

		if (app.mouse.buttons[SDL_BUTTON_LEFT])
		{
			if (collision(app.mouse.x, app.mouse.y, 1, 1, p->x, p->y, p->texture->rect.w, p->texture->rect.h))
			{
				app.mouse.buttons[SDL_BUTTON_LEFT] = 0;

				intermission.selectedPlanet = p;
			}
		}
	}

	selectedPlanetPulse += 0.1 * app.deltaTime;
}
We're looping through all our planets here (via Intermission's planet linked list), and increasing the value of each one's `orbit`, according to their `speed`. We're then calculating their positions (`x` and `y`) using some trigonometry, making use of the planet's `orbit` and `distance` variables (in short, we're making them spin around the near-middle of the screen). Next, we're testing if we've clicked on any of the planets, and setting Intermission's selectedPlanet to be that planet. Lastly, we're updating the value of selectedPlanetPulse, to make our green square pulse.
Easy enough, we're just making our planets orbit and checking if we've clicked on any.
Now for drawPlanets:
void drawPlanets(void)
{
	Planet  *p;
	SDL_Rect r;

	blitAtlasImage(starTexture, SCREEN_WIDTH / 2, STAR_SYSTEM_Y / 2, 1, SDL_FLIP_NONE);

	for (p = intermission.planetHead.next; p != NULL; p = p->next)
	{
		drawCircle(SCREEN_WIDTH / 2, STAR_SYSTEM_Y / 2, p->distance, 64, 64, 128, 255);

		blitAtlasImage(p->texture, p->x, p->y, 0, SDL_FLIP_NONE);
	}

	app.fontScale = 0.5;

	for (p = intermission.planetHead.next; p != NULL; p = p->next)
	{
		drawText(p->name, p->x + 16, p->y + 35, 255, 255, 255, TEXT_ALIGN_CENTER, 0);
	}

	app.fontScale = 1;

	if (intermission.selectedPlanet != NULL)
	{
		r.x = intermission.selectedPlanet->x;
		r.y = intermission.selectedPlanet->y;
		r.w = intermission.selectedPlanet->texture->rect.w;
		r.h = intermission.selectedPlanet->texture->rect.h;

		r.x -= 10 + (sin(selectedPlanetPulse) * 4);
		r.y -= 10 + (sin(selectedPlanetPulse) * 4);
		r.w += 20 + (sin(selectedPlanetPulse) * 8);
		r.h += 20 + (sin(selectedPlanetPulse) * 8);

		drawOutlineRect(r.x, r.y, r.w, r.h, 128, 255, 128, 255);

		app.fontScale = 2;

		drawText(intermission.selectedPlanet->name, SCREEN_WIDTH / 2, 30, 255, 255, 255, TEXT_ALIGN_CENTER, 0);

		app.fontScale = 1;
	}
}
We start by drawing our star in the middle of the screen. Next, we loop through all our planets, and draw both their orbital path via drawCircle (feeding in the planet's `distance` as the radius), and next drawing the planet itself. Following that, we loop through all our planets a second time. This time, we're drawing their names. We're doing it this way so that planets don't draw over the label of another (even if it's only for a brief moment).
With the planets drawn, we're testing if we have a planet selected. If so, we're drawing a box around it. We start with the default position and size (applied to `r`, an SDL_Rect), and then modify these values based on the value of selectedPlanetPulse and a call to sin. With the box drawn, we finally draw the name of the planet at the top of the screen, in a larger font size.
The last function to look at is loadPlanets:
void loadPlanets(void)
{
	char   *data;
	cJSON  *root, *node;
	Planet *p, *planetTail;
	int     distance;

	planetTail = &intermission.planetHead;

	data = readFile("data/intermission/planets.json");

	root = cJSON_Parse(data);

	distance = 100;

	for (node = root->child; node != NULL; node = node->next)
	{
		p = malloc(sizeof(Planet));
		memset(p, 0, sizeof(Planet));
		planetTail->next = p;
		planetTail = p;

		STRCPY(p->name, cJSON_GetObjectItem(node, "name")->valuestring);
		p->distance = distance;
		p->texture = getAtlasImage(cJSON_GetObjectItem(node, "texture")->valuestring, 1);
		p->speed = ORBIT_SPEED * (SCREEN_HEIGHT / p->distance);
		p->orbit = rand() % 100;

		distance += p->texture->rect.w + 8;
	}

	cJSON_Delete(root);

	free(data);
}
Just some standard JSON data loading going on here. Our planets start at a distance of 100 from the middle of the screen, and will increase by a small amount for each planet (the width of the planet itself, plus 8). The planet's `speed` is based on its `distance`, where the further out they are the slower they will orbit. We're also randomizing the value of `orbit`, so the planets don't all start perfectly aligned, which, while not wrong, would look a bit odd.
That's our planets all handled (for now). The last thing we need to do is incorporate it into our intermission screen. So, turning now to intermission.c, we've first updated logic:
static void logic(void)
{
	// snipped

	doSectionIcons();

	switch (section)
	{
		case IS_PLANETS:
			doPlanets();
			break;

		default:
			break;
	}
}
We've added a switch statement, to test which `section` we're currently in. We're only handling IS_PLANETS right now, so we've added that clause, to call doPlanets.
We've also updated `draw` with a similiar change:
static void draw(void)
{
	drawBackground(background);

	drawStarfield();

	switch (section)
	{
		case IS_PLANETS:
			drawPlanets();
			break;

		default:
			break;
	}

	drawSectionIcons();
}
Here, we're calling drawPlanets.
There we go, our first section done. Once again, there are further changes to come, but most of this screen is done for now. We can view our planets, and select them.
In our next part, we'll look at the comms screen, where the player will receive their mission briefing. This will eventually be connected up to selecting planets, so that one can view the mission to be undertaken, and then start it.
Purchase
The source code for all parts of this tutorial (including assets) is available for purchase:
From itch.io
It is also available as part of the SDL2 tutorial bundle: