PC Games
• Orb
• Lasagne Monsters
• Three Guys Apocalypse
• Water Closet
• Blob Wars : Attrition
• The Legend of Edgar
• TBFTSS: The Pandoran War
• Three Guys
• Blob Wars : Blob and Conquer
• Blob Wars : Metal Blob Solid
• Project: Starfighter
• TANX Squadron
Tutorials
• 2D shoot 'em up
• 2D top-down shooter
• 2D platform game
• Sprite atlas tutorial
• Working with TTF fonts
• 2D adventure game
• Widget tutorial
• 2D shoot 'em up sequel
• 2D run and gun
• Roguelike
• Medals (Achievements)
• 2D turn-based strategy game
• 2D isometric game
• 2D map editor
• 2D mission-based shoot 'em up
• 2D Santa game
• 2D split screen game
• 2D quest game
• SDL 1 tutorials (outdated)
Latest Updates
The Legend of Edgar 1.38
Thu, 1st January 2026
SDL2 Quest game tutorial
Wed, 7th May 2025
SDL2 Versus game tutorial
Wed, 20th March 2024
Download keys for SDL2 tutorials on itch.io
Sat, 16th March 2024
The Legend of Edgar 1.37
Mon, 1st January 2024
Tags
• battle-for-the-solar-system (10)
• blob-wars (10)
• brexit (1)
• code (6)
• edgar (10)
• games (45)
• lasagne-monsters (1)
• making-of (5)
• match3 (1)
• numberblocksonline (1)
• orb (2)
• site (1)
• tanx (4)
• three-guys (3)
• three-guys-apocalypse (3)
• tutorials (18)
• water-closet (4)
Books
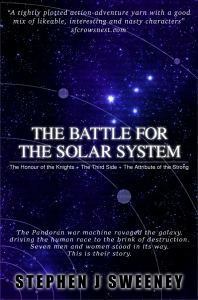
The Battle for the Solar System (Complete)
The Pandoran war machine ravaged the galaxy, driving the human race to the brink of destruction. Seven men and women stood in its way. This is their story.
— Mission-based 2D shoot 'em up —
Part 11: Secondary weapon: Shield
Note: this tutorial assumes knowledge of C, as well as prior tutorials.


Introduction
The final "weapon" we're going to add is an energy shield. The shield will act as a very powerful system that will recharge automatically, doesn't require ammo, and will need to be competely depleted before our fighter starts taking damage. Pretty much like all other energy shields found in games, then..! Adding the shield system is once again a simple task, although this time we won't be going near the bullets functions.
Extract the archive, run cmake CMakeLists.txt, followed by make, and then use ./shooter3-11 to run the code. You will see a window open like the one above. Use the WASD control scheme to move the fighter around. Hold J to fire your main guns. Play the game as normal. Notice as your fighter is shot that the shield takes the hit and loses energy. It will recharge by itself as long as it's not taking damage. Once you're finished, close the window to exit.
Inspecting the code
Again, adding in our shield is easy to do. We're actually going to implement it in such a way that it affects all fighters, not just the player.
We'll start with the updates to defs.h:
#define MAX_PLAYER_SHIELD 15
#define SHIELD_HIT_TIME (FPS * 0.75)
We've added two new defines, one called MAX_PLAYER_SHIELD, that will represent the maximum value for the player's sheild, and another named SHIELD_HIT_TIME, that will control how long the shield is visible for when it is hit. Next, we've updated our secondary weapon enum:
enum
{
	SW_NONE,
	SW_ROCKET,
	SW_HOMING_MISSILE,
	SW_RED_BEAM,
	SW_MINE,
	SW_SHIELD
};
We've added in an enum called SW_SHIELD, thus completing our set of secondary weapons.
Now, over to structs.h:
typedef struct
{
	double health;
	int    maxHealth;
	double shield;
	int    maxShield;
	double dx, dy;
	double reload;
	double hitTimer;
	double shieldHitTimer;
	// snipped
} Fighter;
We've added three new fields to Fighter - `shield`, maxShield, and shieldHitTimer. `shield` will represent the amount of shield we have left, maxShield the maximum amount of shield this fighter has, and shieldHitTimer will be used to control displaying the texture that shows our shield reacting to a hit.
Now over to fighters.c, where the bulk of the changes have been made. We start by adding in a new function, initFighters:
void initFighters(void)
{
	shieldHitTexture = getAtlasImage("gfx/effects/shieldHit.png", 1);
}
We're grabbing a texture to represent our shield being hit (shieldHitTexture).
Now for the update to fighterTick:
void fighterTick(Entity *e, Fighter *f)
{
	f->hitTimer = MAX(f->hitTimer - app.deltaTime, 0);

	f->shieldHitTimer = MAX(f->shieldHitTimer - app.deltaTime, 0);

	f->ai.thinkTime -= app.deltaTime;

	f->reload = MAX(f->reload - app.deltaTime, 0);

	if (f->shieldHitTimer == 0)
	{
		f->shield = MIN(f->shield + ((1.0 / FPS) * app.deltaTime), f->maxShield);
	}

	e->x += f->dx * app.deltaTime;
	e->y += f->dy * app.deltaTime;
}
We're now reducing the value of the fighter's shieldHitTimer, limiting to 0, in the same way as the hitTimer. We're also recharging the fighter's `shield`, up to its maximum value. First, we're checking that shieldHitTimer is 0, then increasing the fighter's `shield` 1 point per second. Note that `shield` isn't allowed to recharge while it's absorbing damage.
Now for fighterDraw. This function sees a larger change, but nothing complicated:
void fighterDraw(Entity *e, Fighter *f)
{
	int      x, y;
	double   shieldAlpha;
	SDL_Rect dest;

	// snipped

	if (f->shieldHitTimer > 0)
	{
		dest.x = x - 12;
		dest.y = y - 12;
		dest.w = e->texture->rect.w + 24;
		dest.h = e->texture->rect.h + 24;

		shieldAlpha = MIN(255.0, 400.0 * (f->shieldHitTimer / SHIELD_HIT_TIME));

		SDL_SetTextureAlphaMod(shieldHitTexture->texture, shieldAlpha);
		SDL_RenderCopyEx(app.renderer, shieldHitTexture->texture, &shieldHitTexture->rect, &dest, 0, NULL, SDL_FLIP_NONE);
		SDL_SetTextureAlphaMod(shieldHitTexture->texture, 255);
	}
}
Now, when drawing our fighter we are testing if its shieldHitTimer is greater than 0. If so, we're going to draw our shieldHitTexture around the fighter's, with 12 pixel padding all around. We want the shield to be bright when it is first hit, but fade down afterwards. We can do this by changing the alpha of the shieldHitTexture, in conjunction with the value of the fighter's shieldHitTimer and SHIELD_HIT_TIME. Notice how we're working with a value of 400 (and limiting it to 255). This is so that the shield stays bright for longer when first struck, and doesn't fade out immediately.
Easy enough - we're just encasing the affected fighter's sprite in a shield texture as needed. Now for the update to fighterTakeDamage:
void fighterTakeDamage(Entity *self, double damage)
{
	Fighter *f;

	f = (Fighter *)self->data;

	if (f->shield > 0)
	{
		f->shield -= damage;

		if (f->shield <= 0)
		{
			f->shield = MIN(f->shield, -5);
		}

		f->shieldHitTimer = SHIELD_HIT_TIME;
	}
	else
	{
		f->health -= damage;

		f->hitTimer = FPS / 8;

		if (f->health <= 0 && !self->dead)
		{
			self->die(self);
		}
	}
}
Of course, our shield is going to be playing a part in fighterTakeDamage. The logic for our shield is that it will asborb damage while it has energy to do so, after which the damage will affect the fighter's `health`. We can see this in action in the updated logic. First, we test if the fighter's `shield` is greater than 0, and then subtract `damage` from `shield`. Next, we perform a special check - if `shield` has now fallen to 0 or less, we're going to push the value down to at least -5. The reason we're doing this is because we want the shield system to become unavailable for a period after it is exhausted, meaning it will be a while before it starts to recharge again. In most cases, the shield will take 5 seconds to fully recover (although a stronger hit will make this wait even longer!). Finally, we set the fighter's shieldHitTimer to SHIELD_HIT_TIME.
The original logic for handling regular damage follows, and will come into play if the fighter's `shield` is 0.
That's it for the shield support logic. Let's now turn to player.c, where we've made updates for the player themselves. Starting with initPlayer:
void initPlayer(Entity *e)
{
	Fighter *f;

	f = malloc(sizeof(Fighter));
	memset(f, 0, sizeof(Fighter));
	f->health = game.kite.health;
	f->maxHealth = game.kite.maxHealth;

	if (game.kite.secondaryWeapon == SW_SHIELD)
	{
		f->shield = f->maxShield = MAX_PLAYER_SHIELD;
	}

	// snipped
}
We're first testing if the player is using the shield (secondaryWeapon is SW_SHIELD), and setting the fighter's `shield` and maxShield to MAX_PLAYER_SHIELD (15) if so. This allows the player to start the mission with their shield fully charged.
Next, we've updated fireSecondary:
static void fireSecondary(Entity *self)
{
	if (game.kite.ammo > 0 && game.kite.secondaryWeapon != SW_NONE && game.kite.secondaryWeapon != SW_SHIELD)
	{
		// snipped
	}
}
As well as not reacting to firing a seconday weapon if they don't have one (SW_NONE), we also want to test that we aren't using the shield (SW_SHIELD). Be default, our secondary weapons will consume ammo when used. The shield doesn't rely on ammo, so would just waste it.
Now we turn to stage.c, for the various updates there. Starting with initStage:
void initStage(void)
{
	initStarfield();

	initHUD();

	initFighters();

	// snipped
}
We're calling the new initFighters function.
Next up, we've modified drawHUD:
void drawHUD(void)
{
	drawIndicatorArrows();

	drawHealthBar();

	if (game.kite.secondaryWeapon == SW_SHIELD)
	{
		drawShieldBar();
	}
	else if (game.kite.secondaryWeapon != SW_NONE)
	{
		drawAmmoBar();
	}

	drawCatnip();

	drawHudMessages();
}
We're testing if we're using the shield, and calling a new function named drawShieldBar. Otherwise, we'lll draw the ammo bar as normal. Again, the shield doesn't use ammo, and so we don't want to draw the blocks.
Now let's look at the drawShieldBar function:
static void drawShieldBar(void)
{
	int       i, x;
	SDL_Color c;
	double    step;
	Fighter  *f;

	f = (Fighter *)stage.player->data;

	x = 10;

	step = 128.0 / MAX_PLAYER_SHIELD;

	for (i = 0; i < MAX_PLAYER_SHIELD; i++)
	{
		c.r = 64 + (step * i);
		c.g = 100 + (step * i);
		c.b = 255;

		if (i > f->shield)
		{
			c.r *= 0.35;
			c.g *= 0.35;
			c.b *= 0.35;
		}

		drawRect(x, 30, HEALTH_BLOCK_WIDTH, HEALTH_BLOCK_HEIGHT, c.r, c.g, c.b, 255);

		drawOutlineRect(x, 30, HEALTH_BLOCK_WIDTH, HEALTH_BLOCK_HEIGHT, 0, 0, 0, 255);

		x += HEALTH_BLOCK_WIDTH;
	}
}
This function works in largely the same way as our health bar and ammo blocks. We're drawing a series of rectangles to represent the player's current shield level, dimming them as our rendering exceeds the current value. Our shield rectangles are drawn in the same manner as our health blocks, and positioned just below the health bar.
With all that done, the last thing is to update game.c and the initGame function:
void initGame(void)
{
	memset(&game, 0, sizeof(Game));

	game.kite.health = game.kite.maxHealth = 10;
	game.kite.reload = MIN_KITE_RELOAD;
	game.kite.output = 1;
	game.kite.damage = 1;
	game.kite.ammo = MAX_KITE_AMMO;
	game.kite.secondaryWeapon = SW_SHIELD;
}
We're setting Game's `kite`'s secondaryWeapon to SW_SHIELD.
Hurrah! All our weapons are done. And what's more, due to the way they have been implemented, these new weapons and attributes can be extended to others in the game. The AI can, for example, use rockets, and be equipped with shields. They could even use the red beam, if we wanted!
Now, before we got side tracked, we were talking about this being an objective and mission-based game. Well, it's time to now explore adding in objectives. So, in the next part we're going to look at how we can implement a objectives system.
Purchase
The source code for all parts of this tutorial (including assets) is available for purchase:
From itch.io
It is also available as part of the SDL2 tutorial bundle: