PC Games
• Orb
• Lasagne Monsters
• Three Guys Apocalypse
• Water Closet
• Blob Wars : Attrition
• The Legend of Edgar
• TBFTSS: The Pandoran War
• Three Guys
• Blob Wars : Blob and Conquer
• Blob Wars : Metal Blob Solid
• Project: Starfighter
• TANX Squadron
Tutorials
• 2D shoot 'em up
• 2D top-down shooter
• 2D platform game
• Sprite atlas tutorial
• Working with TTF fonts
• 2D adventure game
• Widget tutorial
• 2D shoot 'em up sequel
• 2D run and gun
• Roguelike
• Medals (Achievements)
• 2D turn-based strategy game
• 2D isometric game
• 2D map editor
• 2D mission-based shoot 'em up
• 2D Santa game
• 2D split screen game
• 2D quest game
• SDL 1 tutorials (outdated)
Latest Updates
The Legend of Edgar 1.38
Thu, 1st January 2026
SDL2 Quest game tutorial
Wed, 7th May 2025
SDL2 Versus game tutorial
Wed, 20th March 2024
Download keys for SDL2 tutorials on itch.io
Sat, 16th March 2024
The Legend of Edgar 1.37
Mon, 1st January 2024
Tags
• battle-for-the-solar-system (10)
• blob-wars (10)
• brexit (1)
• code (6)
• edgar (10)
• games (45)
• lasagne-monsters (1)
• making-of (5)
• match3 (1)
• numberblocksonline (1)
• orb (2)
• site (1)
• tanx (4)
• three-guys (3)
• three-guys-apocalypse (3)
• tutorials (18)
• water-closet (4)
Books
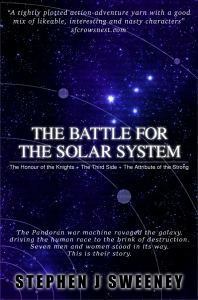
The Battle for the Solar System (Complete)
The Pandoran war machine ravaged the galaxy, driving the human race to the brink of destruction. Seven men and women stood in its way. This is their story.
Intermediate Tutorials
Intermediate Game Tutorial #2 - Scrolling a tile based map

Introduction
This tutorial demonstrates how to scroll around a tile based map.
Compile and run tutorial12. The program will read the map data file and display the map on the screen. Use the arrow keys (not the ones on the numeric pad) to scroll the map around. Closing the window or pressing Escape will exit the program.
An in-depth look
In the previous tutorial, the map size was restricted to 20 x 15 tiles. We have updated the Map structure to allow scrolling and also allow dynamic map sizes. Below is the change we have made to structs.h:
typedef struct Map
{
    int startX, startY;
    int maxX, maxY;
    int tile[MAX_MAP_Y][MAX_MAP_X];
} Map;
There are 4 new variables in the structure now. The startX and
startY variables define the starting horizontal and vertical positions when
drawing our map. The mapX and mapY variables are used
to limit the amount of scrolling that the map can do. This stops unused areas of the map from
being displayed on the screen.
The map loading code in map.c has changed to make use of these new variables:
void loadMap(char *name)
{
    int x, y;
    FILE *fp;

    fp = fopen(name, "rb");

    /* If we can't open the map then exit */

    if (fp == NULL)
    {
        printf("Failed to open map %s\n", name);

        exit(1);
    }

    /* Read the data from the file into the map */

    for (y=0;y<MAX_MAP_Y;y++)
    {
        for (x=0;x<MAX_MAP_X;x++)
        {
            fscanf(fp, "%d", &map.tile[y][x]);
        }
    }

    /* Set the start coordinates */

    map.startX = map.startY = 0;

    /* Set the maximum scroll position of the map */

    map.maxX = MAX_MAP_X * TILE_SIZE;
    map.maxY = MAX_MAP_Y * TILE_SIZE;

    /* Close the file afterwards */

    fclose(fp);
}
We set the startX and startY values of the map to 0. This
will start drawing the map from the top left corner. We also set the maxX
and maxY values to the maximum allowed size of the map. Later tutorials will look
at setting this value more dynamically. We have also added another function to this file:
void doMap()
{
    if (input.left == 1)
    {
        map.startX -= SCROLL_SPEED;

        if (map.startX < 0)
        {
            map.startX = 0;
        }
    }

    else if (input.right == 1)
    {
        map.startX += SCROLL_SPEED;

        if (map.startX + SCREEN_WIDTH >= map.maxX)
        {
            map.startX = map.maxX - SCREEN_WIDTH;
        }
    }

    if (input.up == 1)
    {
        map.startY -= SCROLL_SPEED;

        if (map.startY < 0)
        {
            map.startY = 0;
        }
    }

    else if (input.down == 1)
    {
        map.startY += SCROLL_SPEED;

        if (map.startY + SCREEN_HEIGHT >= map.maxY)
        {
            map.startY = map.maxY - SCREEN_HEIGHT;
        }
    }
}
doMap processes the input passed to it, much in the same way that we processed
player movement in previous tutorials. As always, we do not allow the startX
and startY values to be less than 0. The maximum values are slightly more complicated
though. We must not allow the screen to scroll past the maxX value, but we must
also take into account the screen's width when checking this. So, if the startX plus
the screen's width is greater than or equal to the maxX, we set the
startX to maxX and subtract the screen's width from it.
We do the same for the vertical movement too. The final function is a revised version of the map drawing
function:
void drawMap()
{
    int x, y, mapX, x1, x2, mapY, y1, y2;

    mapX = map.startX / TILE_SIZE;
    x1 = (map.startX % TILE_SIZE) * -1;
    x2 = x1 + SCREEN_WIDTH + (x1 == 0 ? 0 : TILE_SIZE);

    mapY = map.startY / TILE_SIZE;
    y1 = (map.startY % TILE_SIZE) * -1;
    y2 = y1 + SCREEN_HEIGHT + (y1 == 0 ? 0 : TILE_SIZE);

    /* Draw the background */

    drawImage(backgroundImage, 0, 0);

    /* Draw the map starting at the startX and startY */

    for (y=y1;y<y2;y+=TILE_SIZE)
    {
        mapX = map.startX / TILE_SIZE;

        for (x=x1;x<x2;x+=TILE_SIZE)
        {
            if (map.tile[mapY][mapX] != 0)
            {
                drawImage(brickImage, x, y);
            }

            mapX++;
        }

        mapY++;
    }
}
When drawing a scrolled map, we must be mindful to draw tiles that are only partially on the screen. If we don't do
this then tiles will pop in and out of existance when scrolling the map. We first get the starting horizontal index
by dividing the startX by the TILE_SIZE. This will give us the
tile to start with, including any tiles that are to be partially drawn. Next, we set the starting x coordinate,
x1, to the remainder of the startX divided by the
TILE_SIZE. This will require slightly more explaination:
mapX = map.startX / TILE_SIZE;Suppose the startX is 24. This will make the mapX 0 (since it is an int and therefore we get no decimal part). This means that we start at index 0 for the horizontal drawing. However, we also need to know where on the screen to start drawing the tiles.
x1 = (map.startX % TILE_SIZE) * -1;The remainder will be 24, but we do not want to start drawing at 24 pixels. Since we have moved 24 pixels to the right, tile 0 must be 24 pixels off the left hand side of the screen, so we will set the value to negative to achieve this. Finally, we need to know where to stop drawing:
x2 = x1 + SCREEN_WIDTH + (x1 == 0 ? 0 : TILE_SIZE);We take the starting coordinate and add on the screen width. We also have to bear in mind though that we may have started drawing off screen. If we did then we need to draw an extra tile otherwise we will have a few blank pixels at the end of the screen. The easiest way to check this is to test if our starting value is 0 and, if it was not, then we add on an extra tile at the end. We apply the same logic to the vertical drawing. Finally we, draw the blocks to the screen:
for (y=y1;y<y2;y+=TILE_SIZE)
{
    mapX = map.startX / TILE_SIZE;

    for (x=x1;x<x2;x+=TILE_SIZE)
    {
        if (map.tile[mapY][mapX] != 0)
        {
            drawImage(brickImage, x, y);
        }

        mapX++;
    }

    mapY++;
}
The loop is simple enough, we start at y1 and loop through to y2.
mapY and mapX are our tile indexes. At the start of the outer
loop, we reset mapX because we will increment it in our inner loop. In our inner loop,
we test the value of the tile at the current index and, if it is not 0, we draw the tile to the coordinates
in our loop. Notice that we only want to draw what's going to be displayed on the screen. Drawing the entire map
every single frame, particularly if the map is very big will waste a lot of CPU and slow down a game.
The remaining files and functions have been covered in the basic tutorials so we will not look at them.
Conclusion
Implementing scrolling does require a small amount of care to ensure that it is done correctly. The map is in the same format as before so you can again edit the file to change the map layout. In the next tutorial we will create a map editor to assist with the creation of maps.
Downloads