PC Games
• Orb
• Lasagne Monsters
• Three Guys Apocalypse
• Water Closet
• Blob Wars : Attrition
• The Legend of Edgar
• TBFTSS: The Pandoran War
• Three Guys
• Blob Wars : Blob and Conquer
• Blob Wars : Metal Blob Solid
• Project: Starfighter
• TANX Squadron
Tutorials
• 2D shoot 'em up
• 2D top-down shooter
• 2D platform game
• Sprite atlas tutorial
• Working with TTF fonts
• 2D adventure game
• Widget tutorial
• 2D shoot 'em up sequel
• 2D run and gun
• Roguelike
• Medals (Achievements)
• 2D turn-based strategy game
• 2D isometric game
• 2D map editor
• 2D mission-based shoot 'em up
• 2D Santa game
• 2D split screen game
• 2D quest game
• SDL 1 tutorials (outdated)
Latest Updates
The Legend of Edgar 1.38
Thu, 1st January 2026
SDL2 Quest game tutorial
Wed, 7th May 2025
SDL2 Versus game tutorial
Wed, 20th March 2024
Download keys for SDL2 tutorials on itch.io
Sat, 16th March 2024
The Legend of Edgar 1.37
Mon, 1st January 2024
Tags
• battle-for-the-solar-system (10)
• blob-wars (10)
• brexit (1)
• code (6)
• edgar (10)
• games (45)
• lasagne-monsters (1)
• making-of (5)
• match3 (1)
• numberblocksonline (1)
• orb (2)
• site (1)
• tanx (4)
• three-guys (3)
• three-guys-apocalypse (3)
• tutorials (18)
• water-closet (4)
Books
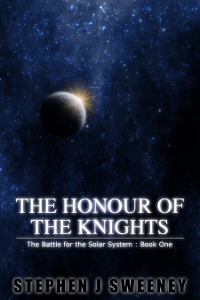
The Honour of the Knights (First Edition) (The Battle for the Solar System)
When starfighter pilot Simon Dodds is enrolled in a top secret military project, he and his wingmates begin to suspect that there is a lot more to the theft of a legendary battleship and an Imperial nation's civil war than either the Confederation Stellar Navy or the government are willing to let on.
— Creating a Run and Gun game —
Part 7: Larger, scrolling map
Note: this tutorial assumes knowledge of C, as well as prior tutorials.


Introduction
So far, we've been constrained to a single screen our game. It's time to make it so that we've got a larger map to explore. In this part, we'll expand the size of the map so that there is more to do and see.
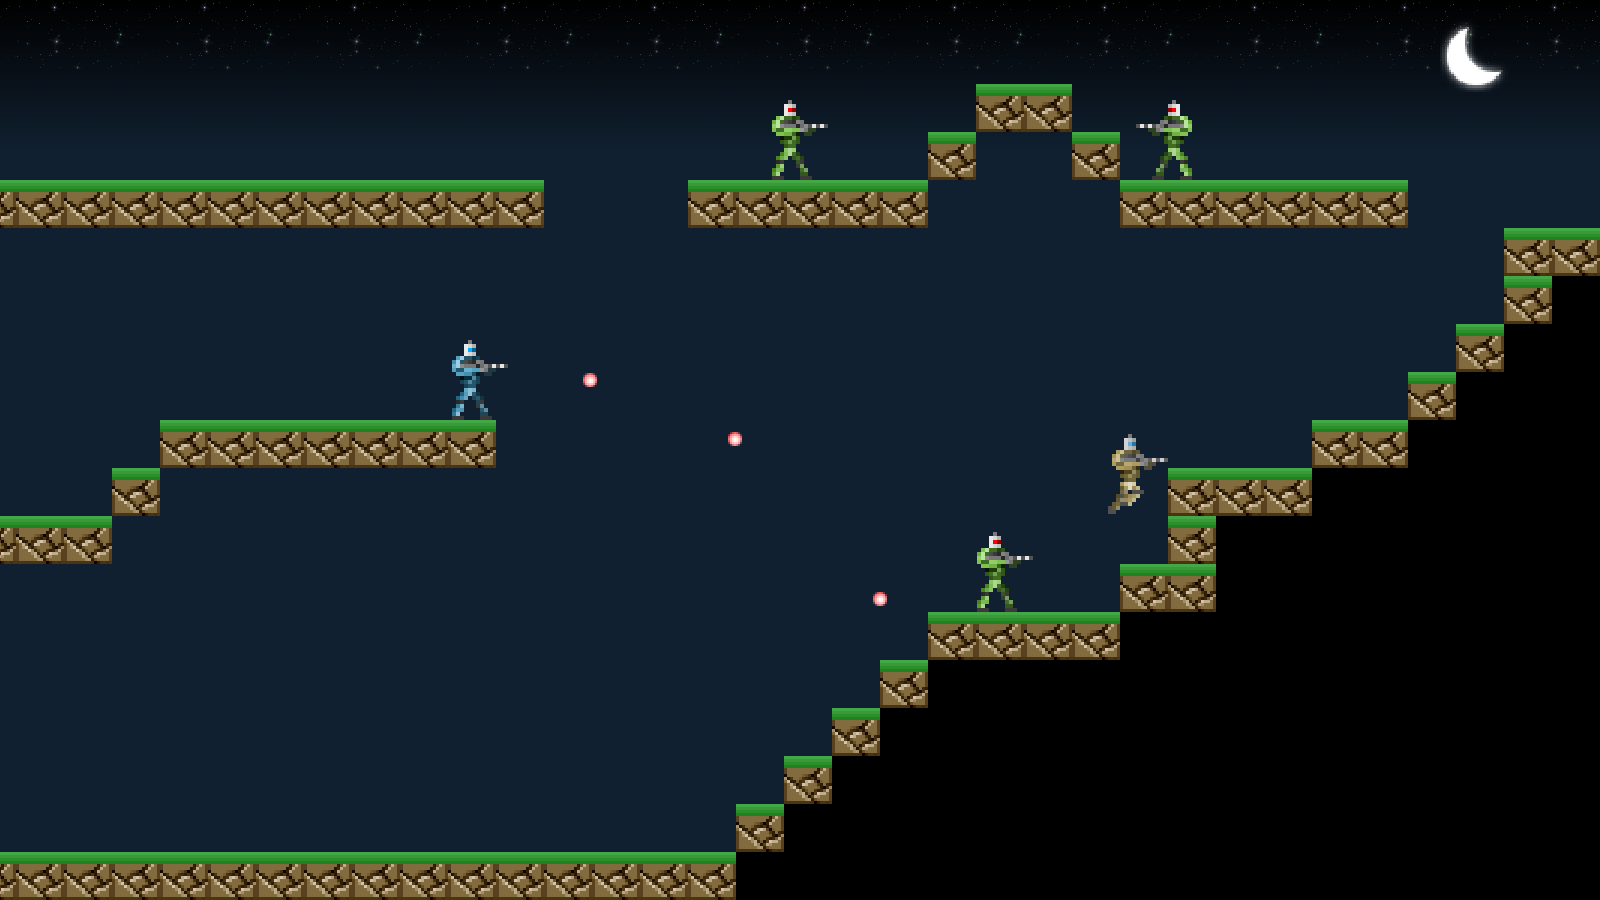
Extract the archive, run cmake CMakeLists.txt, followed by make, and then use ./gunner07 to run the code. You will see a window open like the one above. The main player character starts off at the top left-hand corner. The same controls from past tutorials apply. The player can now move around the map, jump on the various map blocks, and battle the enemies. The map is now around twice the width of the previous one. Once you're finished, close the window to exit.
Inspecting the code
We've not only added in the scrolling to this part of the tutorial, but also added in a new enemy: a blue soldier. You'll have noticed that he doesn't fire straight ahead, but aims at the player. We'll see how he works in a little while. For now, we'll focus on how the map scrolling works. Starting with defs.h:
#define MAP_WIDTH              68
#define MAP_HEIGHT             19

#define MAP_RENDER_WIDTH       34
#define MAP_RENDER_HEIGHT      19
We've doubled the width (MAP_WIDTH) of our map, going from 34 tiles across to 68. We've kept the height the same (MAP_HEIGHT). We've also introduced two near defines - MAP_RENDER_WIDTH and MAP_RENDER_HEIGHT tell us how many tiles to draw on the horizontal and vertical. These are roughly equivalent to the screen resolution divided by the size of a tile (MAP_TILE_SIZE).
We've also made a single change to structs.h, adding in a field to Stage:
typedef struct {
	Entity entityHead, *entityTail;
	Bullet bulletHead, *bulletTail;
	Entity *player;
	int map[MAP_WIDTH][MAP_HEIGHT];
	SDL_Point camera;
} Stage;
`camera` will be used to track our viewing regions, and let us know where and how to render the map and entities in the world. For now, it will be exclusively tracking the player.
Let's now look at how the changes have affected the map rendering. If we go to map.c, we'll see we've pretty much rewritten drawMap:
void drawMap(void)
{
	int x, y, n, x1, x2, y1, y2, mx, my;

	x1 = (stage.camera.x % MAP_TILE_SIZE) * -1;
	x2 = x1 + MAP_RENDER_WIDTH * MAP_TILE_SIZE + (x1 == 0 ? 0 : MAP_TILE_SIZE);

	y1 = (stage.camera.y % MAP_TILE_SIZE) * -1;
	y2 = y1 + MAP_RENDER_HEIGHT * MAP_TILE_SIZE + (y1 == 0 ? 0 : MAP_TILE_SIZE);

	mx = stage.camera.x / MAP_TILE_SIZE;
	my = stage.camera.y / MAP_TILE_SIZE;

	for (y = y1 ; y < y2 ; y += MAP_TILE_SIZE)
	{
		for (x = x1 ; x < x2 ; x += MAP_TILE_SIZE)
		{
			if (isInsideMap(mx, my))
			{
				n = stage.map[mx][my];

				if (n > 0)
				{
					blitAtlasImage(tiles[n], x, y, 0, SDL_FLIP_NONE);
				}
			}

			mx++;
		}

		mx = stage.camera.x / MAP_TILE_SIZE;

		my++;
	}
}
To draw the map according to the position of the camera, we need to work out where to draw from and to on both the x and y axis. Starting with the x axis, and the `x1` and `x2` variables. We calculate `x1` (our from location) by calculating the MAP_TILE_SIZE modulo of the camera's `x` coordinate. With MAP_TILE_SIZE being 48, this will give us a value between 0 and 47. We then multiply this by -1, to get the negative value. This means that we will (for the most part) be starting the map drawing from offscreen. Next, we want to calculate the `x2` value (our to location). This is simply a case of drawing from `x1` to MAP_RENDER_WIDTH * MAP_TILE_SIZE. Since there is the likelihood that we'll be drawing from a negative position, we may also need to draw one extra tile (in effect, creating overscan). To do this, we need only check if `x1` is not zero and add MAP_TILE_SIZE to `x2` (`x1` == 0 ? 0 : MAP_TILE_SIZE).
Calculations for drawing the y axis is handled in the same way, only using the camera's `y` coordinate and the MAP_RENDER_HEIGHT.
Next, we need to work out which tiles we want to draw. We do this by calculating two values: `mx` and `my`. These are calculated by dividing the camera's `x` and `y` coordinates by MAP_TILE_SIZE. With this done, we're ready to begin the main drawing loop. We will draw the rows and columns as before, `y1` to `y2` and `x1` to `x2`, incrementing by MAP_TILE_SIZE each time. As we draw each column, we increment `mx` by one, so we can draw the next relevant tile. Once we reach the end of the row, we increment `my` by 1 and reset `mx` to its initial value. As we're moving the map around, and due to the overscan, we need to ensure our `mx` and `my` values are within the bounds of the map array before we blit the tile to be used. We're therefore testing if `mx` and `my` are inside the map by calling isInsideMap. If so, we're then rendering the tile as before.
Phew! Quite a lot. But our map rendering now works nicely with the camera.
Next, we should look at how we're using the camera to update the entity rendering. We'll start with looking at the changes to player.c. We need only update the `draw` function:
static void draw(Entity *self)
{
	Gunner *g;

	g = (Gunner*) self->data;

	if ((int) g->immuneTimer % 5 == 0)
	{
		blitAtlasImage(self->texture, self->x - stage.camera.x, self->y - stage.camera.y, 0, self->facing == FACING_RIGHT ? SDL_FLIP_NONE : SDL_FLIP_HORIZONTAL);
	}
}
Now, when calling blitAtlasImage, we're subtracting `stage.camera.x` from the entity's `x`. We're also substracting `stage.camera.y` from the entity's `y`. This is important to do, as if we didn't, the player wouldn't render correctly with the map. For example, if we were moving to the right, the player would continue to move to the right as the map scrolled, rather than draw in the real position, giving the impression that the player was moving offscreen. The effect is somewhat hard to describe. If you wished to see it, simply remove the camera substraction from the blitAtlasImage.
We've done the same thing with greenSoldier.c, in their `draw` function:
static void draw(Entity *self)
{
	EnemySoldier *s;
	int x, y;

	s = (EnemySoldier*) self->data;

	x = self->x - stage.camera.x;
	y = self->y - stage.camera.y;

	if (s->damageTimer == 0)
	{
		blitAtlasImage(self->texture, x, y, 0, self->facing == FACING_RIGHT ? SDL_FLIP_NONE : SDL_FLIP_HORIZONTAL);
	}
	else
	{
		SDL_SetTextureColorMod(self->texture->texture, 255, 32, 32);
		blitAtlasImage(self->texture, x, y, 0, self->facing == FACING_RIGHT ? SDL_FLIP_NONE : SDL_FLIP_HORIZONTAL);
		SDL_SetTextureColorMod(self->texture->texture, 255, 255, 255);
	}
}
Again, we're subtracting the camera's `x` and `y` from the entity's `x` and `y` for use with the blitAtlasImage function. This small change will keep the enemies in the correct place when the map scrolls. Once again, if you wish to see the effect of this not being done, all you need to do is remove the subtraction.
We're almost done with the camera. The only thing we need to do is update it. We're doing so in stage.c, during the `logic` function:
static void logic(void)
{
	doEntities();

	doBullets();

	if (app.keyboard[SDL_SCANCODE_F1])
	{
		app.dev.showHitboxes = !app.dev.showHitboxes;

		app.keyboard[SDL_SCANCODE_F1] = 0;
	}

	updateCamera();
}
We've added in a call to a new function named updateCamera. The function itself is below:
static void updateCamera(void)
{
	stage.camera.x = (int) stage.player->x + CAMERA_MID_X;
	stage.camera.y = (int) stage.player->y + CAMERA_MID_Y;

	stage.camera.x -= (SCREEN_WIDTH / 2);
	stage.camera.y -= (SCREEN_HEIGHT / 2);

	stage.camera.x = MIN(MAX(stage.camera.x, 0), (MAP_WIDTH * MAP_TILE_SIZE) - SCREEN_WIDTH);
	stage.camera.y = MIN(MAX(stage.camera.y, 0), (MAP_HEIGHT * MAP_TILE_SIZE) - SCREEN_HEIGHT);
}
Our camera will be tracking the player, so we're setting the camera's `x` and `y` to be the player's `x` and `y`, plus a midpoint about the player (CAMERA_MID_X and CAMERA_MID_Y). We're using this midpoint instead of the middle of the player's hitbox or texture because these can change depending on the player action, and therefore cause the camera to jump around in an undesirable manner. With the camera's `x` and `y` set to the player's midpoint, we then subtract half the screen's with from the camera's `x` and half the screen's height from the camera's `y`. In other words, we're now centering the camera around the player. Finally, to ensure that we remain within the bounds of the level, we're limiting the camera's `x` and `y` low values to 0 and their high values to the map's width and height, less the screen's width and height. This stops the camera from panning past the left edge of the map or the right edge of the map.
That's all we needed to do for our camera.
As already mentioned, we've added in a new enemy type, too, to make things a bit more interested. This is a Blue Soldier, who fires aimed shots at the player, that require us to dodge a little more. All the Blue Soldier's code is found in a file called blueSoldier.c. Since the Blue Soldier shares a lot in common with the Green Soldier, we'll only focus on the things that are different (we might later refactor the code to put all the common functions into their own file, or even create a single enemySoldier.c file). initBlueSoldier is the same as initGreenSoldier, only that we're loading a different texture for the enemy, so we'll start with lookForPlayer:
static void lookForPlayer(Entity *self)
{
	int distX, distY;
	EnemySoldier *s;

	distX = abs(self->x - stage.player->x);
	distY = abs(self->y - stage.player->y);

	if (distX <= SCREEN_WIDTH / 2 && distY <= SCREEN_HEIGHT / 2)
	{
		if ((self->facing == FACING_LEFT && stage.player->x < self->x) || (self->facing == FACING_RIGHT && stage.player->x > self->x))
		{
			if (canSeePlayer(self->x + (self->texture->rect.w / 2), self->y))
			{
				s = (EnemySoldier*) self->data;

				s->shotsToFire = 2 + rand() % 3;

				s->thinkTime = FPS * 2;
			}
		}
	}
}
Our Blue Soldier has a larger sight range compared to the Green Soldier. We're grabbing the horizontal and vertical distances between the player and the enemy, and assigning them to distX and distY respectively. We're then testing whether distX is less than half the screen width and distY is less than half the screen height. If so, we're carrying out the sight check in the same way as the Green Soldier (including the number of shots that can be fired and the pause time between their next think).
The fireBullet function is where things diverge a bit more:
static void fireBullet(Entity *self)
{
	Bullet *b;

	b = spawnBullet(self);
	b->texture = bulletTexture;
	b->hitbox.w = bulletTexture->rect.w;
	b->hitbox.h = bulletTexture->rect.h;
	b->damage = 1;
	b->life = FPS * 2;

	b->x = self->facing == FACING_RIGHT ? self->x + self->texture->rect.w : self->x;
	b->y = self->y + 19;

	calcSlope(stage.player->x + (stage.player->texture->rect.w / 2), stage.player->y + (stage.player->texture->rect.h / 2), b->x, b->y, &b->dx, &b->dy);

	b->dx *= BULLET_SPEED;
	b->dy *= BULLET_SPEED;

	((EnemySoldier*) self->data)->reload = RELOAD_SPEED;
}
The bullet that is created is the same as the Green Soldier, except that instead of the bullet moving straight ahead (it's `dy` would be 0), we're calling a function named calcSlope (the same function as found in SDL2 Shooter 2) to determine the velocity of the bullet. This function takes six parameters: the destination `x` and `y`, the origin `x` and `y`, and references to two variables into which to set the results of the function. We're feeding in the player's position, the bullet's position, and the bullet's `dx` and `dy` variables. With the slope calculated, we then multiply the bullet's `dx` and `dy` up by BULLET_SPEED (defined as 8), before finally resetting the enemy soldier's `reload` time to RELOAD_SPEED (18).
That's our Blue Soldier handled. As you can see, the only difference between the green and blue soldiers is that the blue soldiers will aim directly at the player and have a larger sight range.
One final change we made in this part is to load all the entities in our game from a file, instead of having them hardcoded. If we look at stage.c, we can see how this is done. Starting with initStage:
void initStage(void)
{
	memset(&stage, 0, sizeof(Stage));

	skyTexture = getAtlasImage("gfx/stage/sky.png", 1);

	moonTexture = getAtlasImage("gfx/stage/moon.png", 1);

	initMap();

	initEntities();

	initBullets();

	loadStage("data/stages/1.json");

	app.delegate.logic = logic;
	app.delegate.draw = draw;
}
We've added a call to a function called loadStage, that takes the name of the file we want to load as a parameter. loadStage itself is quite straightforward:
static void loadStage(char *filename)
{
	cJSON *root, *node;
	char *text, *type;
	int x, y;
	Entity *e;

	text = readFile(filename);

	root = cJSON_Parse(text);

	for (node = root->child ; node != NULL ; node = node->next)
	{
		type = cJSON_GetObjectItem(node, "type")->valuestring;
		x = cJSON_GetObjectItem(node, "x")->valueint;
		y = cJSON_GetObjectItem(node, "y")->valueint;

		e = initEntity(type);
		e->x = x;
		e->y = y;
	}

	cJSON_Delete(root);

	free(text);
}
Like many of our other tutorials, we're loading a JSON file. Our entities are defined as an array of JSON objects. We're looping through all of these objects and grabbing the "type", "x", and "y" values from each one. We're then calling initEntity and passing over the `type` as the parameter. `type` will be the name of the entity that we wish to create, such as "player" or "greenSoldier", just as we had when the entities were hardcoded. We're assigning the created entity to a variable called `e`, and then setting its `x` and `y` values to those we grabbed from the JSON object. In short, our JSON object is defining our entity type and position in the map. We're then cleaning up our JSON object and loaded text data by calling cJSON_Delete and `free`.
Our entity JSON is easy to understand, as we can see:
[
	{
		"type" : "player",
		"x" : 35,
		"y" : 65
	},
	{
		"type" : "blueSoldier",
		"x" : 305,
		"y" : 740
	},
	{
		"type" : "greenSoldier",
		"x" : 295,
		"y" : 400
	}
]
This file is simple enough that it can be edited by hand, so long as one knows where they want to place the entities.
That's it for this part. We now have a map that can be scrolled, a means to load a map and the entities that inhabit it, and some different enemy types. What is needed now is to give the player some health, so that the enemies pose a threat, and also allow the player to collect items and power-ups. We'll look into this in the next part.
Purchase
The source code for all parts of this tutorial (including assets) is available for purchase:
From itch.io
It is also available as part of the SDL2 tutorial bundle: