PC Games
• Orb
• Lasagne Monsters
• Three Guys Apocalypse
• Water Closet
• Blob Wars : Attrition
• The Legend of Edgar
• TBFTSS: The Pandoran War
• Three Guys
• Blob Wars : Blob and Conquer
• Blob Wars : Metal Blob Solid
• Project: Starfighter
• TANX Squadron
Tutorials
• 2D shoot 'em up
• 2D top-down shooter
• 2D platform game
• Sprite atlas tutorial
• Working with TTF fonts
• 2D adventure game
• Widget tutorial
• 2D shoot 'em up sequel
• 2D run and gun
• Roguelike
• Medals (Achievements)
• 2D turn-based strategy game
• 2D isometric game
• 2D map editor
• 2D mission-based shoot 'em up
• 2D Santa game
• 2D split screen game
• 2D quest game
• SDL 1 tutorials (outdated)
Latest Updates
The Legend of Edgar 1.38
Thu, 1st January 2026
SDL2 Quest game tutorial
Wed, 7th May 2025
SDL2 Versus game tutorial
Wed, 20th March 2024
Download keys for SDL2 tutorials on itch.io
Sat, 16th March 2024
The Legend of Edgar 1.37
Mon, 1st January 2024
Tags
• battle-for-the-solar-system (10)
• blob-wars (10)
• brexit (1)
• code (6)
• edgar (10)
• games (45)
• lasagne-monsters (1)
• making-of (5)
• match3 (1)
• numberblocksonline (1)
• orb (2)
• site (1)
• tanx (4)
• three-guys (3)
• three-guys-apocalypse (3)
• tutorials (18)
• water-closet (4)
Books
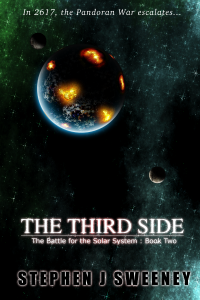
The Third Side (Battle for the Solar System, #2)
The White Knights have had their wings clipped. Shot down and stranded on a planet in independent space, the five pilots find themselves sitting directly in the path of the Pandoran war machine as it prepares to advance The Mission. But if they can somehow survive and find a way home, they might just discover something far more worrisome than that which destroyed an empire.
— Simple 2D map editor —
Part 2: Tile selection
Note: this tutorial assumes knowledge of C, as well as prior tutorials.


Introduction
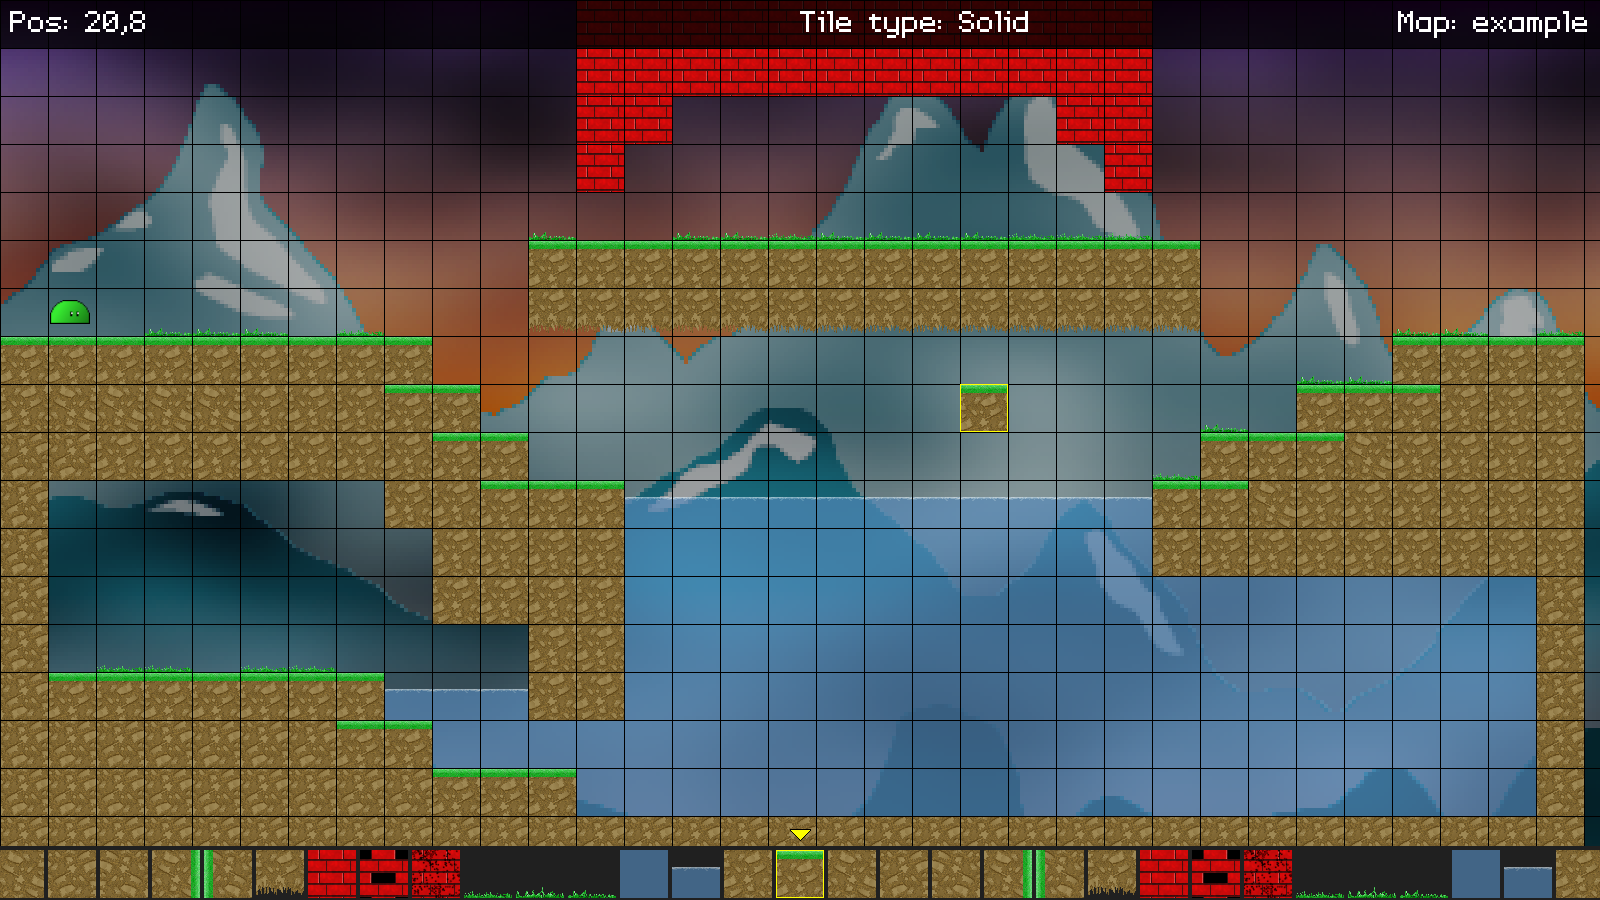
Now that we can make a basic map using a tile, it's time to expand things out a bit, and support tile selection. As we've already seen, our editor is loading up all the available tile graphics, but we have no means of selecting them. We'll change that now.
Extract the archive, run cmake CMakeLists.txt, followed by make, and then use ./editor02 -edit example to run the editor. You will see a window open, displaying a scene like the one above. The controls from the previous tutorial apply. However, the mouse wheel can now be used to cycle through the available tiles. The currently selected tile is shown by the cursor, and also at the bottom of the screen. As the mouse wheel is moved up and down, the list of tiles at the bottom will cycle left and right, looping around. The active tile is indicated by a yellow outline, as well as a yellow bobbing arrow. Once you're finished editing, press Space to save the map. If there are errors, these will be logged to the terminal. With your map saved, close the window to exit. As before, you can play the map by using ./editor02 -map example.
Inspecting the code
Adding in our tile selection is quite easy. The hardest part is the bottom bar, displaying the tiles that can be cycled through. Once again, we've only updated editor.c, so let's see what's changed.
Starting with initEditor:
void initEditor(void)
{
	// snipped

	currentTile = 1;

	activeObjectArrowTexture = getAtlasImage("gfx/editor/activeObjectArrow.png", 1);

	activeObjectArrowBob = 0;

	app.delegate.logic = logic;
	app.delegate.draw = draw;
}
We're loading a texture called activeObjectArrow, and assigning it to an AtlasImage variable called activeObjectArrowTexture. This is our little yellow indicator arrow. Next, we're setting a variable called activeObjectArrowBob to 0. This variable is used to control the bobbing motion of the arrow.
Heading over to `logic` next, we've made just one single update:
static void logic(void)
{
	mouseTile.x = (app.mouse.x + stage.camera.x) / MAP_TILE_SIZE;
	mouseTile.y = (app.mouse.y + stage.camera.y) / MAP_TILE_SIZE;

	doMouse();

	doKeyboard();

	activeObjectArrowBob += 0.1 * app.deltaTime;
}
We're increasing the value of activeObjectArrowBob every time logic is called.
doMouse has next been updated:
static void doMouse(void)
{
// snipped
if (app.mouse.buttons[SDL_BUTTON_X1])
{
app.mouse.buttons[SDL_BUTTON_X1] = 0;
cycleTile(¤tTile, -1);
}
if (app.mouse.buttons[SDL_BUTTON_X2])
{
app.mouse.buttons[SDL_BUTTON_X2] = 0;
cycleTile(¤tTile, 1);
}
}
We've added in some code to handle the mouse wheel. We're testing for our wheel in input.c, and storing the state in App's mouse's `buttons` array. We first test if SDL_BUTTON_X1 (a wheel button) is set (has a non-zero value). If so, we're resetting the value 0, to clear it, and then calling a new function called cycleTile. We'll see this function in a moment. To this function, we're passing over a pointer reference to currentTile and also -1 (the direction of the scrolling). Next, we're testing if SDL_BUTTON_X2 (mouse wheel, opposite direction) is set. Again, we're resetting the value to 0, and calling cycleTile. This time, however, we're passing 1, to move in the opposite direction. The reason we're clearing the mouse wheel each time is to stop our tile selection from cycling infinitely; we only want the current tile to change once per movement of the wheel.
We'll look at cycleTile now:
static void cycleTile(int *i, int dir)
{
	do
	{
		*i = *i + dir;

		if (*i < 0)
		{
			*i = MAX_TILES - 1;
		}

		if (*i >= MAX_TILES)
		{
			*i = 1;
		}
	} while (tiles[*i] == NULL);
}
This is quite an easy function to understand, despite it perhaps looking a bit complicated. The function takes two parameters `i`, a pointer reference to the variable we wish to affect, and `dir`, the direction we wish to scroll through our tiles array. We start by entering a do-loop, that will continue while the AtlasImage at `tiles` index `i` is NULL. The first thing we do is update `i` by the value of `dir` (notice we're working with a pointer here). Next, we test if the value of `i` has fallen below 0. If so, we're going to reset `i` to MAX_TILES - 1. In other words, if we move beyond the start of the `tiles` array, we'll jump back to the end. Next, we test to see if we've passed the end of the array, and reset the value of `i` to 1 if so (we don't set it to 0, since that's an empty tile..!). Once we've found a valid tile, the do-loop will exit.
So, as you can see, the function simply moves to the next available tile in our array, based on the scroll direction. We're using a pointer to a variable (`i`) so that we can use the function elsewhere (as we'll see in a bit).
That's our logic all done with. We can now move onto the rendering phase. Starting with `draw`:
static void draw(void)
{
	// snipped

	blitAtlasImage(tiles[currentTile], (mouseTile.x * MAP_TILE_SIZE) - stage.camera.x, (mouseTile.y * MAP_TILE_SIZE) - stage.camera.y, 0, SDL_FLIP_NONE);

	drawOutlineRect((mouseTile.x * MAP_TILE_SIZE) - stage.camera.x, (mouseTile.y * MAP_TILE_SIZE) - stage.camera.y, MAP_TILE_SIZE, MAP_TILE_SIZE, 255, 255, 0, 255);

	drawUI();
}
We've added a call to a new function: drawUI:
static void drawUI(void)
{
	drawTopBar();

	drawBottomBar();
}
Right now, this function simply delegates to other functions: drawTopBar and drawBottomBar.
We'll start with drawTopBar:
static void drawTopBar(void)
{
	char text[MAX_LINE_LENGTH];

	drawRect(0, 0, SCREEN_WIDTH, 48, 0, 0, 0, 192);

	sprintf(text, "Pos: %d,%d", mouseTile.x, mouseTile.y);
	drawText(text, 10, 0, 255, 255, 255, TEXT_ALIGN_LEFT, 0);

	sprintf(text, "Tile type: %s", getTileTypeName());
	drawText(text, 800, 0, 255, 255, 255, TEXT_ALIGN_LEFT, 0);

	sprintf(text, "Map: %s", stage.name);
	drawText(text, SCREEN_WIDTH - 10, 0, 255, 255, 255, TEXT_ALIGN_RIGHT, 0);
}
This function is responsible for rendering the information bar that we see at the top of the screen. We first call drawRect, to draw a transparent black bar, and then render various pieces of informational text, including mouseTile's coordinates, the tile type (via a call to getTileTypeName(), that we'll see in a bit), and finally the name of the map that we're editing.
getTileTypeName is a simple function, but provides some helpful information:
static char *getTileTypeName(void)
{
	if (currentTile >= TILE_WATER)
	{
		return "Water";
	}
	else if (currentTile >= TILE_FOREGROUND)
	{
		return "Foreground";
	}
	else
	{
		return "Solid";
	}
}
In this function, we're testing which tile we're currently using (currentTile), and returning a text string. Basically, depending on the number range that currentTile occupies, we'll return "water", "foreground", or "solid". This helps a great deal with knowing the sort of tile we're working with (as it's sometimes not obvious, especially with foreground and water tiles)!
Now let's look at drawBottomBar. This is an important function in this part, as it shows our tile selection:
static void drawBottomBar(void)
{
	int x, x2, i, j;

	drawRect(0, SCREEN_HEIGHT - 54, SCREEN_WIDTH, 54, 32, 32, 32, 255);

	x = (SCREEN_WIDTH - MAP_TILE_SIZE) / 2;
	x2 = x - (MAP_TILE_SIZE + 4);

	i = currentTile;
	j = currentTile;

	cycleTile(&j, -1);

	while (x < SCREEN_WIDTH)
	{
		blitAtlasImage(tiles[i], x, SCREEN_HEIGHT - 50, 0, SDL_FLIP_NONE);
		blitAtlasImage(tiles[j], x2, SCREEN_HEIGHT - 50, 0, SDL_FLIP_NONE);

		x += MAP_TILE_SIZE + 4;
		x2 -= MAP_TILE_SIZE + 4;

		cycleTile(&i, 1);
		cycleTile(&j, -1);
	}

	x = (SCREEN_WIDTH - MAP_TILE_SIZE) / 2;

	drawOutlineRect(x, SCREEN_HEIGHT - MAP_TILE_SIZE - 2, MAP_TILE_SIZE, MAP_TILE_SIZE, 255, 255, 0, 255);

	blitAtlasImage(activeObjectArrowTexture, x + (MAP_TILE_SIZE / 2), SCREEN_HEIGHT - 64 + (sin(activeObjectArrowBob) * 8), 1, SDL_FLIP_NONE);
}
Once again, this looks complicated, but there is actually less going on than it first appears. To begin with, we're drawing a transparent black strip at the bottom of the screen, using drawRect. Next, we're setting a variable called `x` to half the screen width, less half the width of a map tile (MAP_TILE_SIZE). This is so that we can render the currently selected tile in the middle of the screen. We then set another variable called `x2` to the value of `x`, less MAP_TILE_SIZE + 4. This is so that when it comes to rendering the tiles to the left of the middle, they do not overlap, and also have some padding added.
We next set two variables, `i` and `j`, to the value of currentTile. With that done, we call cycleTile, passing a reference to `j`, and telling the function to find the previous tile (-1). So, we now have the values of the current tile, the previous tile, and the x positions on screen of each. We now enter a while-loop, that will continue while the value of `x` is less than the width of the screen (remember that we're starting from the middle). We render two tiles - the ones at indexes `i` and `j`, at positions `x` and `x2` respectively, along the bottom of the screen. We then increase `x` by MAP_TILE_SIZE + 4, and decrease `x2` by MAP_TILE_SIZE + 4. Again, the 4 is to add padding. This means that `x` will move right across the screen, while `x2` will move left. Finally, we call cycleTile, passing over `i` and `j` as the references, and 1 and -1 as the directions.
So, our loop will draw tiles from the middle of the screen to the left and right of it, looping through the available images as it goes. Since we're using currentTile as the starting value, it creates the illusion of us moving through a list as we use the mouse wheel to change the value of currentTile.
With our tile list done, we once again set `x` to the middle of the screen (including the width of a tile), draw an outlined yellow rectangle in that position (to surround the currently selected tile), and finally blit activeObjectArrowTexture. We're adding the sin of activeObjectArrowBob to the vertical render position, causing the arrow to bob up and down.
There we go! We can now cycle through all our tiles, selecting the one that we wish to work with. We also have an information bar at the top of the screen, to give us a little more information on what's going on.
Since we've basically now covered the editing of the map itself, it's time to move onto placing entities. Unlike the map tiles, there are a few interesting caveats to keep in mind when we're doing so, as we'll soon see.
Purchase
The source code for all parts of this tutorial (including assets) is available for purchase:
From itch.io
It is also available as part of the SDL2 tutorial bundle: