PC Games
• Orb
• Lasagne Monsters
• Three Guys Apocalypse
• Water Closet
• Blob Wars : Attrition
• The Legend of Edgar
• TBFTSS: The Pandoran War
• Three Guys
• Blob Wars : Blob and Conquer
• Blob Wars : Metal Blob Solid
• Project: Starfighter
• TANX Squadron
Tutorials
• 2D shoot 'em up
• 2D top-down shooter
• 2D platform game
• Sprite atlas tutorial
• Working with TTF fonts
• 2D adventure game
• Widget tutorial
• 2D shoot 'em up sequel
• 2D run and gun
• Roguelike
• Medals (Achievements)
• 2D turn-based strategy game
• 2D isometric game
• 2D map editor
• 2D mission-based shoot 'em up
• 2D Santa game
• 2D split screen game
• 2D quest game
• SDL 1 tutorials (outdated)
Latest Updates
The Legend of Edgar 1.38
Thu, 1st January 2026
SDL2 Quest game tutorial
Wed, 7th May 2025
SDL2 Versus game tutorial
Wed, 20th March 2024
Download keys for SDL2 tutorials on itch.io
Sat, 16th March 2024
The Legend of Edgar 1.37
Mon, 1st January 2024
Tags
• battle-for-the-solar-system (10)
• blob-wars (10)
• brexit (1)
• code (6)
• edgar (10)
• games (45)
• lasagne-monsters (1)
• making-of (5)
• match3 (1)
• numberblocksonline (1)
• orb (2)
• site (1)
• tanx (4)
• three-guys (3)
• three-guys-apocalypse (3)
• tutorials (18)
• water-closet (4)
Books
The Battle for the Solar System (Complete)
The Pandoran war machine ravaged the galaxy, driving the human race to the brink of destruction. Seven men and women stood in its way. This is their story.
— Simple 2D adventure game —
Part 2: Map scrolling and collisions
Note: this tutorial assumes knowledge of C, as well as prior tutorials.


Introduction
Our dungeon will not be limited to a single screen (although it could be, since it could be designed as a flip screen affair where moving past the bounds of one screen takes you to another). We'll be going the traditional route of scrolling the map as the player moves around. For the most part, the player will always be in the centre of the screen, other than when at the limits of the map. We also want to prevent the player from walking into walls and holes in the ground.
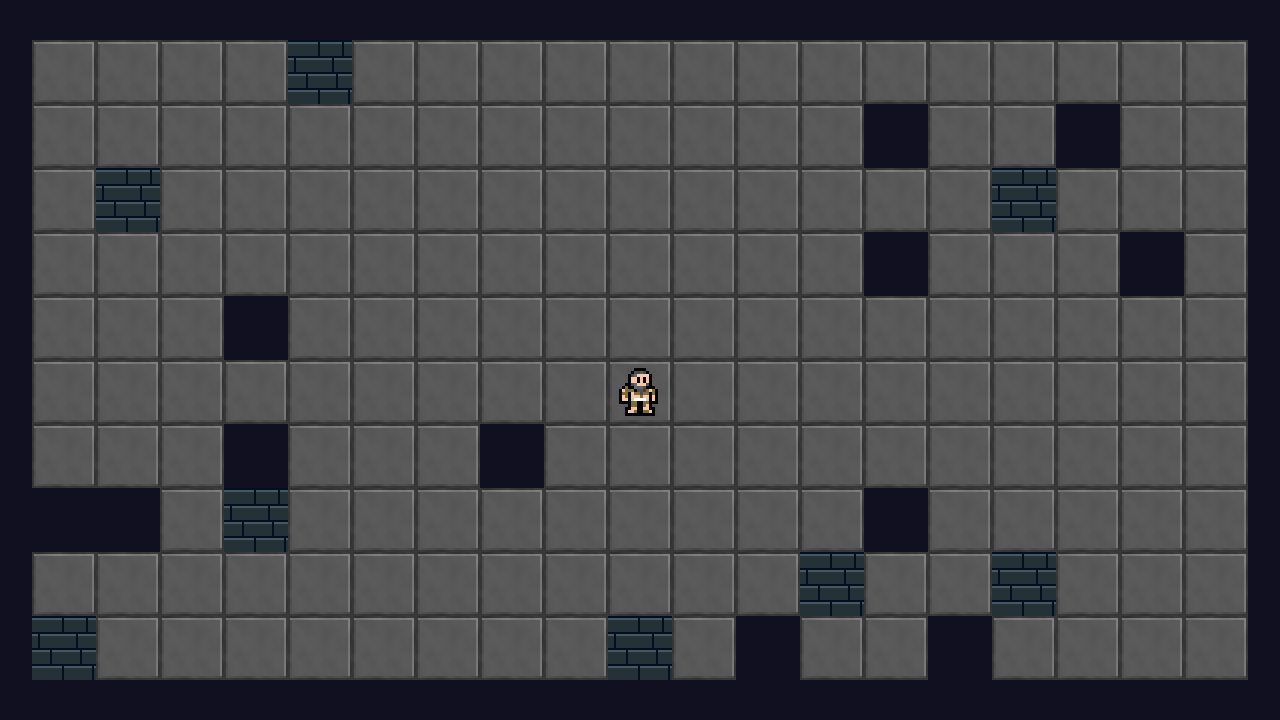
Extract the archive, run cmake CMakeLists.txt, followed by make, and then use ./adventure02 to run the code. You will see a window open like the one above, showing the prisoner on a tiled background. Use WASD to move around. Compared with the first tutorial, the dungeon is now three times larger. You will find you can move around a larger area, but are prevented from moving into the hole (black zones) and walls (beige-ish squares). Close the window to exit.
Inspecting the code
We've not had to make too many changes to the code to introduce mapping and collision to the map. We'll start with defs.h:
#define MAP_WIDTH              57
#define MAP_HEIGHT             30

#define MAP_RENDER_WIDTH       19
#define MAP_RENDER_HEIGHT      10

#define TILE_HOLE              0
#define TILE_GROUND            1
#define TILE_WALL              40
We've increased the MAP_WIDTH and MAP_HEIGHT to 57 and 30, making it three times larger than the original map. We've also introduced two new defines: MAP_RENDER_WIDTH and MAP_RENDER_HEIGHT. These will be used to determined how many tiles along the x or y axis should be drawn. These values are both the same as the original map size, since these fit prefectly into our screen space. We've also added in a define for TILE_WALL, with a value of 40. This will be used to specify that any tile with a value of 40 or greater should be classed as a wall. We'll see more on this later on.
The single change made to structs.h is to introduce a camera variable into Dungeon. This is an SDL_Point, so just an x and y:
typedef struct {
	SDL_Point renderOffset;
	SDL_Point camera;
	Entity entityHead, *entityTail;
	Map map;
} Dungeon;
Let's take a look at dungeon.c next. Only the initDungeon funciton has changed here, and that's to use MAP_RENDER_WIDTH and MAP_RENDER_HEIGHT in our render offsets calculation, instead of the MAP_WIDTH and MAP_HEIGHT:
void initDungeon(void)
{
	initMap();

	initEntities();

	initPlayer();

	dungeon.renderOffset.x = (SCREEN_WIDTH - (MAP_RENDER_WIDTH * TILE_SIZE)) / 2;
	dungeon.renderOffset.y = (SCREEN_HEIGHT - (MAP_RENDER_HEIGHT * TILE_SIZE)) / 2;

	app.delegate.logic = &logic;
	app.delegate.draw = &draw;
}
If we didn't change these, our offsets would be all wrong and map would render in the wrong position.
Moving onto map.c, we've again made just a handful of changes. Instead of loading the map data or pre-defining it, we're going to randomly place walls and holes on an otherwise flat map:
void initMap(void)
{
	int x, y;

	srand(141);

	loadTiles();

	for (x = 0 ; x < MAP_WIDTH ; x++)
	{
		for (y = 0 ; y < MAP_HEIGHT ; y++)
		{
			dungeon.map.data[x][y] = TILE_GROUND;

			if (rand() % 25 == 0)
			{
				dungeon.map.data[x][y] = TILE_HOLE;
			}

			if (rand() % 30 == 0)
			{
				dungeon.map.data[x][y] = TILE_WALL;
			}
		}
	}
}
In order to keep the map layout the same each time, we're going to seed the random (srand) with a fixed number. After this, we're defaulting all the tiles to TILE_GROUND, but randomly changing the them into a TILE_HOLE or a TILE_WALL, when testing a random. It's crude, but again it's just to populate the map with fixed demo data.
With that done, we can move onto the map drawing. If we examine drawMapTiles we can see that our y and x loops use MAP_RENDER_HEIGHT and MAP_RENDER_WIDTH, instead of drawing the entire map. This is done just to draw a fixed portion of the dungeon map and not the entire thing:
static void drawMapTiles(void)
{
	int x, y, mx, my, n;

	for (y = 0 ; y < MAP_RENDER_HEIGHT ; y++)
	{
		for (x = 0 ; x < MAP_RENDER_WIDTH ; x++)
		{
			mx = dungeon.camera.x + x;
			my = dungeon.camera.y + y;

			n = dungeon.map.data[mx][my];

			if (n > TILE_HOLE)
			{
				blitAtlasImage(tiles[n], (x * TILE_SIZE) + dungeon.renderOffset.x, (y * TILE_SIZE) + dungeon.renderOffset.y, 0, SDL_FLIP_NONE);
			}
		}
	}
}
Notice the important change here: we're taking the dungeon camera's x and y values and adding them to the x and y of our loop, and assigning them to two variables: mx and my. We're then using mx and my as the indexes within our map data. This is important to ensure we render the map correctly. The y and x loops will give us numbers from 0 to MAP_RENDER_HEIGHT and MAP_RENDER_WIDTH (10 and 19). Adding the camera's x and y will allow us to pick out the correct tile for our camera position. We then use mx and my to extract the tile and render it if it's not a TILE_HOLE.
We also need to employ the camera's x and y when drawing our entities, as we can see in entities.c:
void drawEntities(void)
{
	Entity *e;
	int x, y;

	for (e = dungeon.entityHead.next ; e != NULL ; e = e->next)
	{
		x = e->x - dungeon.camera.x;
		y = e->y - dungeon.camera.y;

		x = (x * TILE_SIZE) + (TILE_SIZE / 2);
		y = (y * TILE_SIZE) + (TILE_SIZE / 2);

		x += dungeon.renderOffset.x;
		y += dungeon.renderOffset.y;

		blitAtlasImage(e->texture, x, y, 1, e->facing == FACING_LEFT ? SDL_FLIP_NONE : SDL_FLIP_HORIZONTAL);
	}
}
However, in this case we want to subtract the camera's x and y from the entity's, to ensure everything is correctly centered around the player. We're assigning the result of this subtraction to two variables: x and y, and then using those to carry out the drawing operation as before.
Finally, we'll come to the most important section of this part of the tutorial - testing the player movement and controlling the camera. The player's movement checks and the camera controls are both handled in movePlayer:
static void movePlayer(int dx, int dy)
{
	int x, y;

	x = player->x + dx;
	y = player->y + dy;

	x = MAX(0, MIN(x, MAP_WIDTH - 1));
	y = MAX(0, MIN(y, MAP_HEIGHT - 1));

	if (dungeon.map.data[x][y] >= TILE_GROUND && dungeon.map.data[x][y] < TILE_WALL)
	{
		player->x = x;
		player->y = y;

		dungeon.camera.x = x;
		dungeon.camera.x -= (MAP_RENDER_WIDTH / 2);
		dungeon.camera.x = MIN(MAX(dungeon.camera.x, 0), MAP_WIDTH - MAP_RENDER_WIDTH);

		dungeon.camera.y = y;
		dungeon.camera.y -= (MAP_RENDER_HEIGHT / 2);
		dungeon.camera.y = MIN(MAX(dungeon.camera.y, 0), MAP_HEIGHT - MAP_RENDER_HEIGHT);

		moveDelay = 5;
	}
}
movePlayer has had some changes made it to before the assignment of the result to the player's x and y. After clamping the x and y values to the bounds of the map, we then test to see if the tile at those coordinates has a value of equal to or greater than a TILE_GROUND and less than a TILE_WALL. In other words, is the tile walkable by the player. Remember that ground tiles can be anywhere between TILE_GROUND and TILE_WALL - 1 (so, 1 and 39). If so, we're good to assign the x and y to the player.
After that, we're ready to make the camera adjustments. We want to center the camera around the player. So, we assign the camera's x and y values to the player's x and y values. We then subtract half the MAP_RENDER_WIDTH from the camera's x and half the MAP_RENDER_HEIGHT from the y. We finally clamp these values to ensure they never go below 0 and also never greater than the MAP_WIDTH / MAP_HEIGHT less the appropriate render size.
That might sound a bit confusing, so just image that when assigning the camera to the player's x and y, it would means the player would always be drawn in the top left of the screen. We want the player displayed in the center, so we need to subtract half of each of the dungeon's render sizes. This would move the view left by half the dungeon render width and up by half the render height.
As you can see, moving the player around correctly, and controlling and using the camera is pretty easy. Next we'll look at how to load a map, instead of relying on generation.
Purchase
The source code for all parts of this tutorial (including assets) is available for purchase:
From itch.io
It is also available as part of the SDL2 tutorial bundle: