PC Games
• Orb
• Lasagne Monsters
• Three Guys Apocalypse
• Water Closet
• Blob Wars : Attrition
• The Legend of Edgar
• TBFTSS: The Pandoran War
• Three Guys
• Blob Wars : Blob and Conquer
• Blob Wars : Metal Blob Solid
• Project: Starfighter
• TANX Squadron
Tutorials
• 2D shoot 'em up
• 2D top-down shooter
• 2D platform game
• Sprite atlas tutorial
• Working with TTF fonts
• 2D adventure game
• Widget tutorial
• 2D shoot 'em up sequel
• 2D run and gun
• Roguelike
• Medals (Achievements)
• 2D turn-based strategy game
• 2D isometric game
• 2D map editor
• 2D mission-based shoot 'em up
• 2D Santa game
• 2D split screen game
• 2D quest game
• SDL 1 tutorials (outdated)
Latest Updates
The Legend of Edgar 1.38
Thu, 1st January 2026
SDL2 Quest game tutorial
Wed, 7th May 2025
SDL2 Versus game tutorial
Wed, 20th March 2024
Download keys for SDL2 tutorials on itch.io
Sat, 16th March 2024
The Legend of Edgar 1.37
Mon, 1st January 2024
Tags
• battle-for-the-solar-system (10)
• blob-wars (10)
• brexit (1)
• code (6)
• edgar (10)
• games (45)
• lasagne-monsters (1)
• making-of (5)
• match3 (1)
• numberblocksonline (1)
• orb (2)
• site (1)
• tanx (4)
• three-guys (3)
• three-guys-apocalypse (3)
• tutorials (18)
• water-closet (4)
Books
The Attribute of the Strong (Battle for the Solar System, #3)
The Pandoran War is nearing its end... and the Senate's Mistake have all but won. Leaving a galaxy in ruin behind them, they set their sights on Sol and prepare to finish their twelve year Mission. All seems lost. But in the final forty-eight hours, while hunting for the elusive Zackaria, the White Knights make a discovery in the former Mitikas Empire that could herald one last chance at victory.
— Simple 2D adventure game —
Part 1: Movement and rendering
Note: this tutorial assumes knowledge of C, as well as prior tutorials.


Introduction
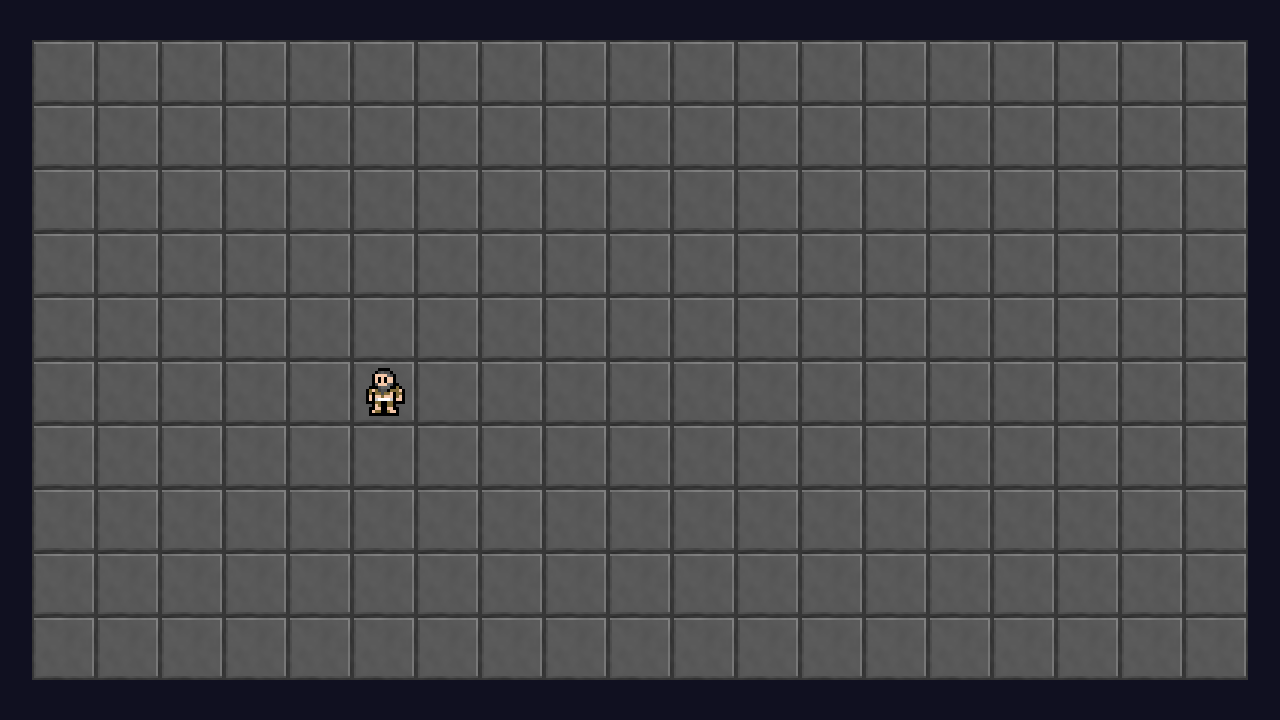
In this tutorial series, we'll look at creating a small adventure game, in which the player can explore a dungeon, interact with entities, collect items, and a bunch of other things. This game is loosely inspired by Adventure on the Atari 2600, although it will feature a multiscrolling environmnent, and more modern features. The plot of the game is that a prisoner (known as a "contestant") has been given the chance of earning his freedom if he can find and return 4 artefacts scattered throughout the dungeon. As there will be a lot to this, we'll be taking this tutorial slow (expect some long articles, too!).
Extract the archive, run cmake CMakeLists.txt, followed by make, and then use ./adventure01 to run the code. You will see a window open like the one above, showing the prisoner on a tiled background. Use WASD to move around. Your movement is restricted to the bounds of the screen, and the prisoner will move from square to square, like in a rogue-like. Close the window to exit.
Inspecting the code
Again, as things like setting open SDL, opening a window, and working with a sprite atlas have been covered in previous tutorials we'll be skipping over them, and focusing on what it takes to make this game. Keep in mind also that since this game is going to be larger and more complicated than previous ones, our file structure for our code has changed. Rather than everything living in src, our files now live in subfolders. We'll continue to refer to them by filename, however:
.
|-- common.h
|-- defs.h
|-- game
|   |-- dungeon.c
|   |-- dungeon.h
|   |-- entities.c
|   |-- entities.h
|   |-- map.c
|   |-- map.h
|   |-- player.c
|   `-- player.h
|-- json
|   |-- cJSON.c
|   `-- cJSON.h
|-- main.c
|-- main.h
|-- structs.h
`-- system
    |-- atlas.c
    |-- atlas.h
    |-- draw.c
    |-- draw.h
    |-- init.c
    |-- init.h
    |-- input.c
    |-- input.h
    |-- textures.c
    |-- textures.h
    |-- util.c
    `-- util.h
We'll start by looking at structs.h, where we define our object structures:
typedef struct {
	int data [MAP_WIDTH][MAP_HEIGHT];
} Map;

struct Entity {
	int x;
	int y;
	int facing;
	AtlasImage *texture;
	Entity *next;
};

typedef struct {
	SDL_Point renderOffset;
	Entity entityHead, *entityTail;
	Map map;
} Dungeon;
The first thing we're defining is a map structure. This will hold a multidimensional array about our tile data, based on MAP_WIDTH and MAP_HEIGHT (as defined in defs.h). At this point, it's just an array of ints, nothing complicated. The next thing we're defining is an Entity. An entity in our game will anything that lives in the dungeon: the contestant, an object to pick up, a door, that sort of thing. The x and y coordinates will be location on the map, while the facing variable will say which way they are facing (for when moving left and right, for example). It will also hold a texture and a link to the next Entity. The last thing we declare is a Dungeon object. It will hold our entities, the map, and a SDL_Point (x + y coordinates) to help with the rendering. More on this in a bit.
Let's now look at dungeon.c, which will be where our main drawing and logic for the game will be performed. We're once again using the logic and draw delegate approach:
void initDungeon(void)
{
	initMap();

	initEntities();

	initPlayer();

	dungeon.renderOffset.x = (SCREEN_WIDTH - (MAP_WIDTH * TILE_SIZE)) / 2;
	dungeon.renderOffset.y = (SCREEN_HEIGHT - (MAP_HEIGHT * TILE_SIZE)) / 2;

	app.delegate.logic = &logic;
	app.delegate.draw = &draw;
}
Our initDungeon prepares things. It calls off to initMap, initEntities, and initPlayer. It then sets the dungeon render offset, based on the render size of the map. Since our screen size is 1280 x 720 and our tiles are 64 x 64, there will be space left aroun the map. To compensate for this, we center the rendering, so things don't look odd. Finally, we assign the logic and draw delegates to dungeon.c's logic and draw.
The logic function itself is simple, it just calls doPlayer (defined in player.c):
static void logic(void)
{
	doPlayer();
}
Equally, our draw function calls drawMap and drawEntities, defined in map.c and entities.c, respectively:
static void draw(void)
{
	drawMap();

	drawEntities();
}
Moving onto map.c, we'll see things are quite simple here right now. There are only handful of function. Starting with initMap:
void initMap(void)
{
	int x, y;

	loadTiles();

	for (x = 0 ; x < MAP_WIDTH ; x++)
	{
		for (y = 0 ; y < MAP_HEIGHT ; y++)
		{
			dungeon.map.data[x][y] = TILE_GROUND;
		}
	}
}
This function calls off to loadTiles, to load our tile graphics, and also sets up the map data itself. Right now, we're just looping through our multidimensional array in our map data and setting every tile to TILE_GROUND. TILE_GROUND is set to 1 in defs.h:
#define TILE_GROUND 1
Moving onto the loadTiles function, we're again doing something straightforward:
static void loadTiles(void)
{
	int i;
	char filename[MAX_FILENAME_LENGTH];

	for (i = 1 ; i <= MAX_TILES ; i++)
	{
		sprintf(filename, "gfx/tiles/%d.png", i);

		tiles[i] = getAtlasImage(filename, 0);
	}
}
We're creating a for-loop from 1 to MAX_TILES (defined as 64), creating a filename using sprintf, and attempting to load the named AtlasImage. So, for example, the first tile image to look for will be "gfx/tiles/1.png", then "gfx/tiles/2.png", etc. We're also passing 0 to getAtlasImage, to tell the function that this image is optional. Our getAtlasImage will print an error and exit if we attempt to fetch an image that doesn't exist, but in this case we don't need all our tile images to exist. The reason for this is so that we can define the ground tiles (walkable one) as being numbered 1 - 25, and wall tiles defined as 26 - 64. This won't strictly be our setup later, but it should give you an idea of what we're going for.
The next function in map.c is drawMap, which right now simply delegate to drawMapTiles:
void drawMap(void)
{
	drawMapTiles();
}
Right now, the drawMapTiles function renders the entire map on screen, by looping through the x and y of the map data, and drawing the tile:
static void drawMapTiles(void)
{
	int x, y, n;

	for (y = 0 ; y < MAP_HEIGHT ; y++)
	{
		for (x = 0 ; x < MAP_WIDTH ; x++)
		{
			n = dungeon.map.data[x][y];

			if (n > TILE_HOLE)
			{
				blitAtlasImage(tiles[n], (x * TILE_SIZE) + dungeon.renderOffset.x, (y * TILE_SIZE) + dungeon.renderOffset.y, 0, SDL_FLIP_NONE);
			}
		}
	}
}
For each iteration of the inner loop (x) we're grabbing the value of dungeon.map.data and assign it to n (this is just to increase readability and isn't strictly required). We're then testing the value of n and only drawing it if it's value is greater than TILE_HOLE (0). Since tile 0 is never loaded and will always be NULL, we'll skip it by default. We could of course also test whether tiles[n] is NULL.
Having determined that we want to render the tile, we call blitAtlasImage, passing over the AtlasImage from tiles[n] and the coordinates the render at. We also tell the blitAtlasImage not to center the image (0) and not to mirror it in any way (SDL_FLIP_NONE).
entities.c is where we handle all our entities. The first function is initEntities:
void initEntities(void)
{
	dungeon.entityTail = &dungeon.entityHead;
}
Our entities will be handled as a linked list, the head of the list living in the Dungeon object. We're pointing the entity tail (the last entry in the list, to which new ones will be appended) to entityHead. We need to do this to ensure that when we create our first entity, the game won't crash. Speaking of creating entities, we have a function just for doing that:
Entity *spawnEntity(void)
{
	Entity *e;

	e = malloc(sizeof(Entity));
	memset(e, 0, sizeof(Entity));
	dungeon.entityTail->next = e;
	dungeon.entityTail = e;

	e->facing = FACING_LEFT;

	return e;
}
This is a convenience function to malloc an Entity, append it to the Dungeon's entity tail, make the new one the tail, default the facing to FACING_LEFT, and return it. Doing this work here helps to keep everything in one place, rather than scattering mallocs all over the place when creating an entity.
Drawing the entities themselves isn't too different from drawing the tiles, other than we're looping through our list of entities:
void drawEntities(void)
{
	Entity *e;
	int x, y;

	for (e = dungeon.entityHead.next ; e != NULL ; e = e->next)
	{
		x = (e->x * TILE_SIZE) + (TILE_SIZE / 2);
		y = (e->y * TILE_SIZE) + (TILE_SIZE / 2);

		x += dungeon.renderOffset.x;
		y += dungeon.renderOffset.y;

		blitAtlasImage(e->texture, x, y, 1, e->facing == FACING_LEFT ? SDL_FLIP_NONE : SDL_FLIP_HORIZONTAL);
	}
}
We're using the entity's x and y coordinates as their location on in the dungeon, and multiplying up the same way as we did with the tiles (including adding the render offset). One minor difference is that you're centering the entity around the tile (by adding half the TILE_SIZE to the x and y), and also horizontally flipping the entity's texture depending on whether they are facing left or right.
Time to now talk about how we handle the prisoner contestant. player.c is where we'll deal with everything related to player controls. Starting from the top, we're declaring a variable called moveDelay.
static double moveDelay;
This variable will be used to ensure that when we hold down a movement key we don't race from one end of the map to the other in the blink of an eye. Of course, we could cancel the key when it's pressed, but most people will prefer not to keep presssing WASD to move about. For setup, our initPlayer (as called by initDungeon) is a simple function:
void initPlayer(void)
{
	player = spawnEntity();

	player->x = 5;
	player->y = 5;
	player->texture = getAtlasImage("gfx/entities/prisoner.png", 1);

	moveDelay = 0;
}
We're calling spawnEntity, assigning it to the player variable (a global variable, like dungeon), setting the texture by fetching the AtlasImage to use, and setting moveDelay to 0, so we can move right away. Controlling the player is simple, and handled in doPlayer:
void doPlayer(void)
{
	moveDelay = MAX(0, moveDelay - app.deltaTime);

	if (moveDelay == 0)
	{
		if (app.keyboard[SDL_SCANCODE_A])
		{
			movePlayer(-1, 0);

			player->facing = FACING_LEFT;
		}

		if (app.keyboard[SDL_SCANCODE_D])
		{
			movePlayer(1, 0);

			player->facing = FACING_RIGHT;
		}

		if (app.keyboard[SDL_SCANCODE_W])
		{
			movePlayer(0, -1);
		}

		if (app.keyboard[SDL_SCANCODE_S])
		{
			movePlayer(0, 1);
		}
	}
}
We only want to be able to move the player when moveDelay is 0. We therefore need to decrement the value of moveDelay each time doPlayer is called, limiting it at 0. The macro MAX will return the greater value between 0 and moveDelay less the deltaTime (more of on the delta time at the end of the tutorial). This macro will means that moveDelay will never go below zero.
We then test if moveDelay is 0. If so, we're allowed to process movement controls. We'll test the standard WSAD control scheme to determine the direction we want to move, changing the player facing depending on whether we're moving left or right. To move the player, we're delegating to the movePlayer function, passing in the delta directions we want to go:
static void movePlayer(int dx, int dy)
{
	int x, y;

	x = player->x + dx;
	y = player->y + dy;

	x = MAX(0, MIN(x, MAP_WIDTH - 1));
	y = MAX(0, MIN(y, MAP_HEIGHT - 1));

	player->x = x;
	player->y = y;

	moveDelay = 5;
}
dx and dy will represent our delta x and y directions. So, if we're moving left, dx will be -1. If down, dy will be 1, etc. What this function when does is assign x and y variables the values of the player's x and y, plus the dx and dy we have specified. The x and y are then clamped to between 0 and the map's width and height, less one (remember: arrays are 0 indexed). Then, the x and y are assigned to the player's x and y. We don't have to create x and y variables here, it's just done to increase readability a bit. Finally, we set the moveDelay to 5, to stop the next movement from happening right away. If we wanted speed up the player's movement, we could reduce this value, or increase it to make them move slower.
That's it for the game's main logic. Before we finish up this first part, let's look at some of the functions we're making use of, as well as that time delta stuff. To begin with, let's look at the getAtlasImage function:
AtlasImage *getAtlasImage(char *filename, int required)
{
	AtlasImage *a;
	unsigned long i;

	i = hashcode(filename) % NUM_ATLAS_BUCKETS;

	for (a = atlases[i].next ; a != NULL ; a = a->next)
	{
		if (strcmp(a->filename, filename) == 0)
		{
			return a;
		}
	}

	if (required)
	{
		SDL_LogMessage(SDL_LOG_CATEGORY_APPLICATION, SDL_LOG_PRIORITY_CRITICAL, "No such atlas image '%s'", filename);
		exit(1);
	}

	return NULL;
}
If you've read the sprite atlas tutorial, you'll recognise this function. It looks up an AtlasImage by name. As we can see, the required variable will cause the function to call exit(1) if the AtlasImage isn't found. Many will not like to employ such a brutal method of ensuring that necessary data exists, but this can be useful during the development phase. Perhaps wrap it in a #ifdef block if it isn't to your taste.
The blitAtlasImage is, again, like the one from the sprite atlas tutorial, although we're passing over the SDL_RenderFlip variable, for use with SDL_RenderCopyEx:
void blitAtlasImage(AtlasImage *atlasImage, int x, int y, int center, SDL_RendererFlip flip)
{
	SDL_Rect dest;

	dest.x = x;
	dest.y = y;
	dest.w = atlasImage->rect.w;
	dest.h = atlasImage->rect.h;

	if (center)
	{
		dest.x -= dest.w / 2;
		dest.y -= dest.h / 2;
	}

	SDL_RenderCopyEx(app.renderer, atlasImage->texture, &atlasImage->rect, &dest, 0, NULL, flip);
}
Finally, let's look at main.c. This is where we are calculating our deltaTime:
int main(int argc, char *argv[])
{
	long then;

	memset(&app, 0, sizeof(App));

	initSDL();

	initGameSystem();

	initDungeon();

	atexit(cleanup);

	nextFPS = SDL_GetTicks() + 1000;

	while (1)
	{
		then = SDL_GetTicks();

		prepareScene();

		doInput();

		logic();

		app.delegate.draw();

		presentScene();

		/* allow the CPU/GPU to breathe */
		SDL_Delay(1);

		app.deltaTime = LOGIC_RATE * (SDL_GetTicks() - then);

		doFPS();
	}

	return 0;
}
Delta time and unlocked frame rates isn't something I tend to use; I prefer to lock at around 60fps using SDL_Delay(16) or an exact 60fps lock by using an accumulator with the remaining time (60fps in 16.6666666666667 frames per second). However, for this tutorial (and perhaps others in future), we'll experiment with it. Notice how we're always calling SDL_Delay(1). This is so that we're giving the CPU and GPU a chance to rest. You can see the difference by commenting out the line and checking your CPU usage with and without it. You'll notice that without the line, your CPU is doing a lot more work, for no reason.
Another thing to take not of when using delta times is how we never allow our logic rate to exceed 1. This because we want our logic to always operate at 60fps, no matter what.
static void logic(void)
{
	double tmpDelta;

	/* don't exceed target logic rate */
	while (app.deltaTime > 1)
	{
		tmpDelta = app.deltaTime;

		app.deltaTime = 1;

		app.delegate.logic();

		app.deltaTime = (tmpDelta - 1);
	}

	app.delegate.logic();
}
LOGIC_RATE is defined in defs.h as:
#define FPS                    60.0
#define LOGIC_RATE             (FPS / 1000)
If we exceed our logic rate, undesirable side effects can occur, such as collision detection failing (objects skipping over one another and never overlapping). This is a way of avoiding our logic from becoming tied to our frame rate.
The final function is doFPS. It's just for debugging and hasn't been employed just yet.
static void doFPS(void)
{
	fps++;

	if (SDL_GetTicks() >= nextFPS)
	{
		app.dev.fps = fps;

		fps = 0;

		nextFPS = SDL_GetTicks() + 1000;
	}
}
That's the first part of our tutorial done. Mostly setup and baby steps. The following parts will be more exciting!
Purchase
The source code for all parts of this tutorial (including assets) is available for purchase:
From itch.io
It is also available as part of the SDL2 tutorial bundle: