PC Games
• Orb
• Lasagne Monsters
• Three Guys Apocalypse
• Water Closet
• Blob Wars : Attrition
• The Legend of Edgar
• TBFTSS: The Pandoran War
• Three Guys
• Blob Wars : Blob and Conquer
• Blob Wars : Metal Blob Solid
• Project: Starfighter
• TANX Squadron
Tutorials
• 2D shoot 'em up
• 2D top-down shooter
• 2D platform game
• Sprite atlas tutorial
• Working with TTF fonts
• 2D adventure game
• Widget tutorial
• 2D shoot 'em up sequel
• 2D run and gun
• Roguelike
• Medals (Achievements)
• 2D turn-based strategy game
• 2D isometric game
• 2D map editor
• 2D mission-based shoot 'em up
• 2D Santa game
• 2D split screen game
• 2D quest game
• SDL 1 tutorials (outdated)
Latest Updates
The Legend of Edgar 1.38
Thu, 1st January 2026
SDL2 Quest game tutorial
Wed, 7th May 2025
SDL2 Versus game tutorial
Wed, 20th March 2024
Download keys for SDL2 tutorials on itch.io
Sat, 16th March 2024
The Legend of Edgar 1.37
Mon, 1st January 2024
Tags
• battle-for-the-solar-system (10)
• blob-wars (10)
• brexit (1)
• code (6)
• edgar (10)
• games (45)
• lasagne-monsters (1)
• making-of (5)
• match3 (1)
• numberblocksonline (1)
• orb (2)
• site (1)
• tanx (4)
• three-guys (3)
• three-guys-apocalypse (3)
• tutorials (18)
• water-closet (4)
Books
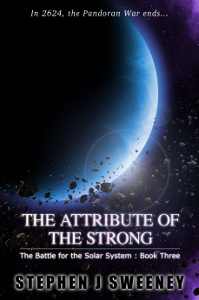
The Attribute of the Strong (Battle for the Solar System, #3)
The Pandoran War is nearing its end... and the Senate's Mistake have all but won. Leaving a galaxy in ruin behind them, they set their sights on Sol and prepare to finish their twelve year Mission. All seems lost. But in the final forty-eight hours, while hunting for the elusive Zackaria, the White Knights make a discovery in the former Mitikas Empire that could herald one last chance at victory.
Basic Tutorials
Basic Game Tutorial #2 - Displaying an image
Introduction
In this second tutorial, we will explain how to display an image in SDL. If you have not read the first tutorial, you are advised to do so as only new function calls will be explained.
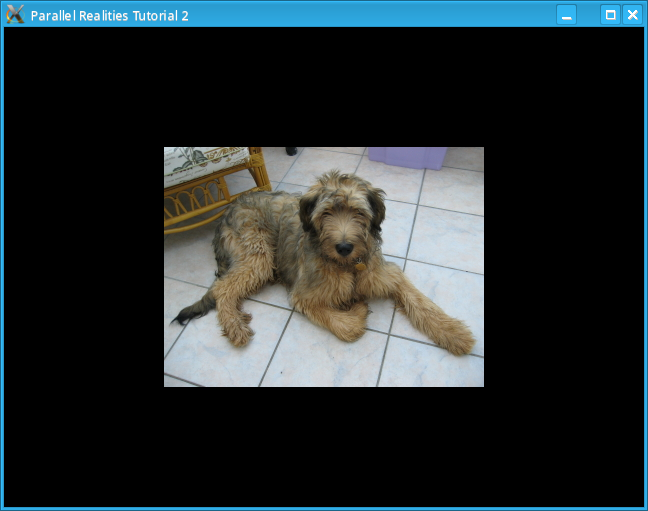
Compile and run the program as before. Note that the executable is called tutorial02. If successful you should see a window similar to the one in the screenshot. As before, you can exit the program by either closing the window or pressing Escape.
An in-depth look
In the src directory, you will see that there are 2 new files: graphics.c and graphics.h. Other files have changed too though, so we will go through these as well.
The defs.h file contains a new include, SDL/SDL_image.h. SDL is limited to only loading BMP files, so this include allows us to load other file types, such as JPEGs and PNGs, so it is very useful to have.main.h includes an additional SDL_Surface, which we will use to store the image that we load.
main.c has changed slightly. We now have to additional function calls, loadImage and updateScreen. Both these functions are in graphics.c which we will look at shortly.
init.h contains a reference to the external new SDL_Surface.
init.c is slightly different. We initialise SDL as before, but we pass in an additional flag to the window creation
screen = SDL_SetVideoMode(640, 480, 0, SDL_HWPALETTE|SDL_DOUBLEBUF);The SDL_DOUBLEBUF flag tells SDL to use double buffering which prevents flickering when displaying moving images. Double buffering works by rendering the screen to be displayed to an offscreen image and then showing it when it is complete. The onscreen image is then swapped with the offscreen image and is then used for rendering the next screen. The swapping of the buffers is not automatic though and must be called manually. The cleanup function now has an additional function call
SDL_FreeSurface(dexterImage);All SDL_Surfaces must be freed after they have been used. The only exception to this rule is the surface used to create the SDL window. This surface is freed when SDL_Quit is called.
input.h and input.c have not changed.
graphics.h contains the defs.h include and the external declarations of our 2 surfaces. Since the header files only ever contain the includes and references to external variables, they will not be discussed anymore.
graphics.h contains the defs.h include and the external declarations of our 2 surfaces. Since the header files only ever contain the includes and references to external variables, they will not be discussed anymore.
graphics.c contains 3 function calls, loadImage, drawImage and updateScreen. The loadImage function contains numerous SDL function calls:
SDL_Surface *loadImage(char *name)
{
    /* Load the image using SDL Image */

    SDL_Surface *temp = IMG_Load(name);
    SDL_Surface *image;

    if (temp == NULL)
    {
        printf("Failed to load image %s\n", name);

        return NULL;
    }

    /* Make the background transparent */

    SDL_SetColorKey(temp, (SDL_SRCCOLORKEY|SDL_RLEACCEL),
    SDL_MapRGB(temp->format, 0, 0, 0));

    /* Convert the image to the screen's native format */

    image = SDL_DisplayFormat(temp);

    SDL_FreeSurface(temp);

    if (image == NULL)
    {
        printf("Failed to convert image %s to native format\n", name);

        return NULL;
    }

    /* Return the processed image */

    return image;
}
The IMG_Load function is from SDL_image and allows
us to load JPEGs and PNGs. There is no need to specify what the file type is as it will use the file's
extension to figure out what it is. The function returns an SDL_Surface if
successful or NULL if it fails. The next function call
SDL_SetColorKey(temp,(SDL_SRCCOLORKEY|SDL_RLEACCEL), SDL_MapRGB(temp->format, 0, 0, 0));makes one of the colours in the image transparent. This function takes 3 arguments. The first is the image to process, the second is a flag: SDL_SRCCOLORKEY makes the 3rd argument the transparent pixel in the source image of the blit. SDL_RLEACCEL improves blitting performance, which is desirable. The third argument is the color of the pixel to make transparent, we use SDL_MapRGB for this
SDL_MapRGB(temp->format, 0, 0, 0)SDL_MapRGB takes 4 arguments, the surface's pixel format and the RGB values of the colour desired. The function then returns the pixel value of the desired colour. Finally, we need to convert the loaded image to the current display's format. This is important because otherwise SDL will need to perform this conversion every time we attempt to blit the image to the screen, and this will consume a lot of CPU power and slow down our program. The function call SDL_DisplayFormat takes care of this:
image = SDL_DisplayFormat(temp);This function will return the converted image. It is important that we do not reassign the pointer to the unconverted surface to the newly converted surface as we need to free the old surface afterwards to avoid a memory leak. We free the old surface by calling
SDL_FreeSurface(temp);After this, we need to check that the surface converted successfully. If it did not then we will note the error and return NULL.
The second function, drawImage is used to render an SDL_Surface to the screen. We use an SDL_Rect structure to do this. The SDL_Rect contains 4 variables, x, y, w (width) and h (height). We set the width and height of the rectangle to the width and height of the surface to be rendered and the x and y to the values passed into the function. We then call
SDL_BlitSurface(image, NULL, screen, &dest);The first argument is the image to be blitted, the second is the clipping rectangle. If we only wanted a portion of the image, we would have used another SDL_Rect and set its x, y, w and h to the required values of the portion of the image we wanted. Since we want the entire image, we can pass in NULL and SDL will assume we want the whole image. The third argument is the target surface, most usually the screen, but it could also be used to construct another image that would later be blitted to the screen. The fourth argument is the area of the target surface to render to, as specified by the values stored in the SDL_Rect.
The final function updateScreen, is the master drawing function. The first function call
SDL_FillRect(screen, NULL, 0);is used to blank the screen. SDL_FillRect takes 3 arguments, the target surface, an SDL_Rect containing the coordinates to fill and the colour of the fill (using SDL_MapRGB). Passing in NULL for the second argument will make SDL assume that we want to fill the entire surface. 0 in the third argument is simply black. We then call drawImage to draw the image at the specified coordinates. The final call in this function
SDL_Flip(screen);swaps the image buffers on the screen. Since we created the window with the flag SDL_DOUBLEBUF, this is required otherwise nothing will be displayed when the program is run.
Conclusion
Hopefully you should now have an understanding of how to display images in SDL. The next tutorial will look at playing sounds.
Downloads