
— Creating a vertical shoot 'em up —
Part 1: Setting up
Note: this tutorial assumes knowledge of C, as well as prior tutorials.


Introduction
In our very first tutorial, we looked at how to create a basic 2D shoot 'em up. It involved enemies coming from right to left, and the player shooting them to pick up points pods. In this new tutorial, we'll going to mix things up a bit. Our game will now be a vertical shooter, and feature enemies that will move in various attack patterns. Some will also require more than one hit to destroy. In addition, some enemies will drop power-up pods, to grant the player side arms and speed ups. To keep things exciting, points pods will still be required for scoring purposes.
Note: much of this first part was completely covered in the first shoot 'em up tutorial, we this initial setup will only cover the things that are sufficiently different, so as not to get bogged down.
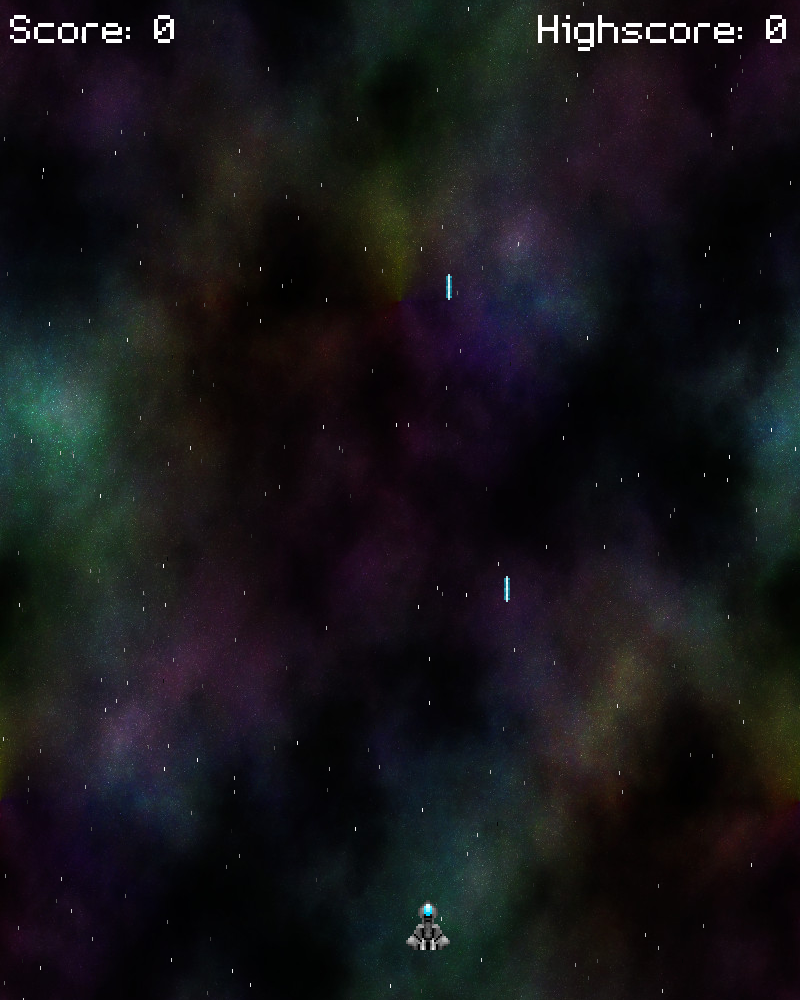
Extract the archive, run cmake CMakeLists.txt, followed by make, and then use ./shooter2-01 to run the code. You will see a window open like the one above. Use the arrow keys to move the fighter around, and the left control key to fire. Close the window to exit.
Inspecting the code
Our code is structured quite different to the first tutorial, and more like SDL2 Adventure:
.
|-- common.h
|-- defs.h
|-- game
|   |-- bullets.c
|   |-- bullets.h
|   |-- entities.c
|   |-- entities.h
|   |-- hud.c
|   |-- hud.h
|   |-- player.c
|   |-- player.h
|   |-- stage.c
|   |-- stage.h
|   |-- stars.c
|   `-- stars.h
|-- json
|   |-- cJSON.c
|   `-- cJSON.h
|-- main.c
|-- main.h
|-- structs.h
`-- system
    |-- atlas.c
    |-- atlas.h
    |-- draw.c
    |-- draw.h
    |-- init.c
    |-- init.h
    |-- input.c
    |-- input.h
    |-- text.c
    |-- text.h
    |-- textures.c
    |-- textures.h
    |-- util.c
    `-- util.h
Our game logic will now live in the game directory, with functions being split across various files (bullets.c, entities.c, hud.c, player.c, stage.c, stars.c). This will make it easier going forward, so that not everything resides in a single compilation unit.
We'll start, as always, with looking at structs.h, where we'll cover the essential structures we've created for our game. We've created a generic struct called Entity, that will be used to represent almost any entity in the game:
struct Entity {
	double x;
	double y;
	AtlasImage *texture;
	void (*data);
	Entity *next;
};
All entities will have `x` and `y` coordinates, an image (`texture`), and a `data` variable, for extended data. Our Entity will also be a linked list, hence the next variable. Our first extended data structure will be Fighter, which will be used to represent the player:
typedef struct {
	double reload;
	int reloadRate;
	double speed;
} Fighter;
Our Fighter will have a `reload` variable, to determine if it can shoot; a reloadRate, to determine how fast we can shoot; and a `speed` variable to government the movement. Note that the reason we're calling this "Fighter" and not "Player" is because we'll have a global Entity variable called Player, and having both could lead to some confusion. Next, we have our Bullet structure:
struct Bullet {
	double x;
	double y;
	double dx;
	double dy;
	AtlasImage *texture;
	Entity *owner;
	Bullet *next;
};
Again, our bullets will have `x` and `y` coordinates, and a `texture`. They will also have `dx` and `dy` (d for delta) variables, which will be used to determine the direction they are moving. An `owner` variable pointing to an Entity is also present. This will be used to help with collision detection and processing later on, so that a bullet fired by an owner doesn't hurt them. Bullets will also be a linked list, using the `next` variable.
A Star structure has been created, for use with our starfield. It's rather simple:
struct Star {
	double x;
	double y;
	double speed;
};
`x` and `y` coordinates, as well as a `speed` variable. As our starfield only moves in one direction (top to bottom), we don't need anything else. Finally, we have our Stage struct, that will hold details related to the stage itself:
typedef struct {
	Entity entityHead, *entityTail;
	Bullet bulletHead, *bulletTail;
} Stage;
All our entities and bullets will live in Stage, so that they can be easily accessed from elsewhere in the game. While we're on the subject of the Stage, let's turn to stage.c, where our main game logic will live. There are a hand of functions here, most of which delegate off to other functions. We'll start with initStage:
void initStage(void)
{
	memset(&stage, 0, sizeof(Stage));

	initEntities();

	initPlayer();

	initStars();

	initBullets();

	background = loadTexture("gfx/background.jpg");

	backgroundY = -SCREEN_HEIGHT;

	app.delegate.logic = logic;
	app.delegate.draw = draw;
}
The first thing we're doing is zeroing the memory for our Stage, and then making various calls to other functions to set them up (our entities, the player, the starfield, and our bullets). With that done, we're going to load our background. Unlike a lot of other textures, our background doesn't live in our texture atlas; it's the same size as the window itself, so it has been kept seperate. We're also setting a variable called `backgroundY` to -SCREEN_HEIGHT (we'll see why in a moment). `backgroundY` will be used to hold the position of the background as it scrolls. We're also setting our app's logic and draw delegates to those in Stage.c.
Moving onto the logic processing, you'll see there are more calls to external functions:
static void logic(void)
{
	backgroundY += app.deltaTime;

	if (backgroundY >= 0)
	{
		backgroundY = -SCREEN_HEIGHT;
	}

	doStars();

	doPlayer();

	doBullets();
}
We're first updating `backgroundY`, increasing its value by the deltaTime. This will shift our background down when it comes to drawing. We'll then check to see if `backgroundY` has reached zero. If so, we'll reset it back to -SCREEN_HEIGHT. With our background scrolling done, we're making calls to doStars, doPlayer, and doBullets, so that they can handle their own processing.
Moving onto to `draw`, we see there is more delegation happening:
static void draw(void)
{
	drawBackground();

	drawStars();

	drawEntities();

	drawBullets();

	drawHud();
}
drawGround is the only function that is found in stage.c, the others living in other files. So, we'll look at drawBackground now:
static void drawBackground(void)
{
	double y;

	for (y = backgroundY ; y < SCREEN_HEIGHT ; y += SCREEN_HEIGHT)
	{
		blit(background, 0, y, 0, SDL_FLIP_NONE);
	}
}
We want our background to appear to be scroll continuously. Our background is the same size as the window, and also seamless, so we can tile it nicely. Now, we're setting up a for-loop here, to tell the background to tile on the y axis. Our loop is starting at `backgroundY` and will keep appending more copies of the background until it has filled the screen. It is for this reason that we're setting `backgroundY` to negative to begin with. That part of the background will start to appear on screen as `backgroundY` increases. We'll then add the value of SCREEN_HEIGHT, which is the same as the texture, and see if we've covered the entire screen. If not, we'll draw another copy of the background. This will only ever draw two copies of our background at most. You'll notice that there's overdraw here. We might clip this later on, but for now it's not causing us any problems, so we're good to leave it.
That's the essentials of stage.c covered, so let's look at stars.c. We'll skip over initStars, as this is just randomization, and look at the logic and draw calls, starting with doStars:
void doStars(void)
{
	int i;

	for (i = 0 ; i < NUM_STARS ; i++)
	{
		stars[i].y += (stars[i].speed * app.deltaTime);

		if (stars[i].y >= SCREEN_HEIGHT)
		{
			stars[i].y -= SCREEN_HEIGHT;
		}
	}
}
As opposed to when we made the horizontal shooter, our stars, like our background, will be moving from top to bottom. That means that we simply want to increase our stars's `y` variables, according to their `speed` and our deltaTime. Once our star has reached SCREEN_HEIGHT (the bottom of the screen), we'll move it back to the top by substracting SCREEN_HEIGHT from its `y` coordinate.
drawStars isn't much different from that found in the original Shooter, either:
void drawStars(void)
{
	int i, c;

	for (i = 0 ; i < NUM_STARS ; i++)
	{
		c = 50 * stars[i].speed;

		SDL_SetRenderDrawColor(app.renderer, c, c, c, 255);

		SDL_RenderDrawLine(app.renderer, stars[i].x, stars[i].y, stars[i].x, stars[i].y - 3);
	}
}
We're looping through all our stars and setting their render colour based on their speed; the faster they're moving, the brighter they will be. In all cases, our stars are represented by a vertical line, drawn 3 pixels tall from the origin of the star itself. This helps us to see them better and also grants a better illusion of speed.
bullets.c is where we'll be doing our bullet logic. Again, doBullets won't look too unfamiliar to anyone who followed the original Shooter tutorial:
void doBullets(void)
{
	Bullet *b, *prev;

	prev = &stage.bulletHead;

	for (b = stage.bulletHead.next ; b != NULL ; b = b->next)
	{
		b->x += b->dx * app.deltaTime;
		b->y += b->dy * app.deltaTime;

		if (!collision(b->x, b->y, b->texture->rect.w, b->texture->rect.h, 0, 0, SCREEN_WIDTH, SCREEN_HEIGHT))
		{
			prev->next = b->next;

			if (b == stage.bulletTail)
			{
				stage.bulletTail = prev;
			}

			free(b);

			b = prev;
		}

		prev = b;
	}
}
The bullet linked list is processed, and each bullet is moved according to its `dx` and `dy`, adjusted to our deltaTime. The next thing we're doing is checking to see if the bullet has moved offscreen. We're doing this by performing a collision check, using the bullet's bounding box (based on it's texture's width and height) against the screen size. If there is no collision, it means that the bullet has moved offscreen, so we'll remove it from the linked list and free the data.
That's the essentials of the bullets handled, so we can now move onto looking at the player. All the player's functions live in player.c. We'll start with initPlayer:
void initPlayer(void)
{
	Fighter *f;

	f = malloc(sizeof(Fighter));
	memset(f, 0, sizeof(Fighter));

	f->speed = 4.0;
	f->reloadRate = 20;

	player = spawnEntity();
	player->texture = getAtlasImage("gfx/player.png", 1);
	player->x = (SCREEN_WIDTH - player->texture->rect.w) / 2;
	player->y = SCREEN_HEIGHT - 100;
	player->data = f;

	bulletTexture = getAtlasImage("gfx/playerBullet.png", 1);
}
Our player is an Entity, with a Fighter data structure added in. We first malloc and memset a Fighter structure, and set `speed` to 4. Setting higher or lower values will make the player move faster or slower. We're also setting reloadRate to 20. Again, setting this lower or higher will allow us to shoot slower or faster. The reason we're using variables here, rather than constants, is so that in future we can allow a powerup to increase the player's stats. With our Fighter created, we setup the main player Entity, creating an entity with a call to spawnEntity. spawnEntity is basically a utility function that will create an entity and add it to the Stage's linked list. We'll set our player entity's texture, it's `x` and `y` values, and finally assign the Fighter struct to the entity's `data` field, for use later. Lastly, we're grabbing the texture that our player's bullets will have, so that we don't look it up each time we fire.
doPlayer is where we'll drive the player's logic, and is a rather easy to understand function:
void doPlayer(void)
{
	Fighter *f;

	f = (Fighter*) player->data;

	f->reload = MAX(f->reload - app.deltaTime, 0);

	if (app.keyboard[SDL_SCANCODE_LEFT])
	{
		player->x -= f->speed * app.deltaTime;
	}

	if (app.keyboard[SDL_SCANCODE_RIGHT])
	{
		player->x += f->speed * app.deltaTime;
	}

	if (app.keyboard[SDL_SCANCODE_UP])
	{
		player->y -= f->speed * app.deltaTime;
	}

	if (app.keyboard[SDL_SCANCODE_DOWN])
	{
		player->y += f->speed * app.deltaTime;
	}

	if (app.keyboard[SDL_SCANCODE_LCTRL] && f->reload == 0)
	{
		fireBullet();

		f->reload = f->reloadRate;
	}

	player->x = MIN(MAX(player->x, 0), SCREEN_WIDTH - player->texture->rect.w);
	player->y = MIN(MAX(player->y, 0), SCREEN_HEIGHT - player->texture->rect.h);
}
We first extract the Fighter from the player entity's `data` field, and decrease its `reload` variable, limiting it to 0. Next, we're testing our keyboard input for the arrow keys, and adjusting the player's position based on the Fighter's `speed` and our deltaTime. We're then also checking if we're attempting to fire, by testing the left control key and whether the Fighter's `reload` is 0. If so, we'll call a function named fireBullet, and then reset our `reload` variable to reloadRate. Finally, we'll ensure that the player doesn't leave our view by constraining their `x` and `y` values to the bounds of the screen.
The final function we'll look at is the fireBullet function:
static void fireBullet(void)
{
	Bullet *b;

	b = spawnBullet();
	b->owner = player;
	b->texture = bulletTexture;
	b->x = player->x + (player->texture->rect.w / 2) - (bulletTexture->rect.w / 2);
	b->y = player->y - bulletTexture->rect.h;
	b->dy = -15;
}
This function does exactly as one would expect - it creates a bullet, fired by the player. We're creating our bullet by calling a function named spawnBullet. Like spawnEntity, this is a utility function to create a bullet and add it to our Stage's linked list. Next, we tell our bullet it is owned by the player, and then set the bullet's `x` and `y` values based on the player. Our bullets will issue from the front of the Fighter, so we center the bullet's `x` on the player, and set the `y` as the player's `y`, less the bullet texture's height. We also set our bullet's `dy` to be -15, to tell it we want it to be moving up the screen.
There we have it for our first part. A short, sharp intro to creating our vertical shooter. But now that we've gotten the ground work out of the way, we can focus on the new aspects in greater detail. In the next part, we'll look at adding in some enemies to shoot, including the first implemention of a wave attack pattern.
Purchase
The source code for all parts of this tutorial (including assets) is available for purchase:
From itch.io
It is also available as part of the SDL2 tutorial bundle: